> ## Documentation Index
> Fetch the complete documentation index at: https://docs.airmdr.com/llms.txt
> Use this file to discover all available pages before exploring further.
# Cisco Advanced Malware Protection (AMP)
> Cisco AMP is an intelligence-powered, integrated, enterprise-class advanced malware analysis and protection solution.
You can connect to a third-party application using the integration functionality, and then use your playbook to call that connection.
### Cisco AMP Events Overview
This Integration retrieves detailed security event information from Cisco AMP, including threat details, affected systems, and timestamps. Use this skill to monitor security incidents, analyze threats, and maintain system integrity.
### Cisco AMP Pre-requisites
> User must have a valid Cisco Secure Endpoint (AMP) subscription & [Console](https://console.amp.cisco.com) login.
>
> Administrator/root access on the machines (for installing AMP connectors/agents).
>
> Network/firewall must allow communication to Cisco AMP cloud servers.
>
> ✅ **Network Firewall/Proxy Allow List:**
>
> | Region | Domain |
> | ------ | ------------------------- |
> | US | `api.amp.cisco.com ` |
> | EU | `api.eu.amp.cisco.com ` |
> | APJC | `api.apjc.amp.cisco.com ` |
### Create Cisco AMP API Credentials
To ingest the logs into AirMDR, User must follow the steps stated below to define API credentials for AirMDR
1. Login to the [Cisco Security Cloud Sign On](https://console.amp.cisco.com/api_credentials).
2. Sign in with your Cisco SecureX or AMP credentials and click **Continue**.
1. Inside the console navigate on the left-hand side menu, click drop-downlist **Accounts → API Credentials**.
2. On the **API Credentials** page, click the **“Create”** button (top right corner).
Fill application name as `airmdr-siem`.
Choose either *Read-Only* or *Read-Write* permission.
In case of *Read-Only*, User must setup an event stream and share the credentials for the event stream in addition to API credentials
For creating event streams, User must use API credentials with both Read-Write permission
Run the following curl after replacing your credentials in url
```
curl --location --request POST 'https://{your_client_id}:{your_api_key}@api.amp.cisco.com/v1/event_streams' \
--header 'Accept: application/json' \
--header 'Content-Type: application/json' \
--data '{
"name": "airmdr-ingestion-stream"
}'
```
```
curl --location --request POST "https://{your_client_id}:{your_api_key}@api.amp.cisco.com/v1/event_streams" ^
--header "Accept: application/json" ^
--header "Content-Type: application/json" ^
--data "{ \"name\": \"airmdr-ingestion-stream\" }"
```
* In response User will get a field called `amqp_credentials`
```
{'version': 'v1.2.0', 'metadata': {'links': {'self': 'https://api.amp.cisco.com/v1/event_streams'}}, 'data': {'id': 23312, 'name': 'airmdr-ingestion-stream', 'amqp_credentials': {'user_name': 'zzz-zz', 'queue_name': 'yyy-yyy', 'password': 'xxx-xxx-xxx', 'host': 'export-streaming.amp.cisco.com', 'port': '443', 'proto': 'amqps'}}}
```
```
import requests
import json
your_client_id =
your_api_key =
url = f"https://{your_client_id}:{your_api_key}@api.amp.cisco.com/v1/event_streams"
payload = json.dumps({
"name": "airmdr-ingestion-stream"
})
headers = {
'Accept': 'application/json',
'Content-Type': 'application/json'
}
response = requests.request("POST", url, headers=headers, data=payload)
print(response.json())
```
Email the data field of response that contains queue credentials and name to AirMDR.
Click **Create**.
This is the only time the **API Client ID** and **API Key** will be displayed. \
Copy and securely store both values somewhere like a password manager.
Share the **API Key** and **API Client ID** securely to AirMDR.\
(or) \
Self Configure Cisco AMP API in the AirMDR Integrations Dashboard.
### Skills Provided by this Integration
| Skill ID | Purpose |
| :---------------------------- | :--------------------------------------------------------------------------------------------------------------------------------------------------------------------------------------------------------------------- |
| **Retrieve Cisco AMP Events** | Retrieve detailed security event information from Cisco AMP, including threat details, affected systems, and timestamps. Use this skill to monitor security incidents, analyze threats, and maintain system integrity. |
To view the details of Input Parameters and Output for the respective skills
* Go to [AirMDR → Cisco AMP](https://app.airmdr.com/integrations?search=Cisco+AMP\&provider=f3c701f2-a808-482c-ab3c-473391eae6b2) Integration page.
* Select the **Skills** tab and click on the required listed skills.
### Configure Cisco AMP API in AirMDR Integrations Dashboard
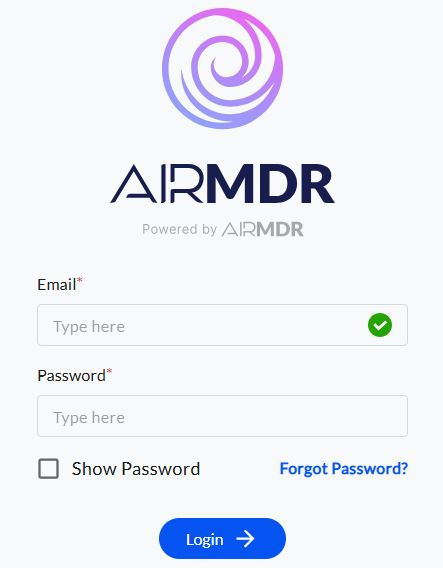
1. Navigate to [AirMDR](https://app.airmdr.com/auth/login), provide the credentials and click **Login.**
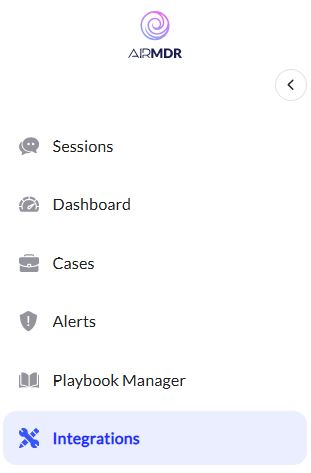
 2. Navigate to the AirMDR Integrations Dashboard in the left navigation pane and select **Integrations.**
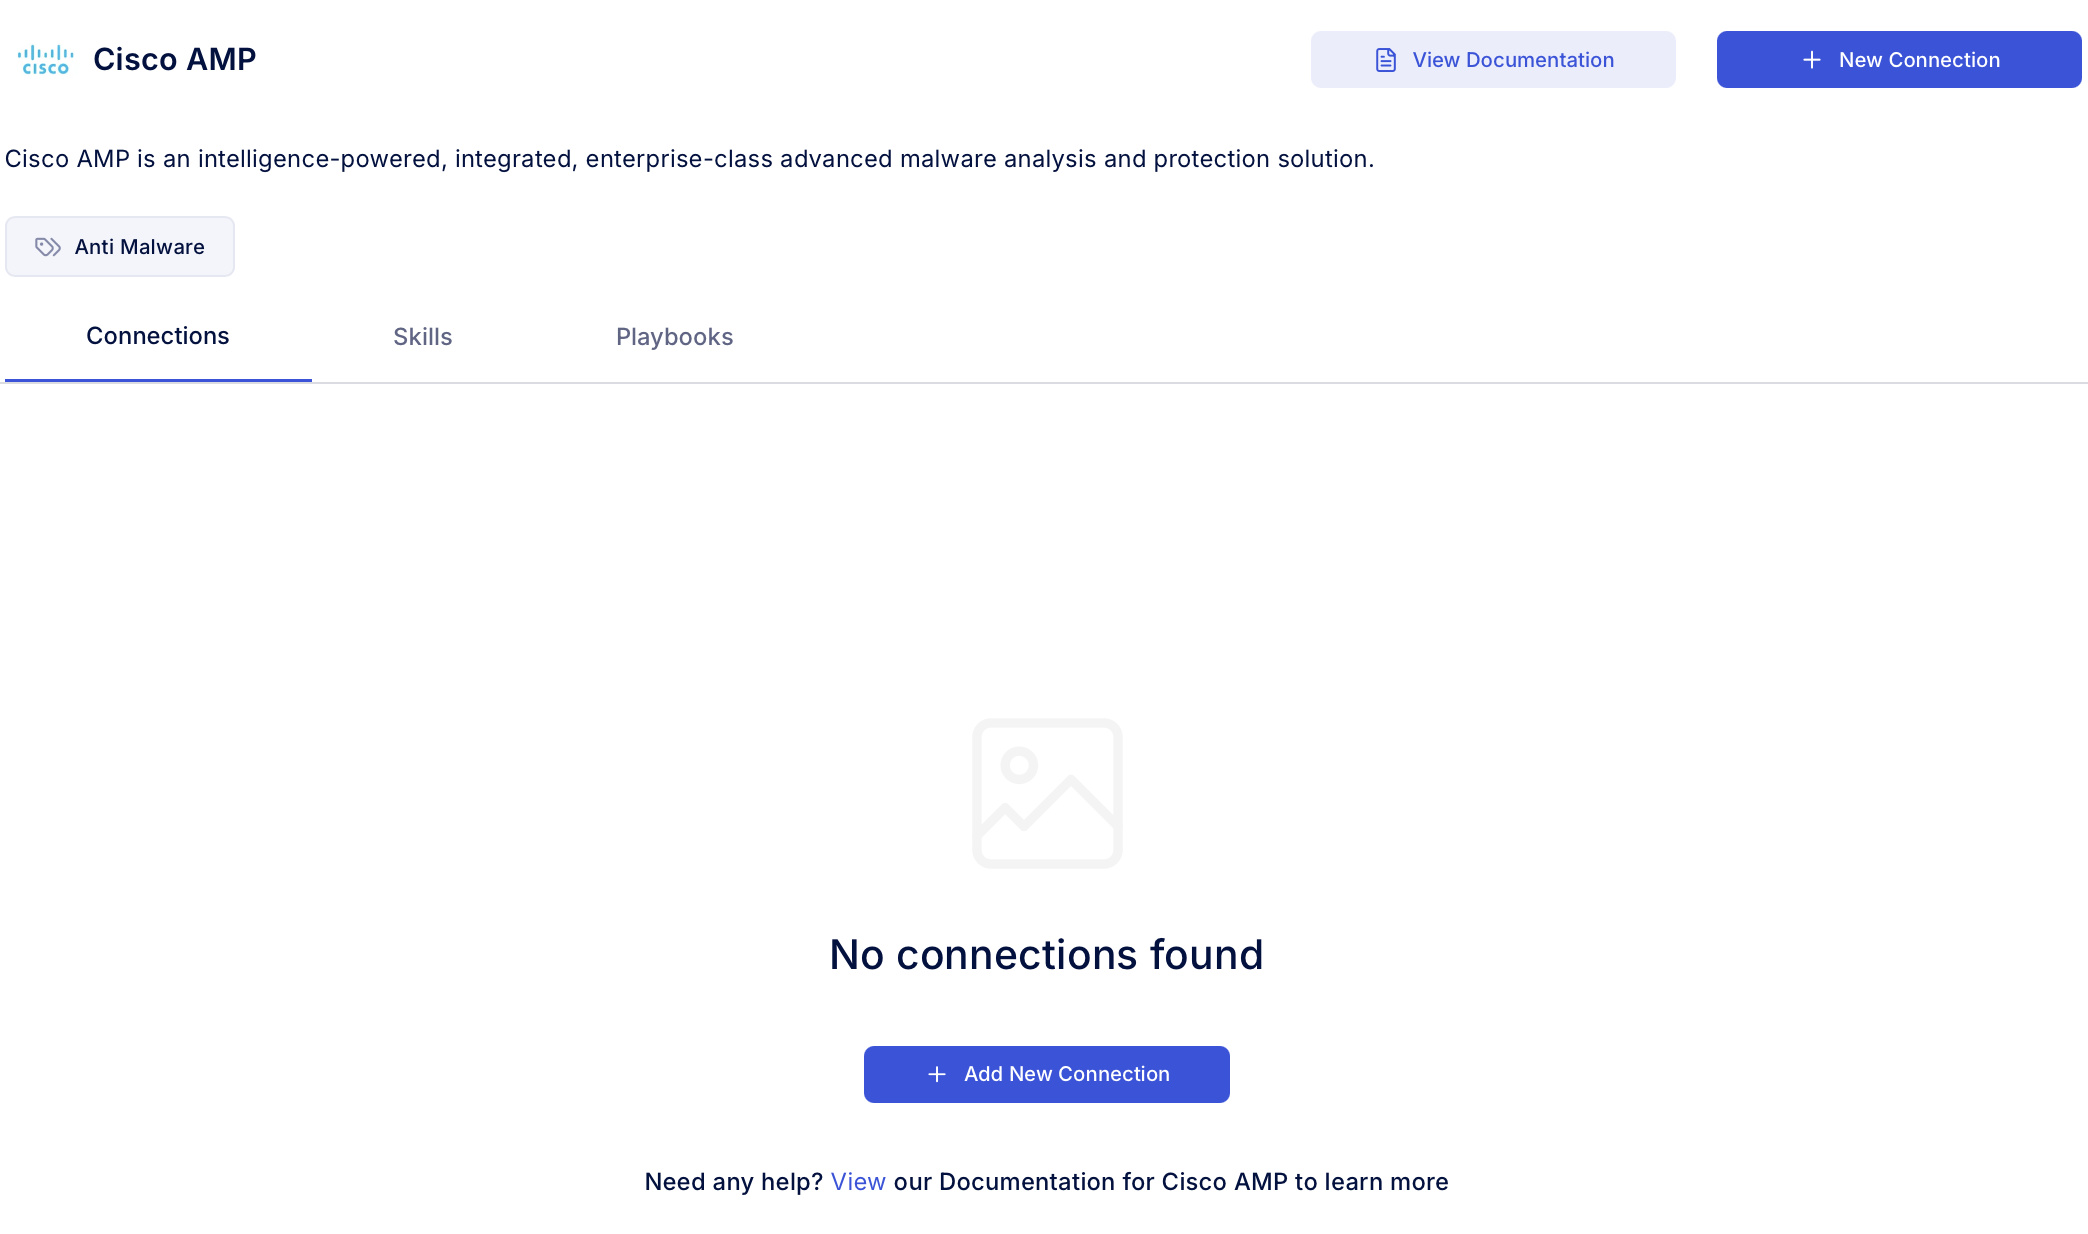
 3. Use the search option, enter the keyword "**Cisco AMP**", select the **Connections** tab, and click **Add New Connection**.
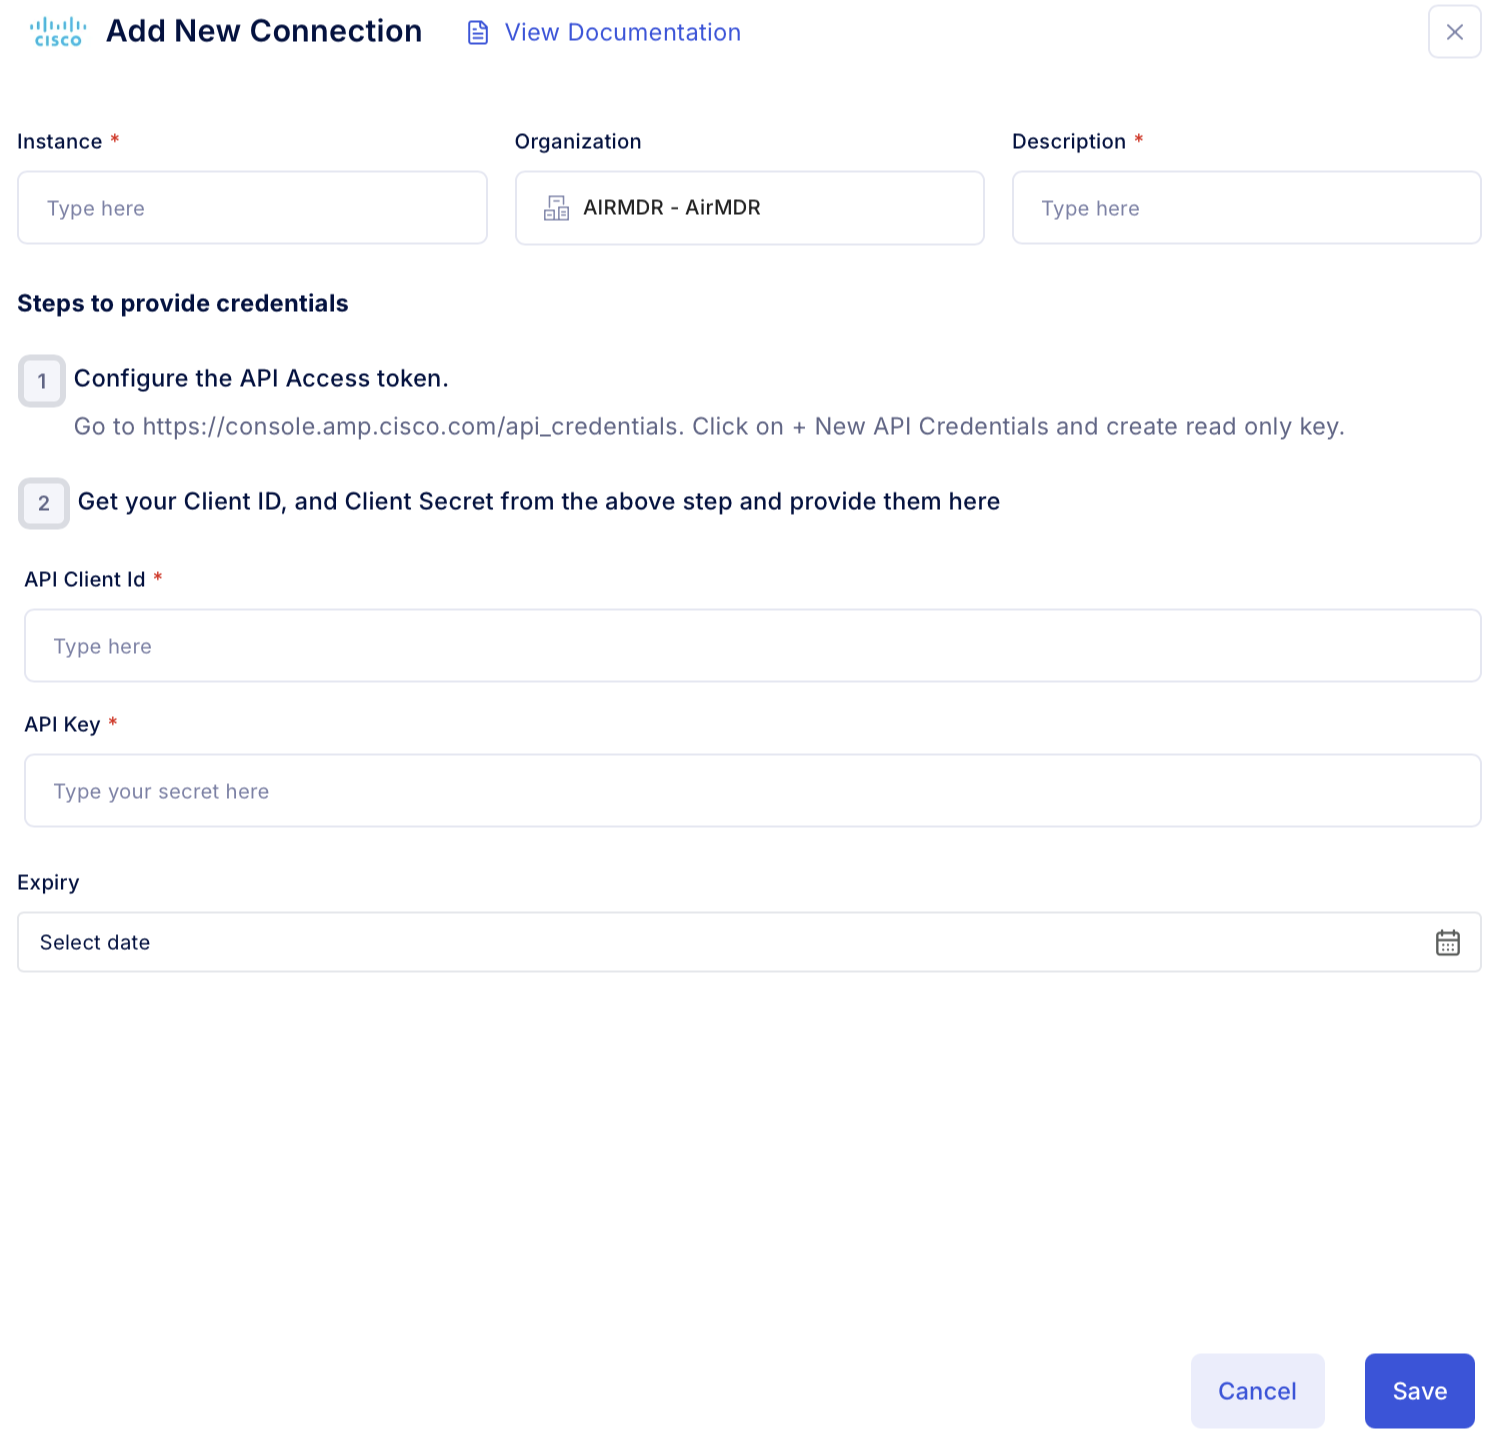
 4. Enter an unique name to the Instance (e.g., `your org name-Cisco AMP`) and brief **Description** to easily identify the user connection by AirMDR.
5. Enter the generated **API Key** and **API Client ID** in the Authentication Details field params, and click **Save.**
4. Enter an unique name to the Instance (e.g., `your org name-Cisco AMP`) and brief **Description** to easily identify the user connection by AirMDR.
5. Enter the generated **API Key** and **API Client ID** in the Authentication Details field params, and click **Save.**
 ### Evaluate Cisco AMP API Key & Client ID
Open **cURL** and run the following command to check if your API Key is working:
```
curl -u 'YOUR_CLIENT_ID:YOUR_API_KEY' 'https://api.amp.cisco.com/v1/computers'
```
**🛠 Replace:**
* `YOUR_CLIENT_ID` → with your real Client ID
* `YOUR_API_KEY` → with your real API Key
If your AMP instance is **in Europe or APJC**, the URL will be different:
* US: `https://api.amp.cisco.com`
* EU: `https://api.eu.amp.cisco.com`
* APJC: `https://api.apjc.amp.cisco.com`
Use the endpoint that matches your region! (You can find it in your AMP dashboard under API Credentials.)
**🔥 Expected Outputs:**
| Result | Meaning |
| :----------------- | :----------------------------------------------- |
| `200 OK` | 🎯 Success! Your API key works! |
| `401 Unauthorized` | 🚫 Invalid credentials — check Client ID/API Key |
Success:
```
Status Code: 200
Response Body:
{
"data": [...],
"metadata": {...}
}
✅ API key and client ID are working!
```
Invalid Credentials
```
Status Code: 401
Response Body:
{
"errors": [
{
"message": "Unauthorized"
}
]
}
❌ Failed to authenticate. Please check your credentials and permissions.
```
### Evaluate Cisco AMP API Key & Client ID
Open **cURL** and run the following command to check if your API Key is working:
```
curl -u 'YOUR_CLIENT_ID:YOUR_API_KEY' 'https://api.amp.cisco.com/v1/computers'
```
**🛠 Replace:**
* `YOUR_CLIENT_ID` → with your real Client ID
* `YOUR_API_KEY` → with your real API Key
If your AMP instance is **in Europe or APJC**, the URL will be different:
* US: `https://api.amp.cisco.com`
* EU: `https://api.eu.amp.cisco.com`
* APJC: `https://api.apjc.amp.cisco.com`
Use the endpoint that matches your region! (You can find it in your AMP dashboard under API Credentials.)
**🔥 Expected Outputs:**
| Result | Meaning |
| :----------------- | :----------------------------------------------- |
| `200 OK` | 🎯 Success! Your API key works! |
| `401 Unauthorized` | 🚫 Invalid credentials — check Client ID/API Key |
Success:
```
Status Code: 200
Response Body:
{
"data": [...],
"metadata": {...}
}
✅ API key and client ID are working!
```
Invalid Credentials
```
Status Code: 401
Response Body:
{
"errors": [
{
"message": "Unauthorized"
}
]
}
❌ Failed to authenticate. Please check your credentials and permissions.
```