> ## Documentation Index
> Fetch the complete documentation index at: https://docs.airmdr.com/llms.txt
> Use this file to discover all available pages before exploring further.
# CrowdStrike
> CrowdStrike is a cloud-delivered security solution that detects, investigates, and mitigates threats on endpoints in real-time.
### Pre-requisites
* User must **download and install the Falcon sensor** on each endpoint and will need the **Customer ID Checksum (CID)** to activate the sensor.
* Ensure that the endpoints can reach CrowdStrike's cloud through **specific URLs and ports**, including:
* **HTTPS (TCP Port 443)** to:
* `api.crowdstrike.com`
* `sensorapi.crowdstrike.com`
* Other regional subdomains depending on your tenant (e.g., `us-2.crowdstrike.com`, `eu-1.crowdstrike.com`)
### Generate CrowdStrike API Client ID & Secret
1. Login to the [Falcon Console](https://falcon.crowdstrike.com).
2. Sign in using your **CrowdStrike Falcon credentials** (admin or user with API management permissions).
1. On the left-hand navigation panel, click **“Support and resources”**.
2. Select **Resources and tools** dropdown.
3. Click on **API clients and keys**.
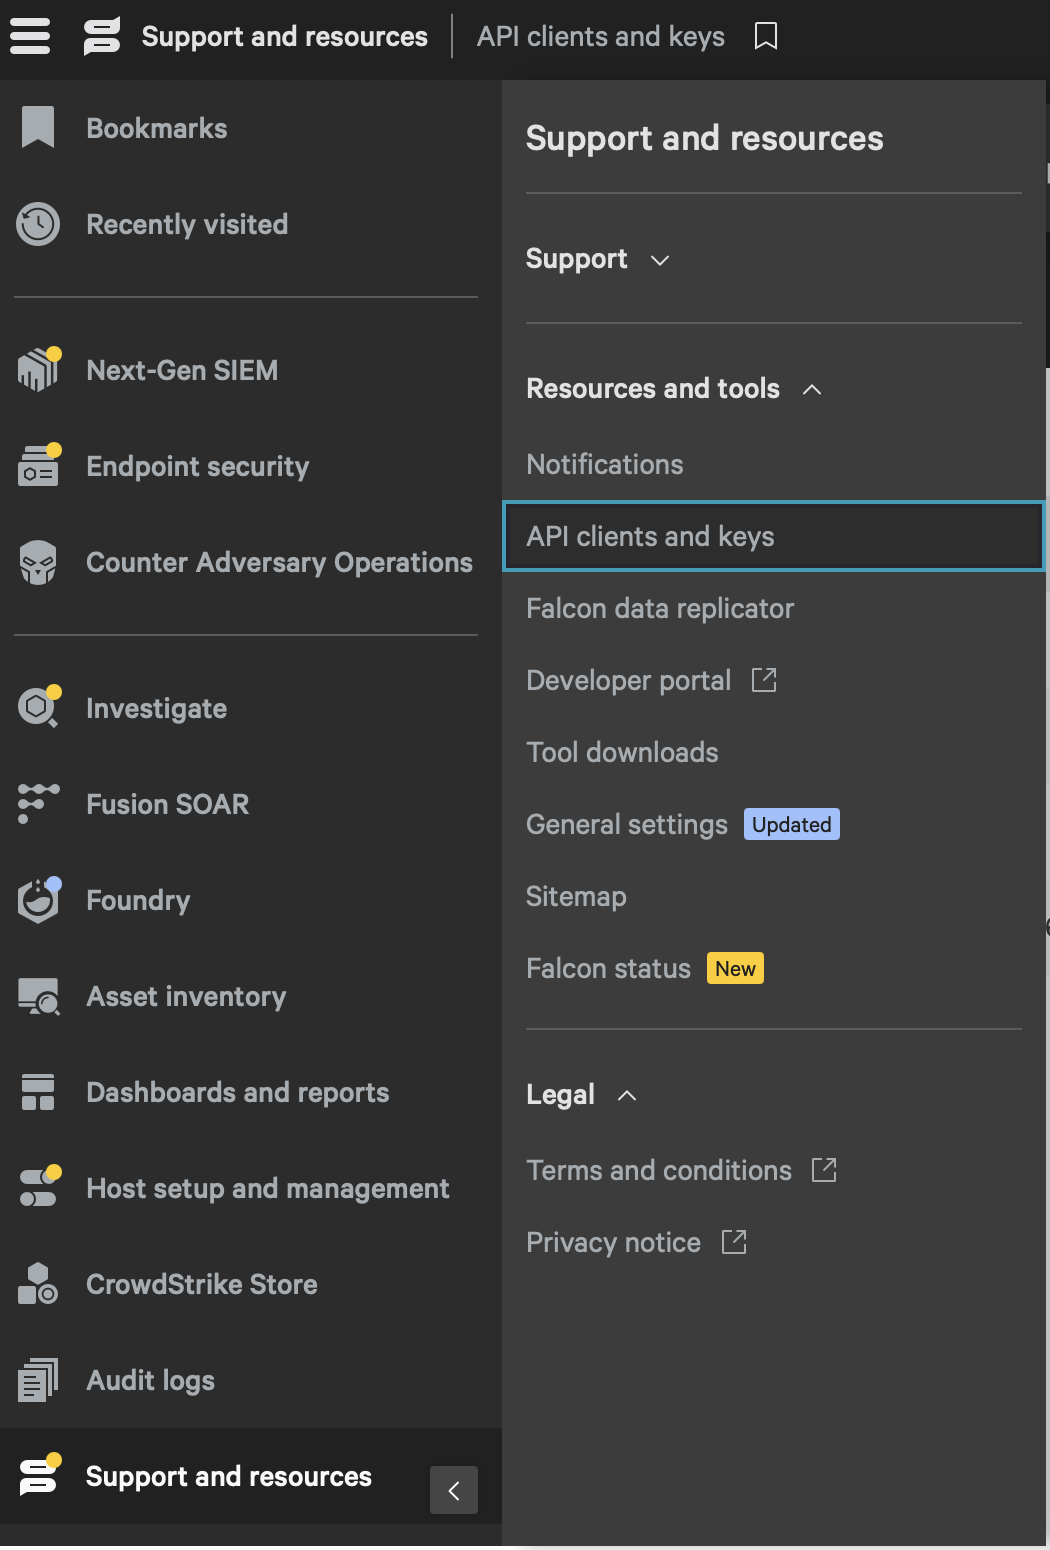 1. Select the toggle tab "**OAuth2API clients**".
2. Click the **“Create API client”** button.
1. Select the toggle tab "**OAuth2API clients**".
2. Click the **“Create API client”** button.
 3. Fill out the form:
* **Client name**: Choose something descriptive (e.g., "AirMDR Integration").
* **Description**: Optional, but helpful for team context.
3. Fill out the form:
* **Client name**: Choose something descriptive (e.g., "AirMDR Integration").
* **Description**: Optional, but helpful for team context.
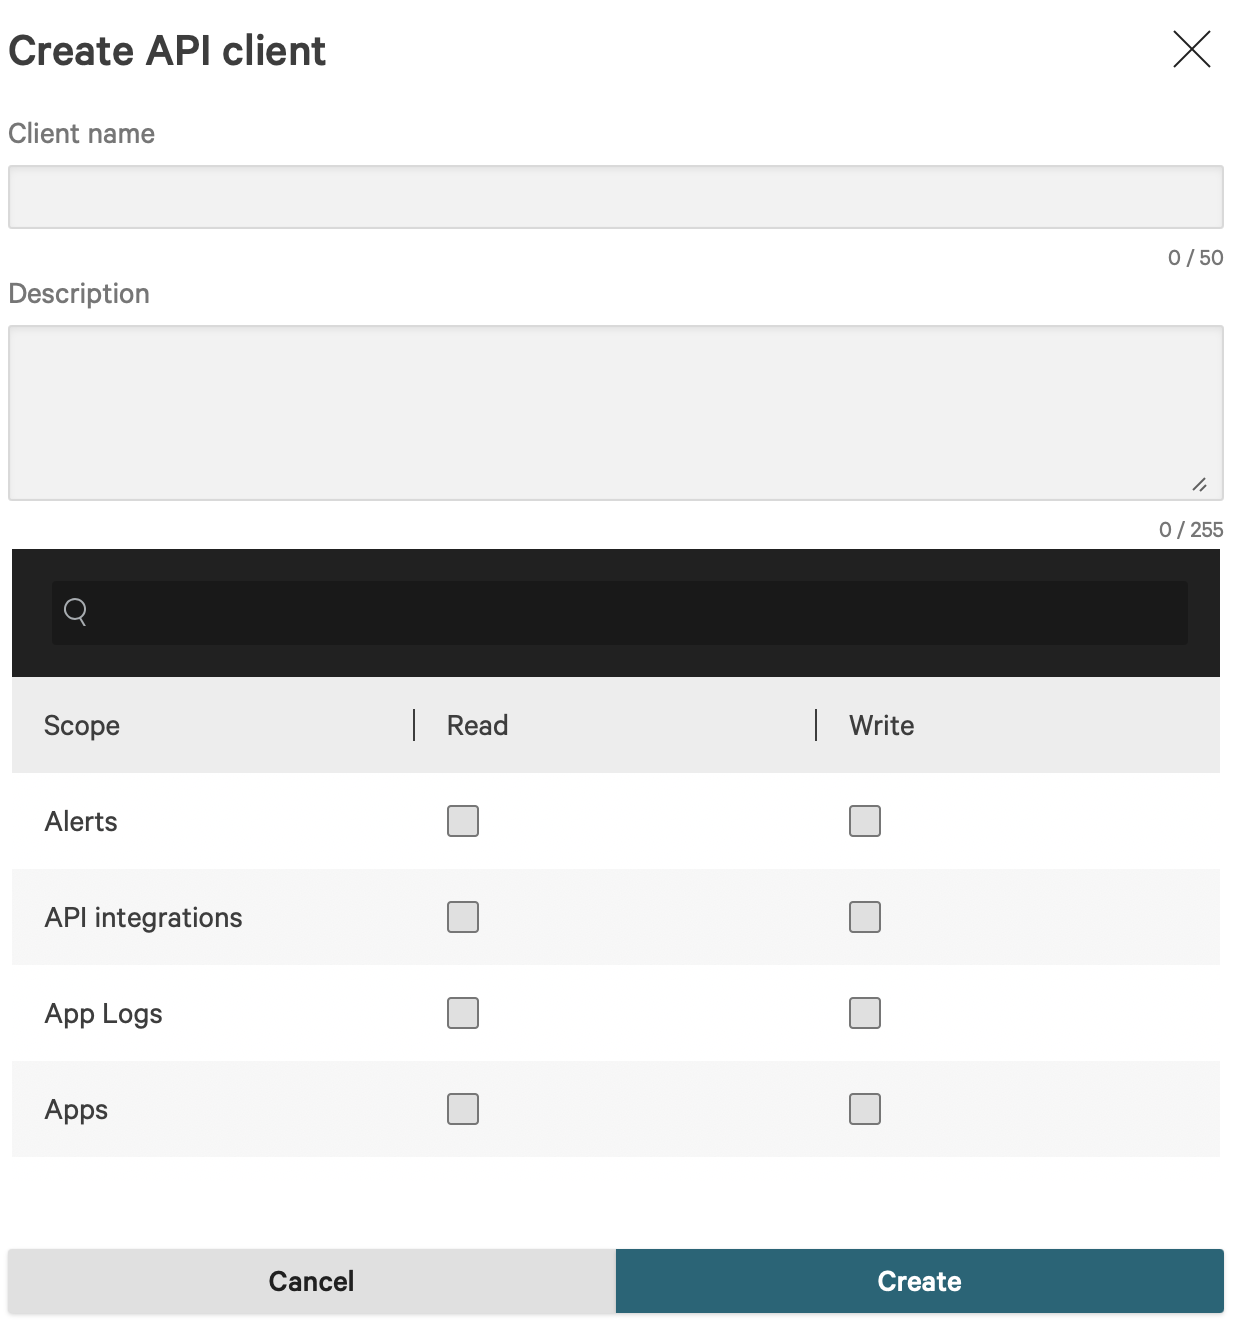 1. Provide the required **permissions (scopes)** for AirMDR use case as stated below:
Assign permissions based on the specific Skills you plan to use in AirMDR. Each Skill requires a defined set of actions, and only those permissions should be granted.
* `Alerts` → `Read` (To Fetch Crowdstrike Alerts)
* `Alerts` → `Write` (To Update Crowdstrike Alerts)
* `Detections` → `Read` (To Fetch Crowdstrike Detections)
* `Incidents` → `Read` (To Fetch Crowdstrike Incidents)
* `Incidents` → `Write` (To Update Crowdstrike Incidents)
* `Hosts` → `Read` (To Get Crowdstrike Device Details)
* `Hosts` → `Write` (To Perform Action on Host and Perform Device Action)
* `NGSIEM` → `Read and Write` (To Create Crowdstrike Query Job)
* `On-demand Scans (ODS)` → `Read and Write` (To Create ODS Scan)
You can assign multiple scopes depending on your needs.
* Edit API client
* Use the option to update the assigned Scopes
* Delete API client
* The **Client ID and Secret are permanently revoked**
* All **integrations, scripts, or tools using that API client will stop working**
* This action **cannot be undone**
* Reset secret (Reset the client secret immediately if you suspect credentials compromise)
* The **old secret becomes invalid** immediately after reset.
* All applications or scripts using the API must be updated with the **new secret**.
* If you want a different **Client Name or scopes**, you will need to **create a new client** — these can not be edited either
* Open details panel
* To view the details of the client id and scopes assigned.
1. Click **“Create”**.
2. The system will generate:
* **Client ID**
* **Client Secret**
**Copy and save these credentials immediately** – **the** **Client secret is shown only once**.
3. To view the Base URL
You can always view your Crowdstrike Base URL under the **API clients and keys** page.
Your **API base URL** depends on your Falcon tenant region: To know the Region-specific endpoint for all API calls refer to the below table:
| Region | Base URL |
| :------------- | :--------------------------------------- |
| US-1 | `https://api.crowdstrike.com` |
| US-2 | `https://api.us-2.crowdstrike.com` |
| EU-1 (Germany) | `https://api.eu-1.crowdstrike.com` |
| EU-2 (Ireland) | `https://api.eu-2.crowdstrike.com` |
| US GovCloud | `https://api.laggar.gcw.crowdstrike.com` |
Done! now you have the required credentials
* **Client ID** → For API authentication
* **Client Secret** → Used only once to get an access token
* **Base URL** → Region-specific endpoint for all API calls
Share the **Client ID, Client Secret** and **Base URL** securely to AirMDR.\
(or) \
Self [Configure](https://docs.airmdr.com/Integrations/Crowdstrike#configure-crowdstrike-api-in-airmdr-integrations-dashboard) Crowdstrike API in the AirMDR Integrations Dashboard.
### Skills Provided by this Integration
| **Skill ID** | **Purpose** |
| ------------------------------------ | ------------------------------------------------------------------------------------------------------------------------------------------------------------------------- |
| **Fetch CrowdStrike Alerts** | Fetch alerts from CrowdStrike, including detailed summaries for analysis or monitoring. |
| **Fetch CrowdStrike Detections** | Fetch detections from CrowdStrike, including detailed summaries for analysis or monitoring. |
| **Fetch CrowdStrike IOM Detections** | Fetch detections from CrowdStrike, including detailed summaries for analysis or monitoring. |
| **Get CrowdStrike Device Details** | Given an IP address, fetch device details including host name and user logon details. Given a hostname, fetch device details including IP address and user logon details. |
| **Fetch CrowdStrike Incidents** | Fetch Incidents from CrowdStrike, including detailed information for analysis or monitoring. |
| **Fetch CrowdStrike IOA Detections** | Fetch detections from CrowdStrike, including detailed summaries for analysis or monitoring. |
To view the details of Input Parameters and Output for the respective skills
* Go to [AirMDR → Crowdstrike](https://app.airmdr.com/integrations?search=crowds\&provider=1f07ba14-afe0-4685-921f-187d1de61686) Integration page.
* Select the **Skills** tab and click on the required listed skills.
### Configure Crowdstrike API in AirMDR Integrations Dashboard
1. Navigate to [AirMDR](https://app.airmdr.com/auth/login), provide the credentials and click **Login**.
1. Provide the required **permissions (scopes)** for AirMDR use case as stated below:
Assign permissions based on the specific Skills you plan to use in AirMDR. Each Skill requires a defined set of actions, and only those permissions should be granted.
* `Alerts` → `Read` (To Fetch Crowdstrike Alerts)
* `Alerts` → `Write` (To Update Crowdstrike Alerts)
* `Detections` → `Read` (To Fetch Crowdstrike Detections)
* `Incidents` → `Read` (To Fetch Crowdstrike Incidents)
* `Incidents` → `Write` (To Update Crowdstrike Incidents)
* `Hosts` → `Read` (To Get Crowdstrike Device Details)
* `Hosts` → `Write` (To Perform Action on Host and Perform Device Action)
* `NGSIEM` → `Read and Write` (To Create Crowdstrike Query Job)
* `On-demand Scans (ODS)` → `Read and Write` (To Create ODS Scan)
You can assign multiple scopes depending on your needs.
* Edit API client
* Use the option to update the assigned Scopes
* Delete API client
* The **Client ID and Secret are permanently revoked**
* All **integrations, scripts, or tools using that API client will stop working**
* This action **cannot be undone**
* Reset secret (Reset the client secret immediately if you suspect credentials compromise)
* The **old secret becomes invalid** immediately after reset.
* All applications or scripts using the API must be updated with the **new secret**.
* If you want a different **Client Name or scopes**, you will need to **create a new client** — these can not be edited either
* Open details panel
* To view the details of the client id and scopes assigned.
1. Click **“Create”**.
2. The system will generate:
* **Client ID**
* **Client Secret**
**Copy and save these credentials immediately** – **the** **Client secret is shown only once**.
3. To view the Base URL
You can always view your Crowdstrike Base URL under the **API clients and keys** page.
Your **API base URL** depends on your Falcon tenant region: To know the Region-specific endpoint for all API calls refer to the below table:
| Region | Base URL |
| :------------- | :--------------------------------------- |
| US-1 | `https://api.crowdstrike.com` |
| US-2 | `https://api.us-2.crowdstrike.com` |
| EU-1 (Germany) | `https://api.eu-1.crowdstrike.com` |
| EU-2 (Ireland) | `https://api.eu-2.crowdstrike.com` |
| US GovCloud | `https://api.laggar.gcw.crowdstrike.com` |
Done! now you have the required credentials
* **Client ID** → For API authentication
* **Client Secret** → Used only once to get an access token
* **Base URL** → Region-specific endpoint for all API calls
Share the **Client ID, Client Secret** and **Base URL** securely to AirMDR.\
(or) \
Self [Configure](https://docs.airmdr.com/Integrations/Crowdstrike#configure-crowdstrike-api-in-airmdr-integrations-dashboard) Crowdstrike API in the AirMDR Integrations Dashboard.
### Skills Provided by this Integration
| **Skill ID** | **Purpose** |
| ------------------------------------ | ------------------------------------------------------------------------------------------------------------------------------------------------------------------------- |
| **Fetch CrowdStrike Alerts** | Fetch alerts from CrowdStrike, including detailed summaries for analysis or monitoring. |
| **Fetch CrowdStrike Detections** | Fetch detections from CrowdStrike, including detailed summaries for analysis or monitoring. |
| **Fetch CrowdStrike IOM Detections** | Fetch detections from CrowdStrike, including detailed summaries for analysis or monitoring. |
| **Get CrowdStrike Device Details** | Given an IP address, fetch device details including host name and user logon details. Given a hostname, fetch device details including IP address and user logon details. |
| **Fetch CrowdStrike Incidents** | Fetch Incidents from CrowdStrike, including detailed information for analysis or monitoring. |
| **Fetch CrowdStrike IOA Detections** | Fetch detections from CrowdStrike, including detailed summaries for analysis or monitoring. |
To view the details of Input Parameters and Output for the respective skills
* Go to [AirMDR → Crowdstrike](https://app.airmdr.com/integrations?search=crowds\&provider=1f07ba14-afe0-4685-921f-187d1de61686) Integration page.
* Select the **Skills** tab and click on the required listed skills.
### Configure Crowdstrike API in AirMDR Integrations Dashboard
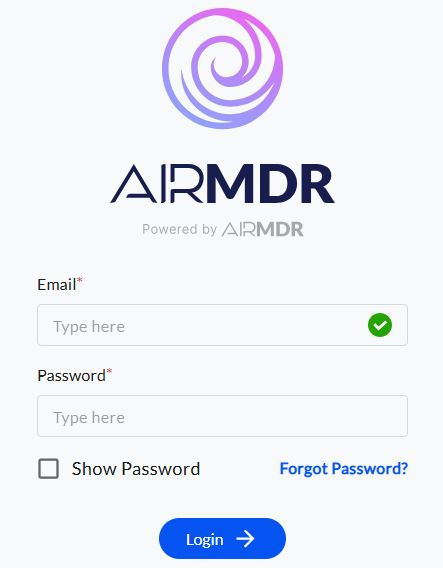
1. Navigate to [AirMDR](https://app.airmdr.com/auth/login), provide the credentials and click **Login**.
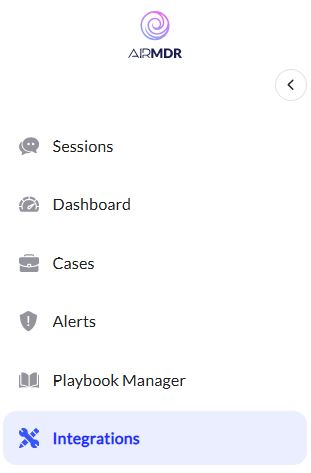
 2. Navigate to the AirMDR Integrations Dashboard in the left navigation pane and select **Integrations**.
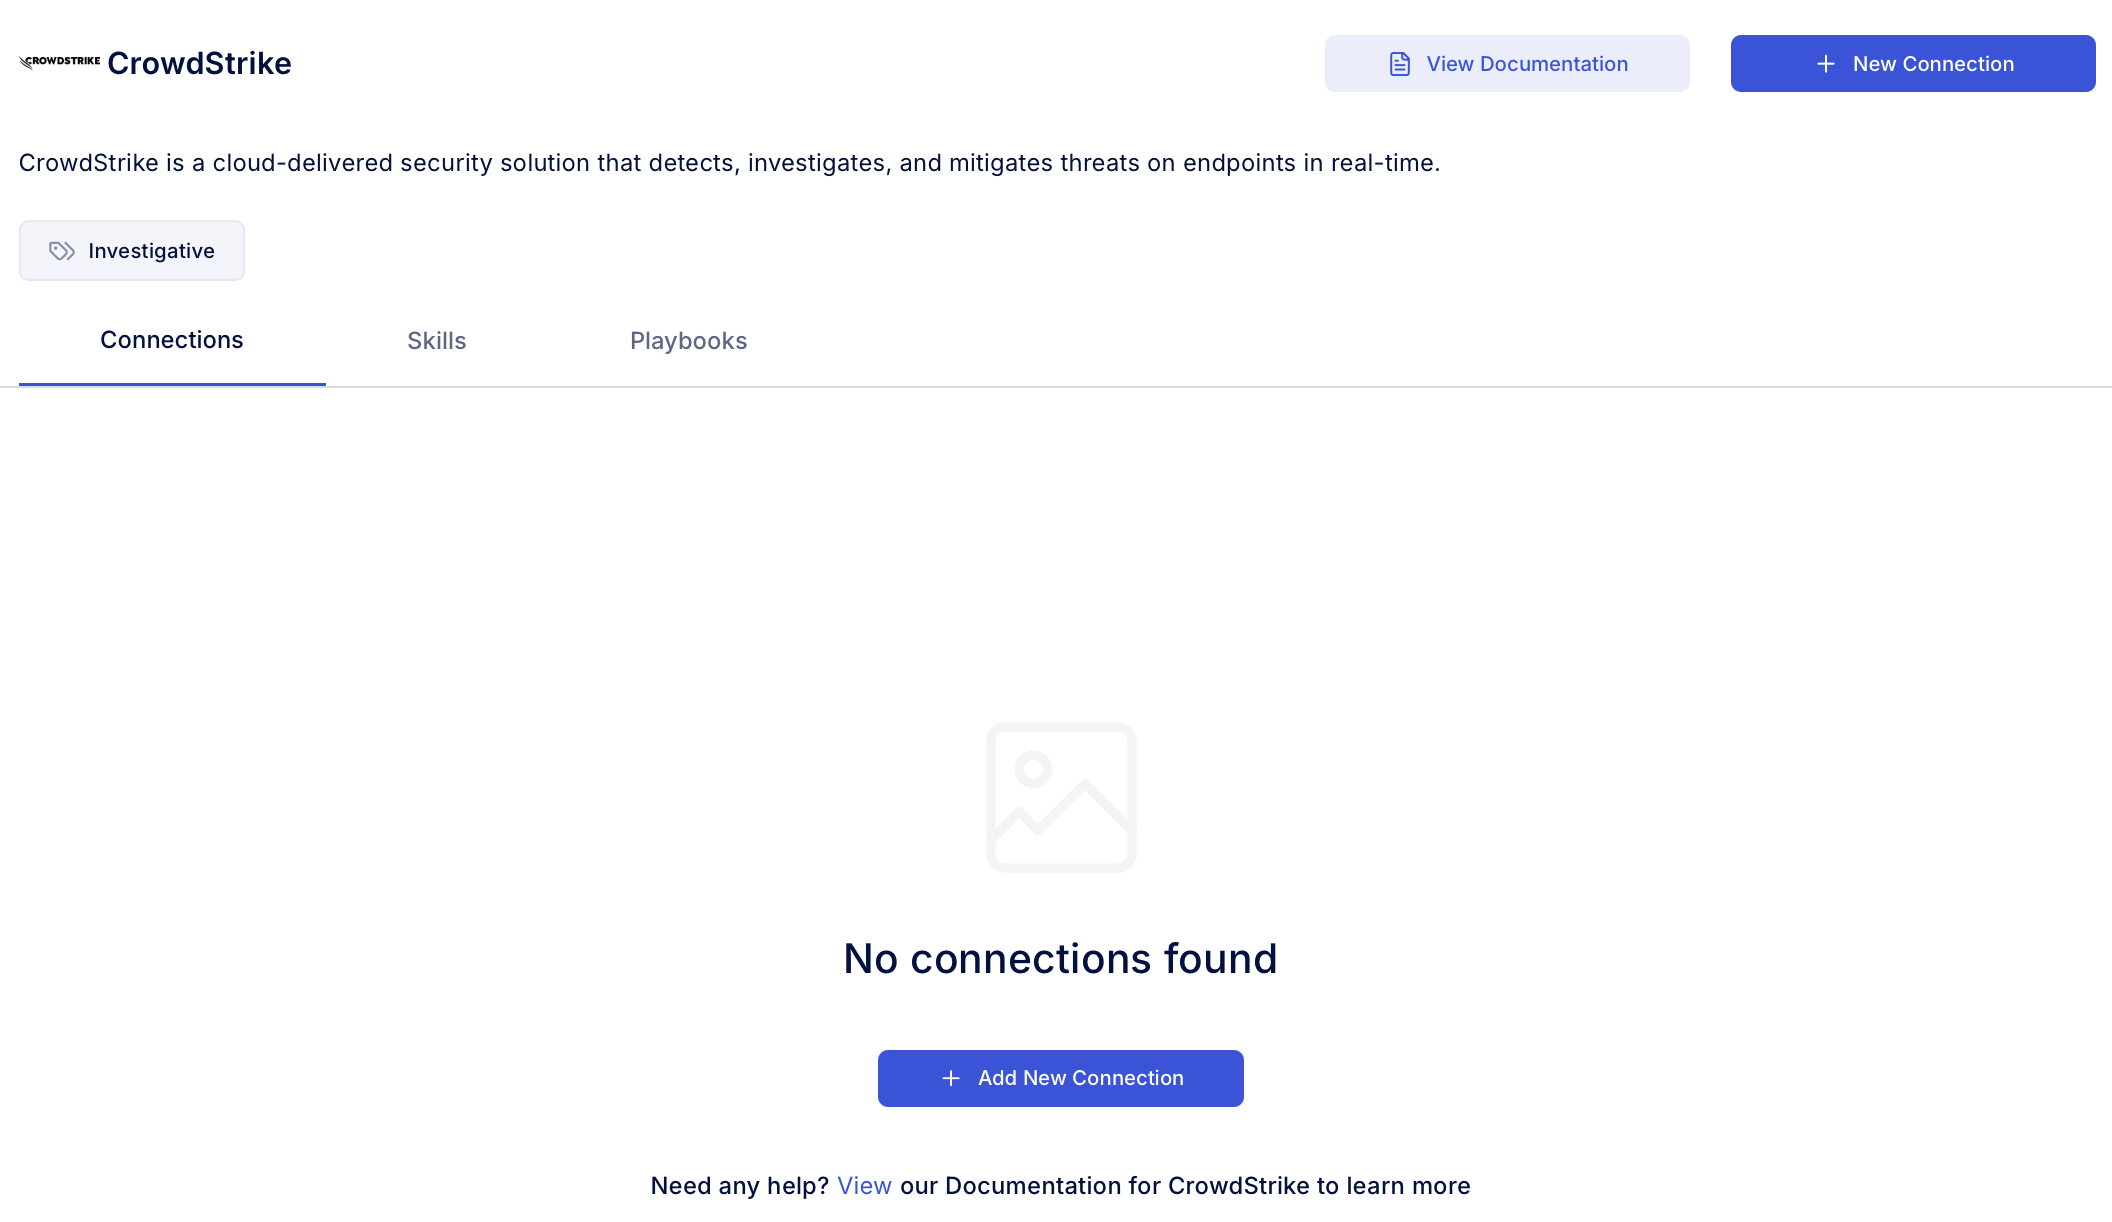
 3. Use the search option, enter the keyword "**Crowdstrike**", select the **Connections** tab, and click **Add New Connection**.
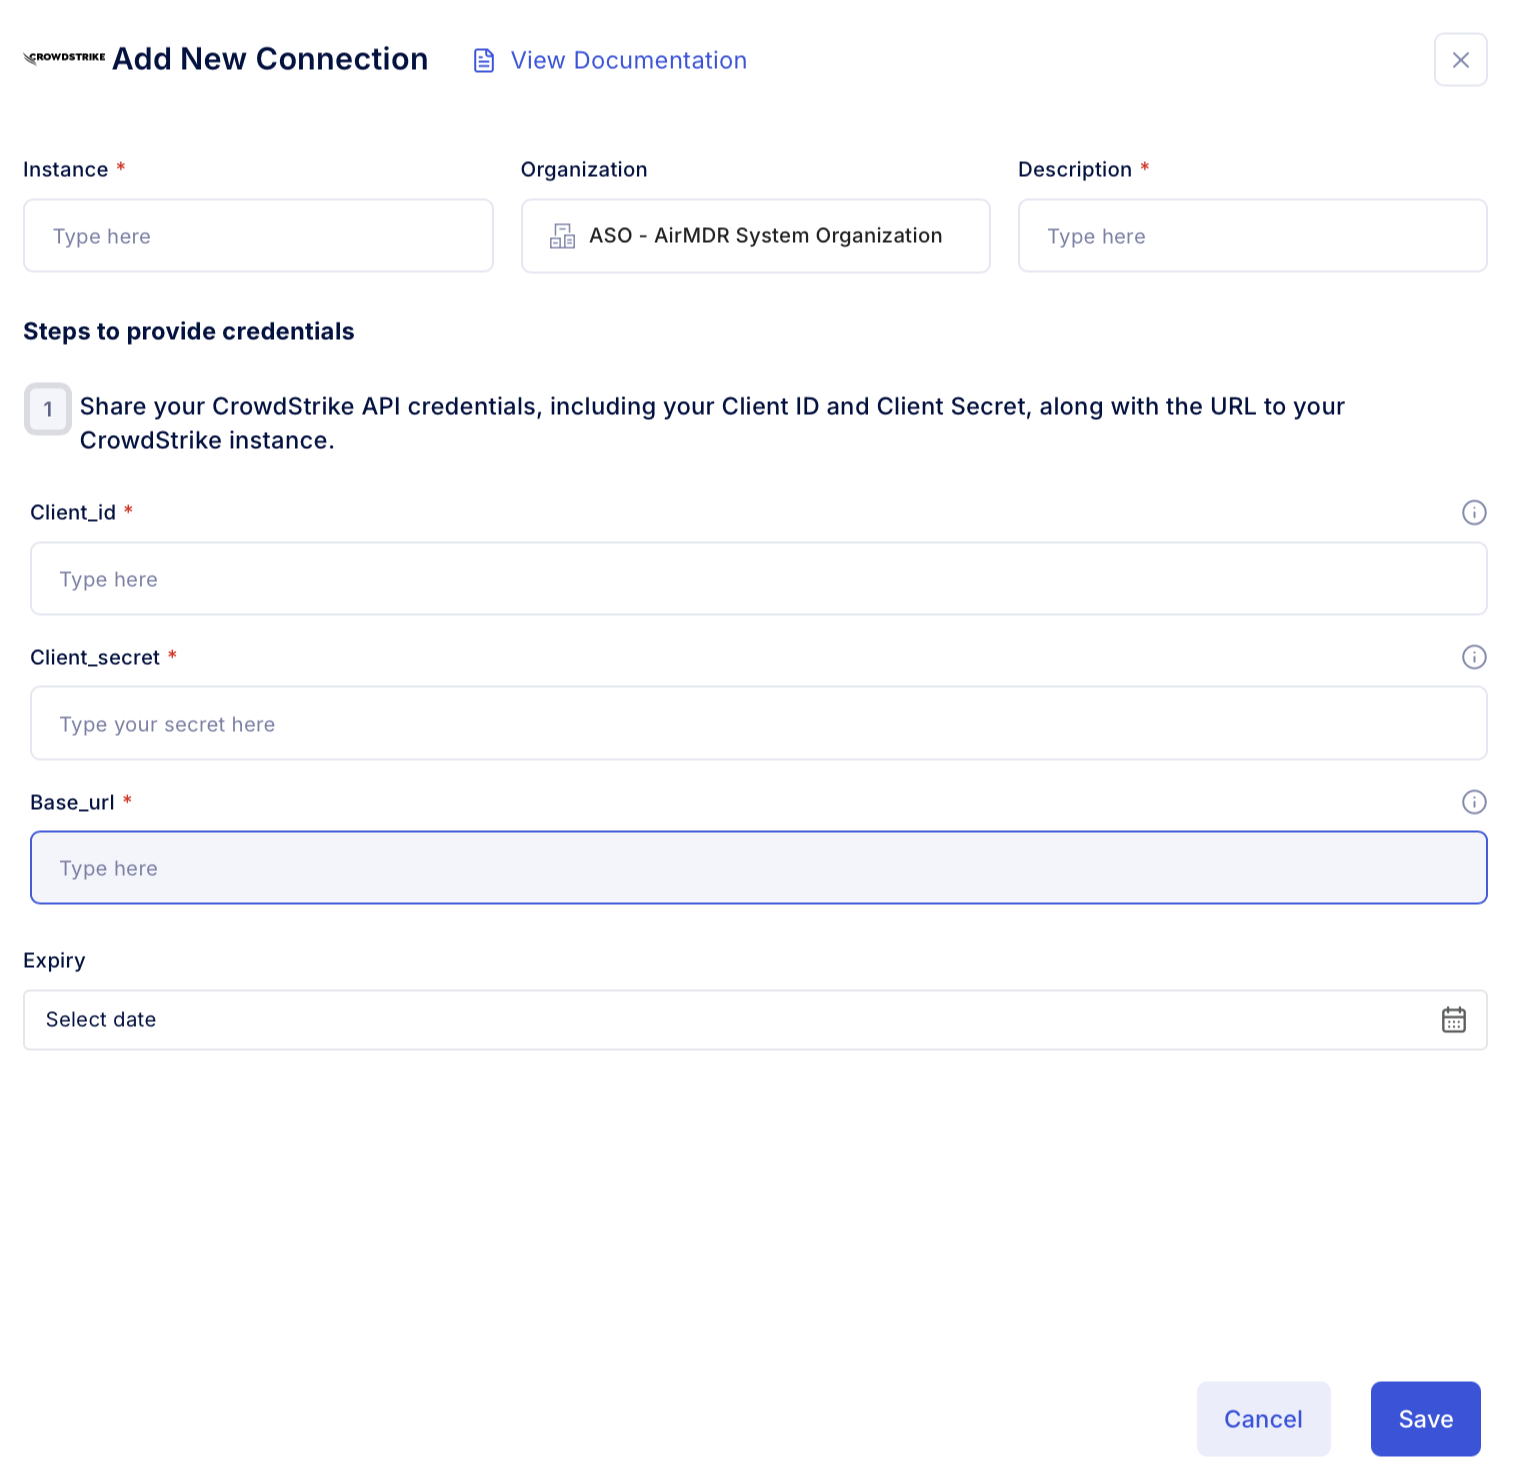
 4. Enter an unique name to the **Instance** (e.g., `your org name-Crowdstrike`) and brief **Description** to easily identify the user connection by AirMDR.
5. Enter the generated **client\_id, client\_secret,** **base\_url** and Expiry (optional) in the Authentication Details field params, and click **Save.**
4. Enter an unique name to the **Instance** (e.g., `your org name-Crowdstrike`) and brief **Description** to easily identify the user connection by AirMDR.
5. Enter the generated **client\_id, client\_secret,** **base\_url** and Expiry (optional) in the Authentication Details field params, and click **Save.**
 ### Evaluate Crowdstrike API
Open **cURL** and run the following command to check if your API Key is working:
**Request**
```
curl --location '/oauth2/token' \
--header 'Content-Type: application/x-www-form-urlencoded' \
--data-urlencode 'client_id=' \
--data-urlencode 'client_secret=' \
--data-urlencode 'grant_type=client_credentials'
```
**Response**
```
{
"access_token": "",
"expires_in": 1799,
"token_type": "bearer"
}
```
### Evaluate Crowdstrike API
Open **cURL** and run the following command to check if your API Key is working:
**Request**
```
curl --location '/oauth2/token' \
--header 'Content-Type: application/x-www-form-urlencoded' \
--data-urlencode 'client_id=' \
--data-urlencode 'client_secret=' \
--data-urlencode 'grant_type=client_credentials'
```
**Response**
```
{
"access_token": "",
"expires_in": 1799,
"token_type": "bearer"
}
```