> ## Documentation Index
> Fetch the complete documentation index at: https://docs.airmdr.com/llms.txt
> Use this file to discover all available pages before exploring further.
# SentinelOne
> SentinelOne is a cloud-based cybersecurity platform that helps protect against cyber threats such as malware, ransomware, and advanced persistent threats (APTs).
### Pre-requisites
A user account with the privileges to generate an API token.
### Generate SentinelOne API
1. Log in to your **SentinelOne Management Console** as an **Admin**.
2. Provide the necessary credentials (**email** and **password**), and click **Sign In**.
**Viewer** role in SentinelOne provides **read-only access**, allowing users to view threats, devices, and reports. See below for additional permissions to perform actions that require modifications.
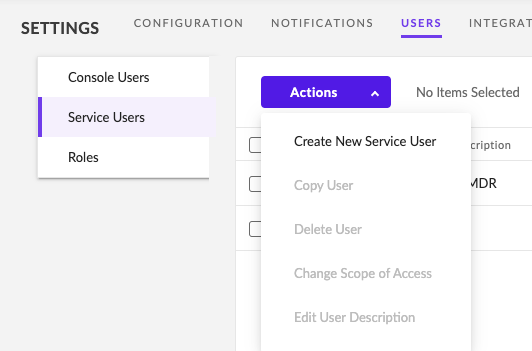
1. Navigate to **Settings** and select the **Users** tab.
2. In the left navigation pane, select **Service Users**.
 3. In the **Actions** drop-down list, click on **Create New Service User**.
 4. Provide the mandatory fields and click **Next**
* Name: (Preferably **AirMDR**)
* Expiration Date
5. Click **Next**.
4. Provide the mandatory fields and click **Next**
* Name: (Preferably **AirMDR**)
* Expiration Date
5. Click **Next**.
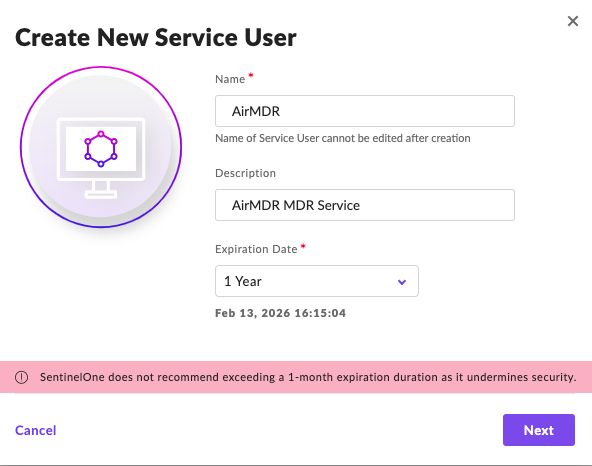 **It is recommended that the duration be equal to the contract, but it depends on how often you wish to re-issue the token.**
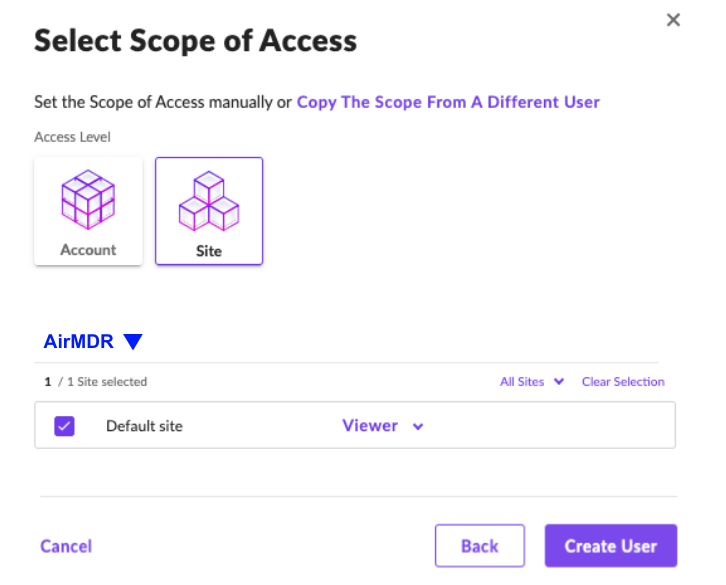
6. Allow access to your site under "**Select Scope of Access**".
7. Set access to "**Viewer**" (that's the default).
8. Click **Create User**.
**It is recommended that the duration be equal to the contract, but it depends on how often you wish to re-issue the token.**
6. Allow access to your site under "**Select Scope of Access**".
7. Set access to "**Viewer**" (that's the default).
8. Click **Create User**.
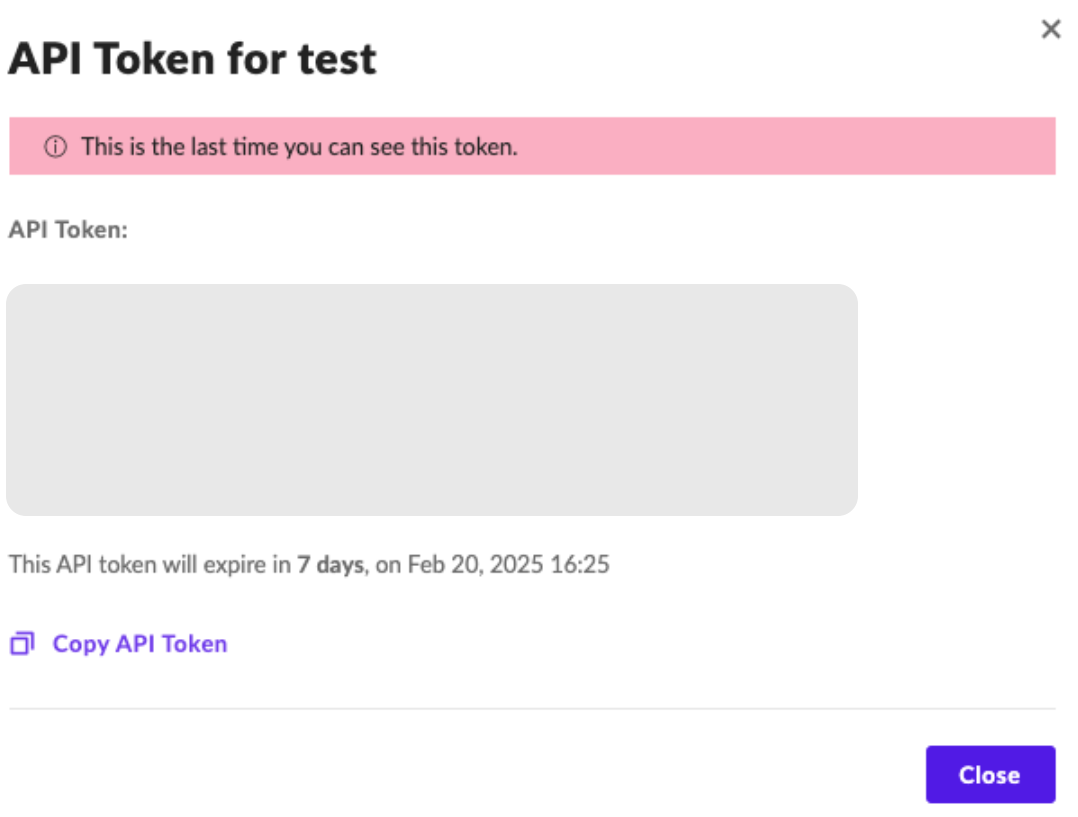
 9. Use the **Copy API Token** option at the bottom to copy the API Token.
**Copy** and securely store the API token (you won’t be able to see it again).
9. Use the **Copy API Token** option at the bottom to copy the API Token.
**Copy** and securely store the API token (you won’t be able to see it again).
 ### Creation of Custom Role
To get defined alerts from SentinelOne, the admin must create a **Custom Role** for your **account** or **scope**.
Actions like Network Quarantine, Updating Threat Status requires additional permissions. Should follow below instructions to create a new role, assign required permissions to this new role and assign this role to the user created above instead of Viewer role.
1. Log in to your **SentinelOne Management Console** as an **Admin**.
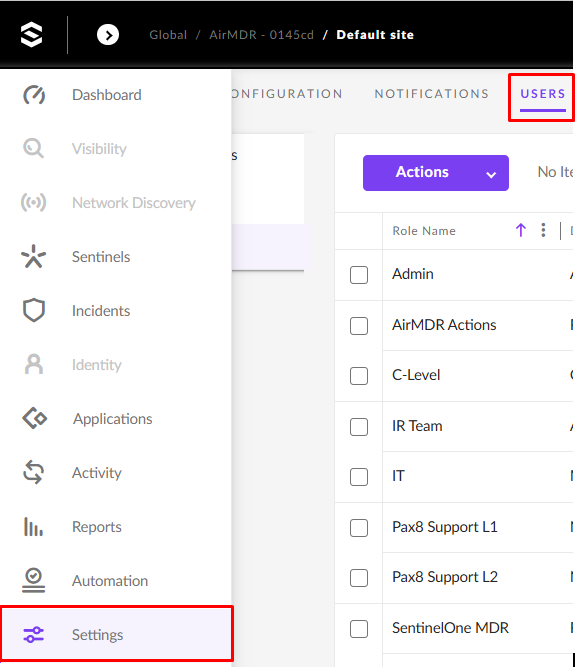
2. Go to **Settings** → **USERS** in the top menu.
### Creation of Custom Role
To get defined alerts from SentinelOne, the admin must create a **Custom Role** for your **account** or **scope**.
Actions like Network Quarantine, Updating Threat Status requires additional permissions. Should follow below instructions to create a new role, assign required permissions to this new role and assign this role to the user created above instead of Viewer role.
1. Log in to your **SentinelOne Management Console** as an **Admin**.
2. Go to **Settings** → **USERS** in the top menu.
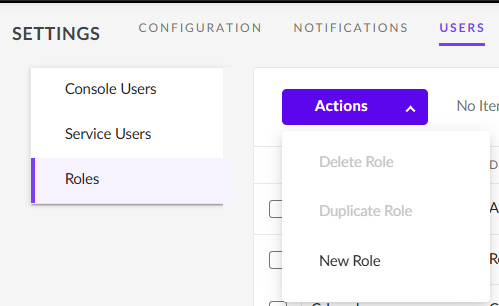
 3. Select the **Roles** tab on the left.
4. Click on the **Actions** drop-down menu and select **New Role**.
3. Select the **Roles** tab on the left.
4. Click on the **Actions** drop-down menu and select **New Role**.
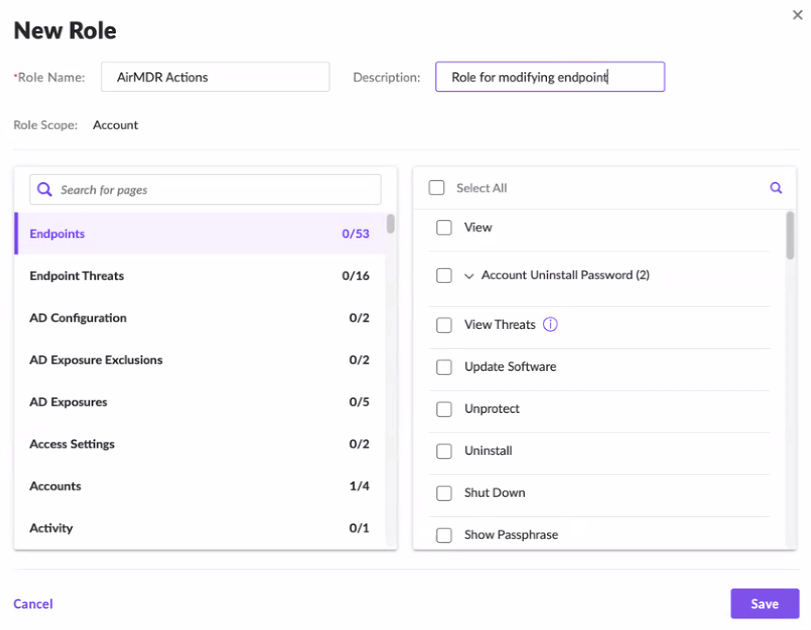
 5. Enter the required details to create a Role:
* Role Name: Unique role name for your organization
* Description: Describe the role of your endpoint configuration.
6. In the left pane, select the required pages (e.g., Endpoints, Endpoint Threats, Access Settings, Accounts, Activity) and the required permissions (e.g., View, Initiate Scan, Disconnect From Network) for the respective page in the right pane to create a custom role.\
Permission requirements for different skills are listed below\
For Example:
To create a SentinelOne API to scan and manage SentinelOne Network connection:
1. Select **Endpoints** in the left pane.
2. Select **View**, **Initiate Scan,** and **Disconnect From Network** from the right pane.
**Endpoints.InitiateScan**: This permission is required for “Initiate SentinelOne Scan Skill”
\
**Endpoints.DisconnectFromNetwork**: This permission is required for “Manage SentinelOne Network Connection”
To create a SentinelOne API to view threats:
1. Select **Endpoints** in the left pane and **View Threats** in the right pane.
2. Select **Threat Detection** in the left pane and **View** in the right pane.
7. Click **Save**.
5. Enter the required details to create a Role:
* Role Name: Unique role name for your organization
* Description: Describe the role of your endpoint configuration.
6. In the left pane, select the required pages (e.g., Endpoints, Endpoint Threats, Access Settings, Accounts, Activity) and the required permissions (e.g., View, Initiate Scan, Disconnect From Network) for the respective page in the right pane to create a custom role.\
Permission requirements for different skills are listed below\
For Example:
To create a SentinelOne API to scan and manage SentinelOne Network connection:
1. Select **Endpoints** in the left pane.
2. Select **View**, **Initiate Scan,** and **Disconnect From Network** from the right pane.
**Endpoints.InitiateScan**: This permission is required for “Initiate SentinelOne Scan Skill”
\
**Endpoints.DisconnectFromNetwork**: This permission is required for “Manage SentinelOne Network Connection”
To create a SentinelOne API to view threats:
1. Select **Endpoints** in the left pane and **View Threats** in the right pane.
2. Select **Threat Detection** in the left pane and **View** in the right pane.
7. Click **Save**.
 8. In the left navigation pane, select **Service Users**.
9. In the **Actions** drop-down list, click on **Create New Service User**.
10. Provide the mandatory fields and click **Next**
* Name: Provide a unique name for the Service User (e.g., AirMDR Actions)
* Expiration Date
8. In the left navigation pane, select **Service Users**.
9. In the **Actions** drop-down list, click on **Create New Service User**.
10. Provide the mandatory fields and click **Next**
* Name: Provide a unique name for the Service User (e.g., AirMDR Actions)
* Expiration Date
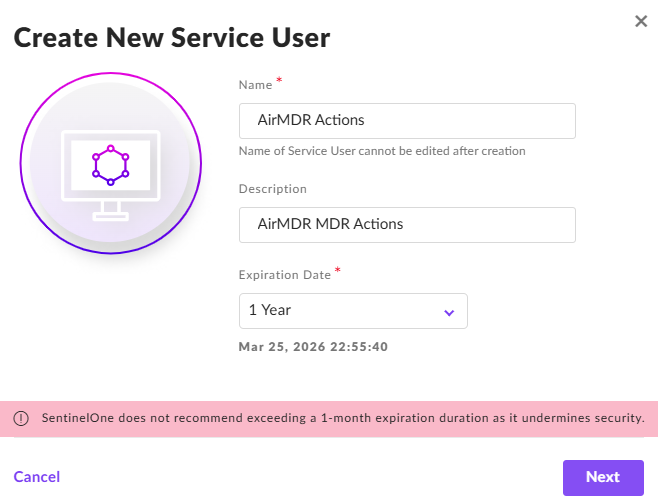 11. Click **Next**.
**It is recommended that the duration be equal to the contract, but it depends on how often you wish to re-issue the token.**
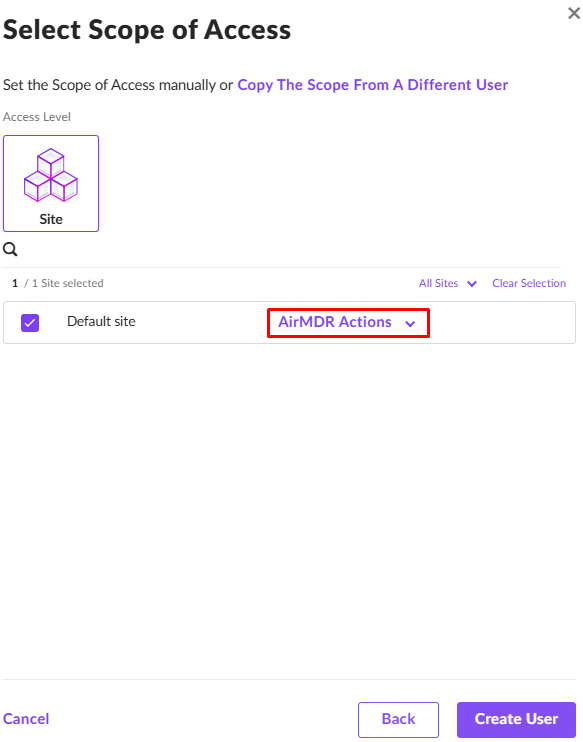
12. Allow access to your site under "**Select Scope of Access**".
13. Set access to "**AirMDR Actions**" (select the custom role defined with pages and permissions).
14. Click **Create User**.
In the Authentication Required pop-up, enter the Two-Factor Authentication Code and click **Confirm Action**.
11. Click **Next**.
**It is recommended that the duration be equal to the contract, but it depends on how often you wish to re-issue the token.**
12. Allow access to your site under "**Select Scope of Access**".
13. Set access to "**AirMDR Actions**" (select the custom role defined with pages and permissions).
14. Click **Create User**.
In the Authentication Required pop-up, enter the Two-Factor Authentication Code and click **Confirm Action**.
 15. Use the **Copy API Token** option at the bottom to copy the API Token.
**Copy** and securely store the API token (you won’t be able to see it again).
15. Use the **Copy API Token** option at the bottom to copy the API Token.
**Copy** and securely store the API token (you won’t be able to see it again).
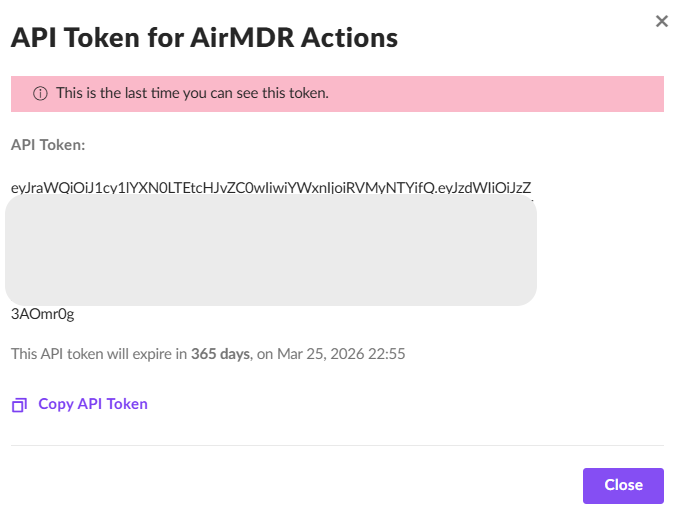 Share the **API Token** and the **SentinelOne URL** securely with the AirMDR team or self-configure them in the AirMDR Integrations Dashboard.
### Evaluate SentinelOne API Test Scope Restrictions
Open **cURL** and run the following command to check if your API Access is working:
**Test Threat Retrieval**
```
curl -X GET "https:///web/api/v2.1/threats" \
-H "Authorization: ApiToken " \
-H "Content-Type: application/json"
```
* If the user has **site-specific access**, it should return threats only for that site.
* If restricted, it should return an **empty list or 403 error**.
**Test Device Access**
```
curl -X GET "https:///web/api/v2.1/agents" \
-H "Authorization: ApiToken " \
-H "Content-Type: application/json"
```
* This verifies if the user can retrieve **device information** based on the assigned scope.
**Troubleshooting API Access Issues**
| Error Code | Possible Issue | Solution |
| --------------------------- | ------------------------ | ---------------------------------------------------------- |
| `401 Unauthorized` | Invalid API token | Regenerate the API token, \ check permissions |
| `403 Forbidden` | Insufficient permissions | Adjust user role or scope |
| `404 Not Found` | Incorrect API endpoint | Verify API version and endpoint, \ check API documentation |
| `500 Internal Server Error` | Rate limit exceeded | Wait and retry or contact support |
### Configure SentinelOne API in the AirMDR Integrations Dashboard
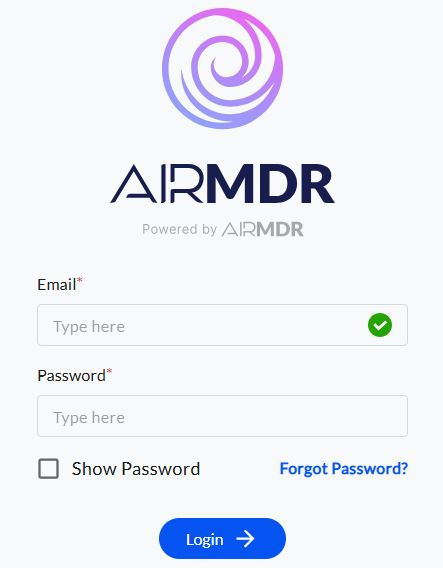
1. Navigate to [AirMDR](https://app.airmdr.com/auth/login), provide the credentials, and click **Login.**
Share the **API Token** and the **SentinelOne URL** securely with the AirMDR team or self-configure them in the AirMDR Integrations Dashboard.
### Evaluate SentinelOne API Test Scope Restrictions
Open **cURL** and run the following command to check if your API Access is working:
**Test Threat Retrieval**
```
curl -X GET "https:///web/api/v2.1/threats" \
-H "Authorization: ApiToken " \
-H "Content-Type: application/json"
```
* If the user has **site-specific access**, it should return threats only for that site.
* If restricted, it should return an **empty list or 403 error**.
**Test Device Access**
```
curl -X GET "https:///web/api/v2.1/agents" \
-H "Authorization: ApiToken " \
-H "Content-Type: application/json"
```
* This verifies if the user can retrieve **device information** based on the assigned scope.
**Troubleshooting API Access Issues**
| Error Code | Possible Issue | Solution |
| --------------------------- | ------------------------ | ---------------------------------------------------------- |
| `401 Unauthorized` | Invalid API token | Regenerate the API token, \ check permissions |
| `403 Forbidden` | Insufficient permissions | Adjust user role or scope |
| `404 Not Found` | Incorrect API endpoint | Verify API version and endpoint, \ check API documentation |
| `500 Internal Server Error` | Rate limit exceeded | Wait and retry or contact support |
### Configure SentinelOne API in the AirMDR Integrations Dashboard
1. Navigate to [AirMDR](https://app.airmdr.com/auth/login), provide the credentials, and click **Login.**
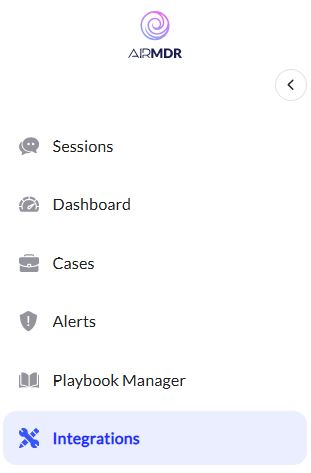
 2. Navigate to the AirMDR Integrations Dashboard in the left navigation pane and select **Integrations.**
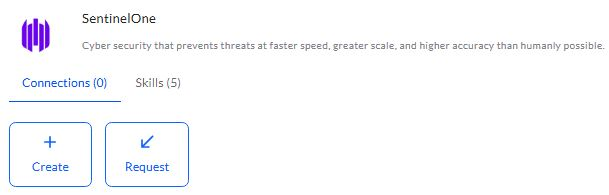
 3. Use the search option, enter the keyword "**SentinelOne**", select the **Connections** tab, and click **Create**.
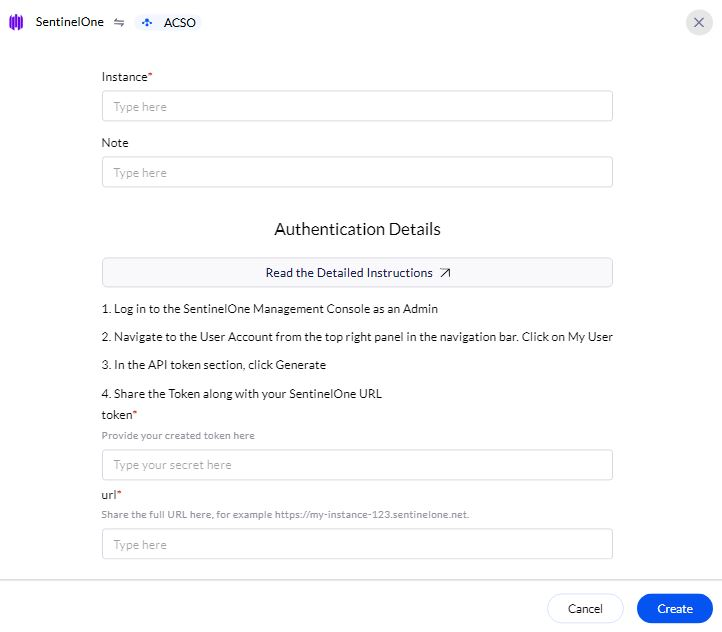
 4. Enter the generated **API token** and **SentinelOne URL** in the Authentication Details field params, and click **Create.**