> ## Documentation Index
> Fetch the complete documentation index at: https://docs.airmdr.com/llms.txt
> Use this file to discover all available pages before exploring further.
# Slack
> Slack is a messaging platform designed for teams and workplaces, offering real-time communication, collaboration tools, and integrations with other apps. Slack API integrations, making it useful for automation and notifications, like using Slack Webhooks to send updates from other systems.
### ✅ Pre-requisites
> User must have the **AirMDR** **Slack API manifest** in JSON format.
>
>
> Follow the steps to generate AirMDR Slack API Manifest
>
>
> 1. Navigate to [AirMDR](https://app.airmdr.com/auth/login), provide the credentials, and click **Login.**
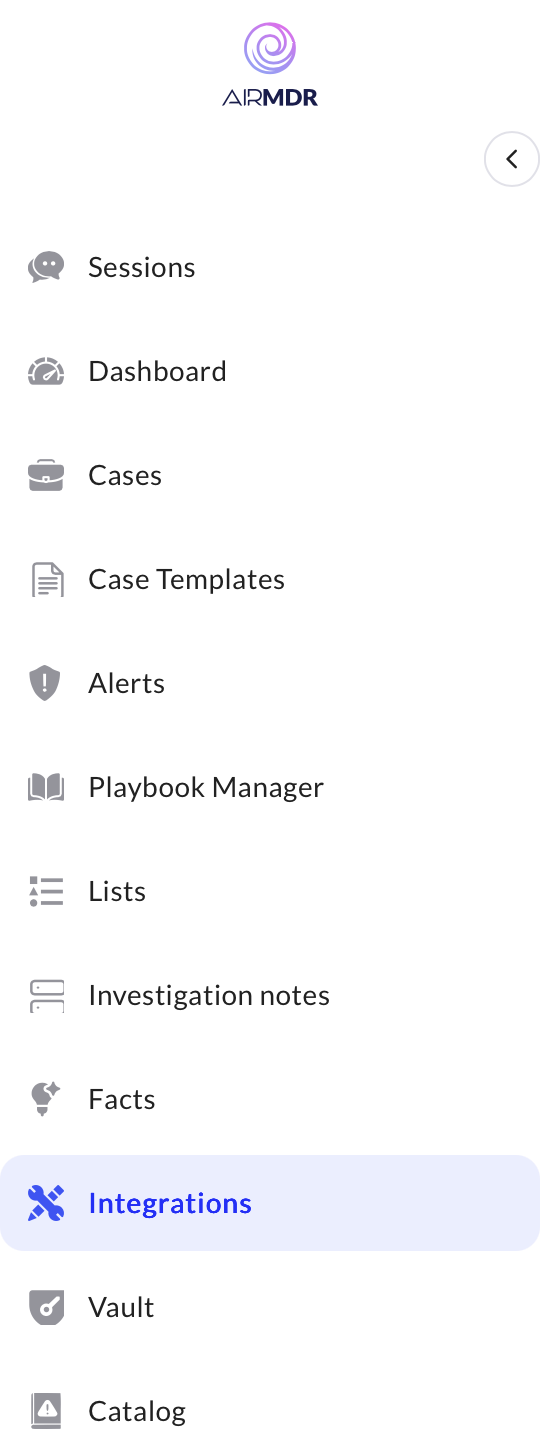
> 2. In the left navigation pane of the application, select **Integrations.**
> 3. Use the search option, enter the keyword "**Slack**", select the **Connections** tab, and click **Create**.
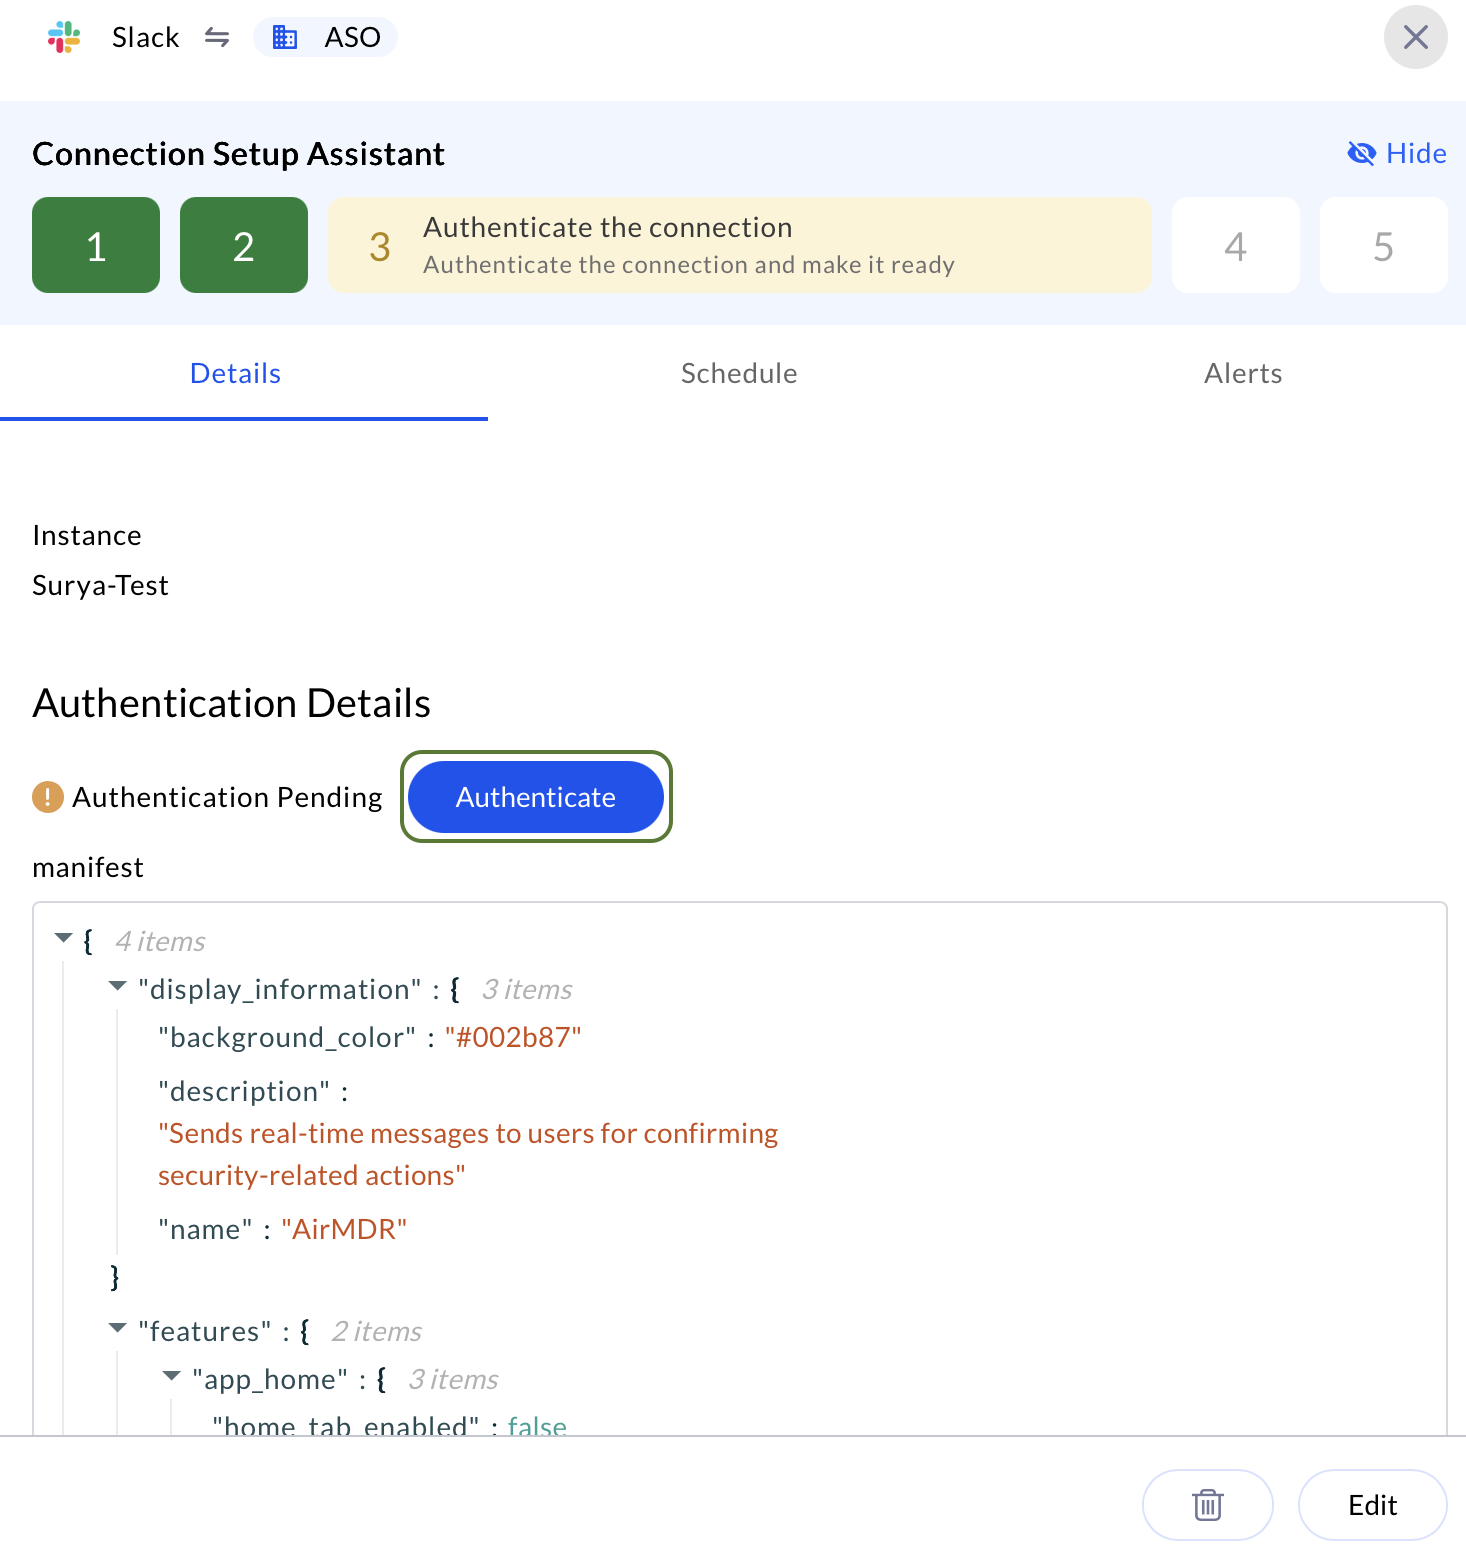
> 4. In the Authentication Details, step 2 copy the pre-generated manifest to use in the Slack application.
>
>
> or\
> Contact AirMDR [support](mailto:support@airmdr.com) team to get the **AirMDR** **Slack API manifest**
>
### Slack App Setup via Manifest
This guide provides step-by-step instructions for setting up a Slack App using a manifest file. It covers how to create the app, enable incoming **Webhook URL**, generate **Signing Secret**, and **Bot Token** — essential components for building and integrating bots, automations, and services with Slack’s API.
1. Go to [Slack API Page](https://api.slack.com/apps).
You can create a new Slack app here.
2. Click **"Create New App"** in the top right corner. A pop-up modal **"Create an app"** will show up.
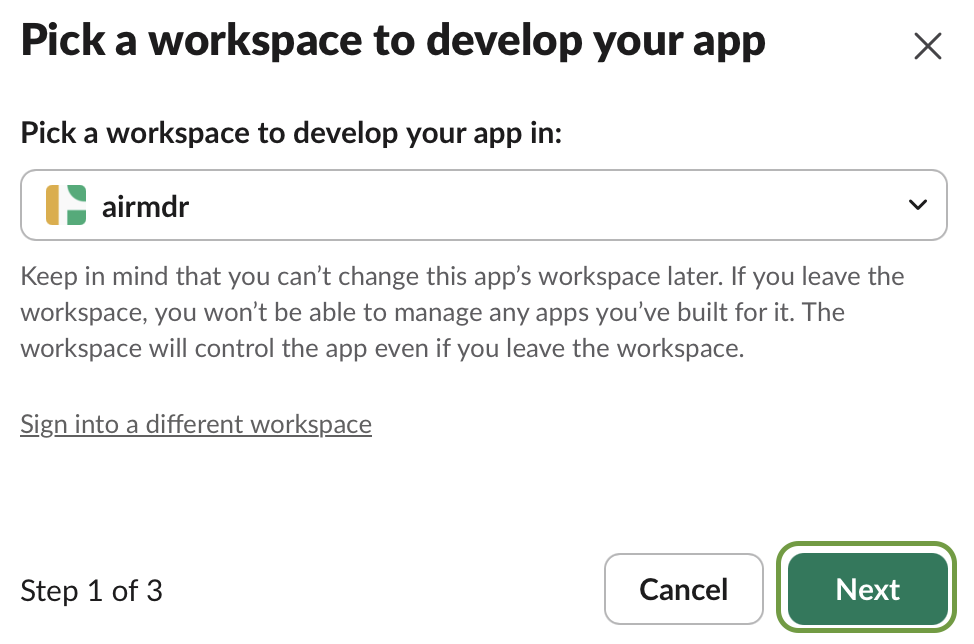
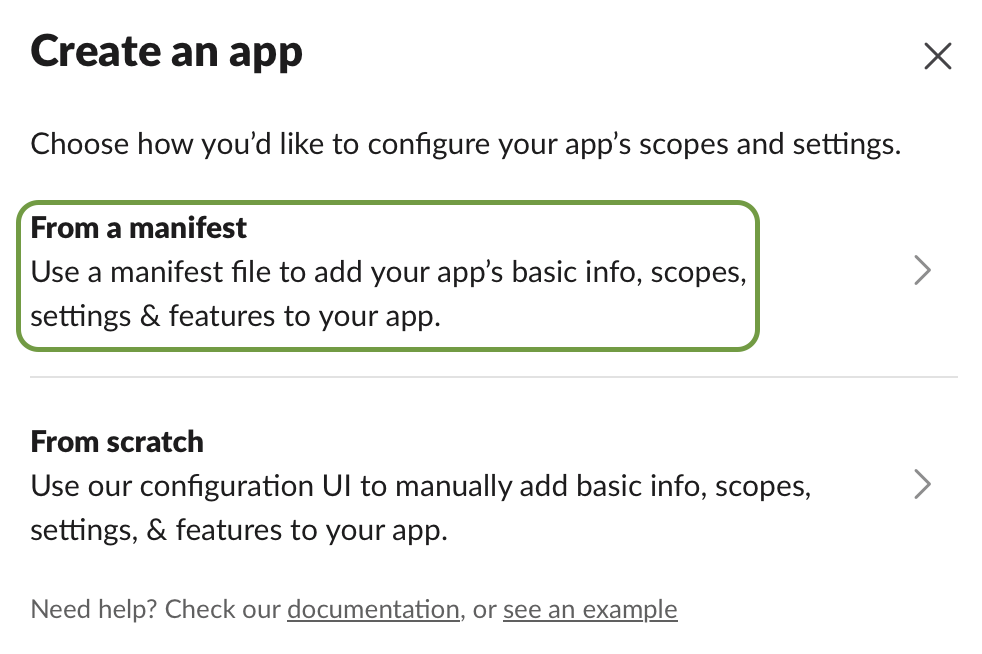 3. Choose **"From a manifest"** and enter the required information:
* **Pick a workspace to develop your app in**: Select a workspace where you want to install the app. (e.g. `airmdr`)
4. Click **Next**.
3. Choose **"From a manifest"** and enter the required information:
* **Pick a workspace to develop your app in**: Select a workspace where you want to install the app. (e.g. `airmdr`)
4. Click **Next**.
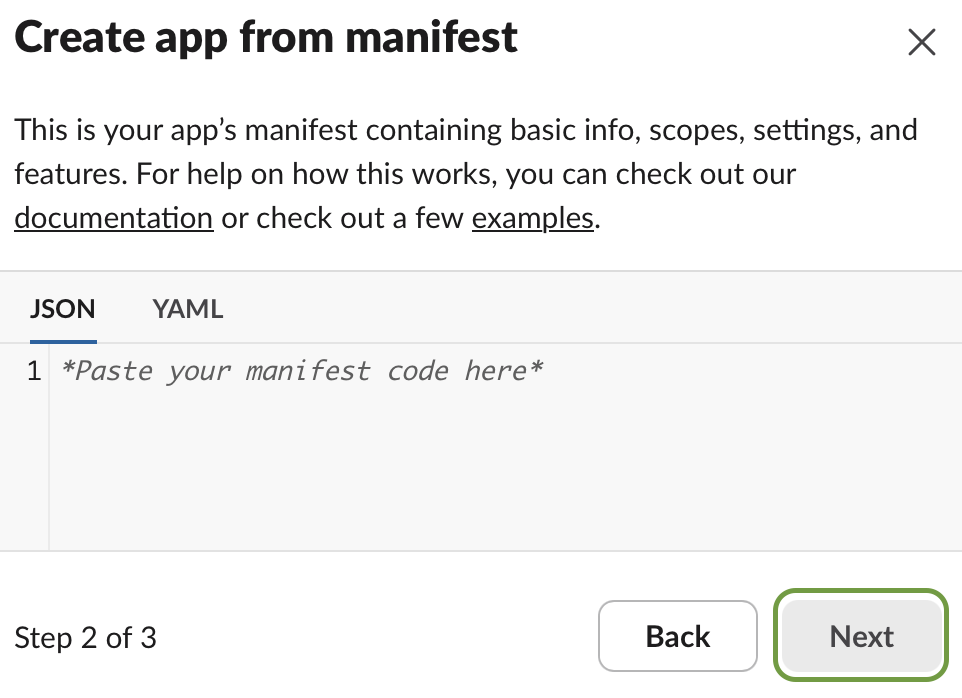
 5. Paste the JSON content \[MANIFEST COPY] generated earlier from the AirMDR Integration Dashboard.
```
{
"display_information": {
"name": "AirMDR",
"description": "Sends real-time messages to users for confirming security-related actions",
"background_color": "#002b87"
},
"features": {
"app_home": {
"home_tab_enabled": false,
"messages_tab_enabled": true,
"messages_tab_read_only_enabled": false
},
"bot_user": {
"display_name": "AirMDR",
"always_online": true
}
},
"oauth_config": {
"scopes": {
"bot": [
"incoming-webhook",
"users:read",
"users:read.email",
"chat:write",
"im:write",
"app_mentions:read",
"im:history"
]
}
},
"settings": {
"event_subscriptions": {
"request_url": "https://app.airmdr.com/airmdrapi/webhooks/slack/v1/events?token=XXX",
"bot_events": [
"message.im"
]
},
"interactivity": {
"is_enabled": true,
"request_url": "https://app.airmdr.com/airmdrapi/webhooks/slack/v1/interactions?token=XXX"
},
"org_deploy_enabled": false,
"socket_mode_enabled": false,
"token_rotation_enabled": false
}
}
```
Optionally you can customise the JSON content information to easily identify the application.
"display\_information" → "name": \< `your org name`>
"bot\_user" → "display\_name": \< `your org name`>
6. Click **Next**.
5. Paste the JSON content \[MANIFEST COPY] generated earlier from the AirMDR Integration Dashboard.
```
{
"display_information": {
"name": "AirMDR",
"description": "Sends real-time messages to users for confirming security-related actions",
"background_color": "#002b87"
},
"features": {
"app_home": {
"home_tab_enabled": false,
"messages_tab_enabled": true,
"messages_tab_read_only_enabled": false
},
"bot_user": {
"display_name": "AirMDR",
"always_online": true
}
},
"oauth_config": {
"scopes": {
"bot": [
"incoming-webhook",
"users:read",
"users:read.email",
"chat:write",
"im:write",
"app_mentions:read",
"im:history"
]
}
},
"settings": {
"event_subscriptions": {
"request_url": "https://app.airmdr.com/airmdrapi/webhooks/slack/v1/events?token=XXX",
"bot_events": [
"message.im"
]
},
"interactivity": {
"is_enabled": true,
"request_url": "https://app.airmdr.com/airmdrapi/webhooks/slack/v1/interactions?token=XXX"
},
"org_deploy_enabled": false,
"socket_mode_enabled": false,
"token_rotation_enabled": false
}
}
```
Optionally you can customise the JSON content information to easily identify the application.
"display\_information" → "name": \< `your org name`>
"bot\_user" → "display\_name": \< `your org name`>
6. Click **Next**.
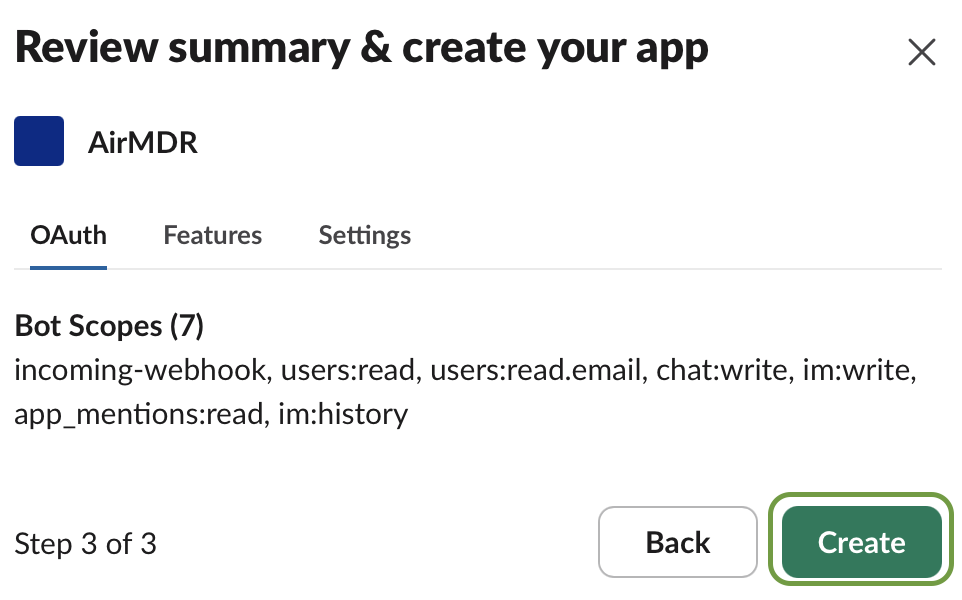
 7. In the **Review summary & create your app** pop-up modal cross-verify the content and click **Create**.
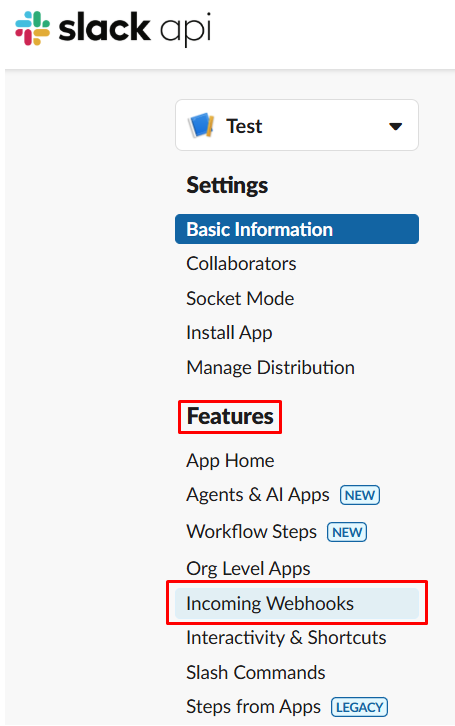
 1. In the left navigation menu, navigate to **Features** → **Incoming Webhooks**.
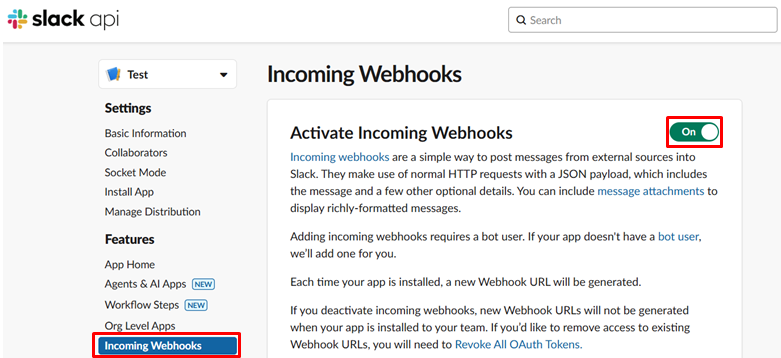
 2. Make sure the toggle option **"Activate Incoming Webhooks"** is **On**.
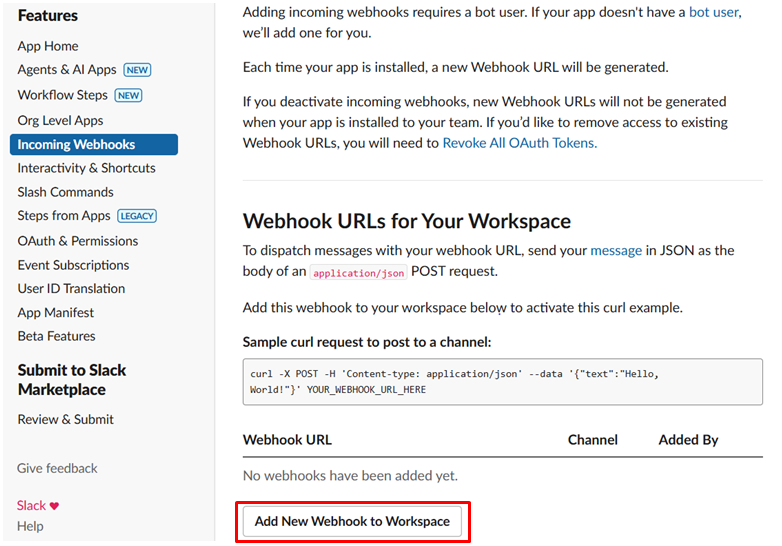
 3. Scroll down to the **"Webhook URLs for Your Workspace"** section.
4. Click **"Add New Webhook to Workspace"**.
3. Scroll down to the **"Webhook URLs for Your Workspace"** section.
4. Click **"Add New Webhook to Workspace"**.
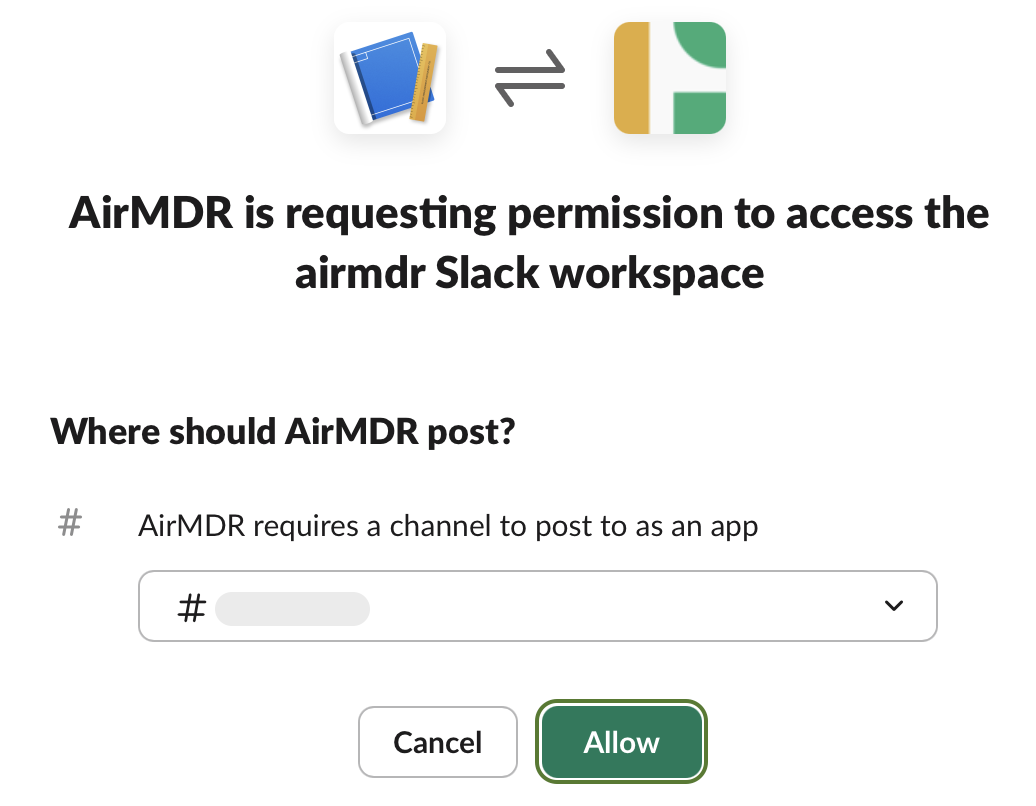
 5. Select a channel in the drop-down list where you want the bot to post to.
6. Click **"Allow"** to grant permissions.
5. Select a channel in the drop-down list where you want the bot to post to.
6. Click **"Allow"** to grant permissions.
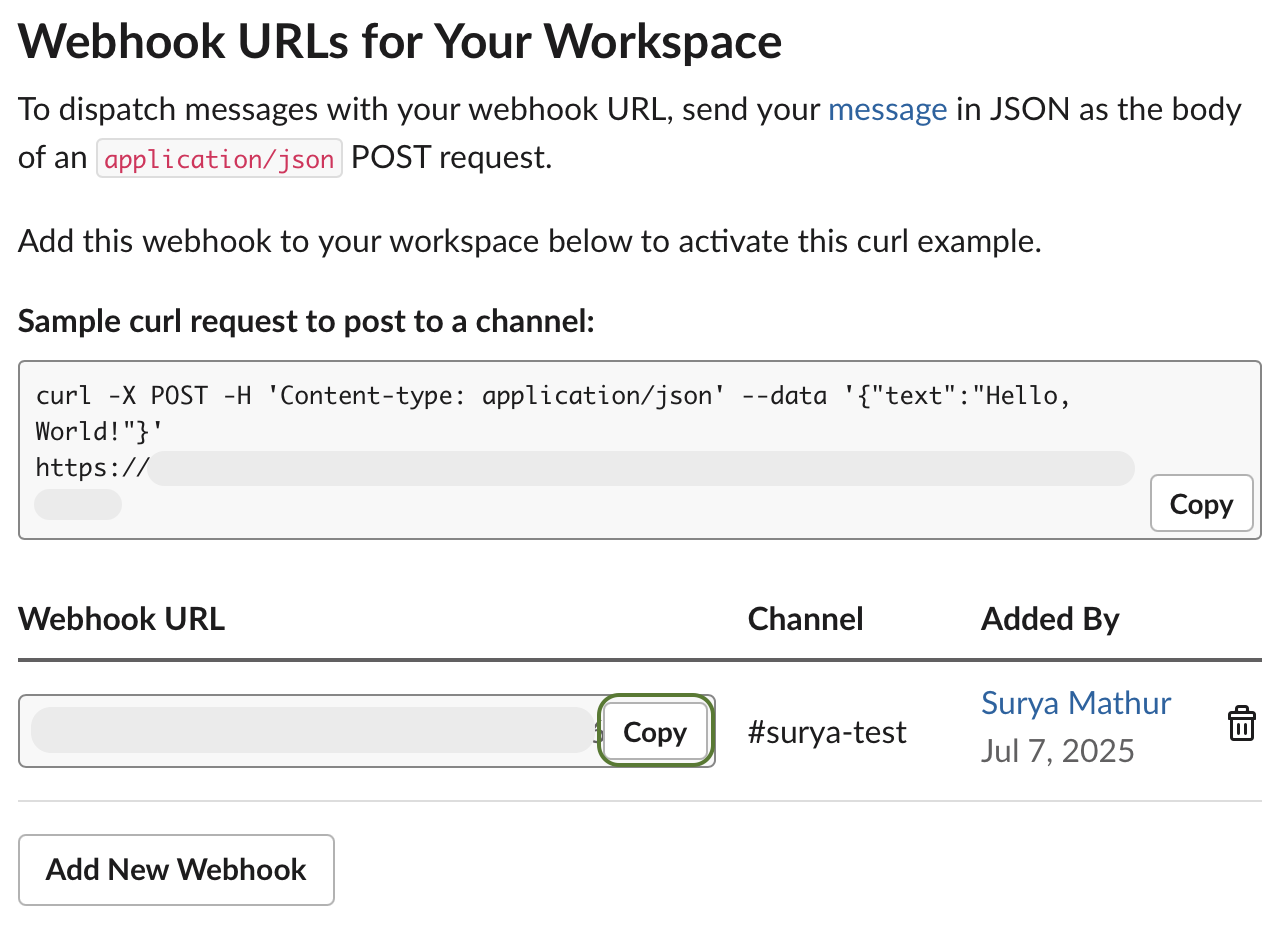
 7. Once redirected, your **Webhook URL** will appear under **Webhook URLs for Your Workspace**.
8. Click **Copy** to save it for use.
7. Once redirected, your **Webhook URL** will appear under **Webhook URLs for Your Workspace**.
8. Click **Copy** to save it for use.
 > Slack requires validation of your request URL to enable event subscriptions.
>
> To ensure your endpoint (e.g., `https://yourdomain.com/slack/events`) is publicly accessible and configured to handle Slack's verification request (responds with the `challenge` value).
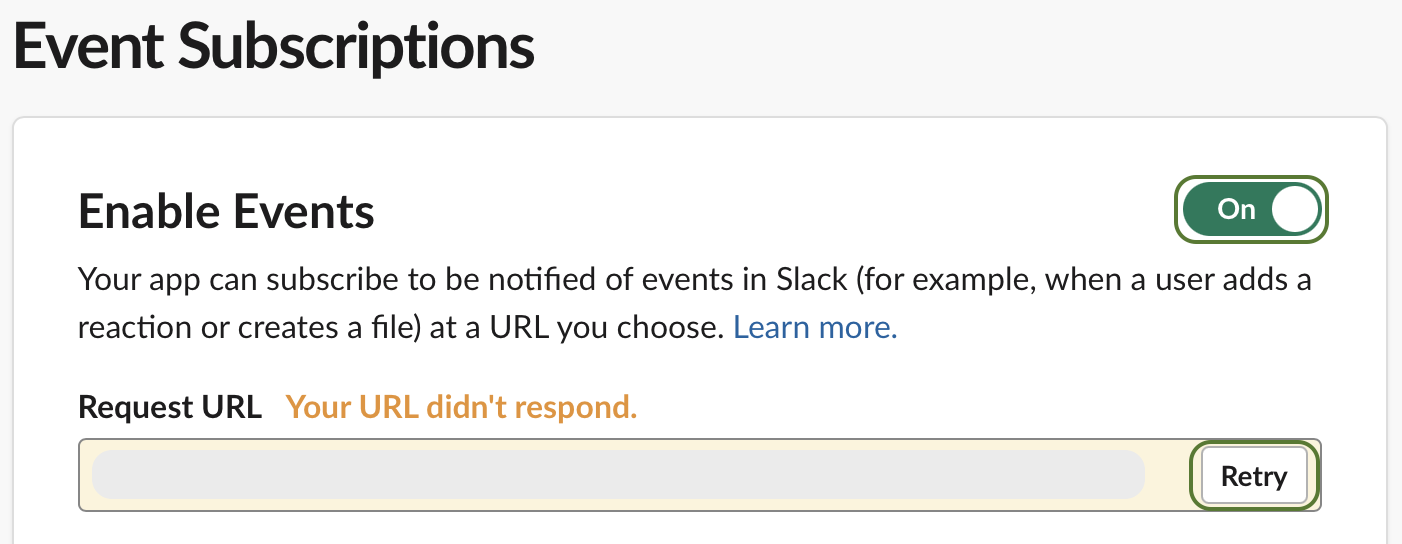
1. In the left navigation menu, navigate to **Settings** → **Event Subscriptions**.
2. Toggle **Enable Events** to **On**.
3. Click **Retry** button in the Request URL.
> Slack requires validation of your request URL to enable event subscriptions.
>
> To ensure your endpoint (e.g., `https://yourdomain.com/slack/events`) is publicly accessible and configured to handle Slack's verification request (responds with the `challenge` value).
1. In the left navigation menu, navigate to **Settings** → **Event Subscriptions**.
2. Toggle **Enable Events** to **On**.
3. Click **Retry** button in the Request URL.
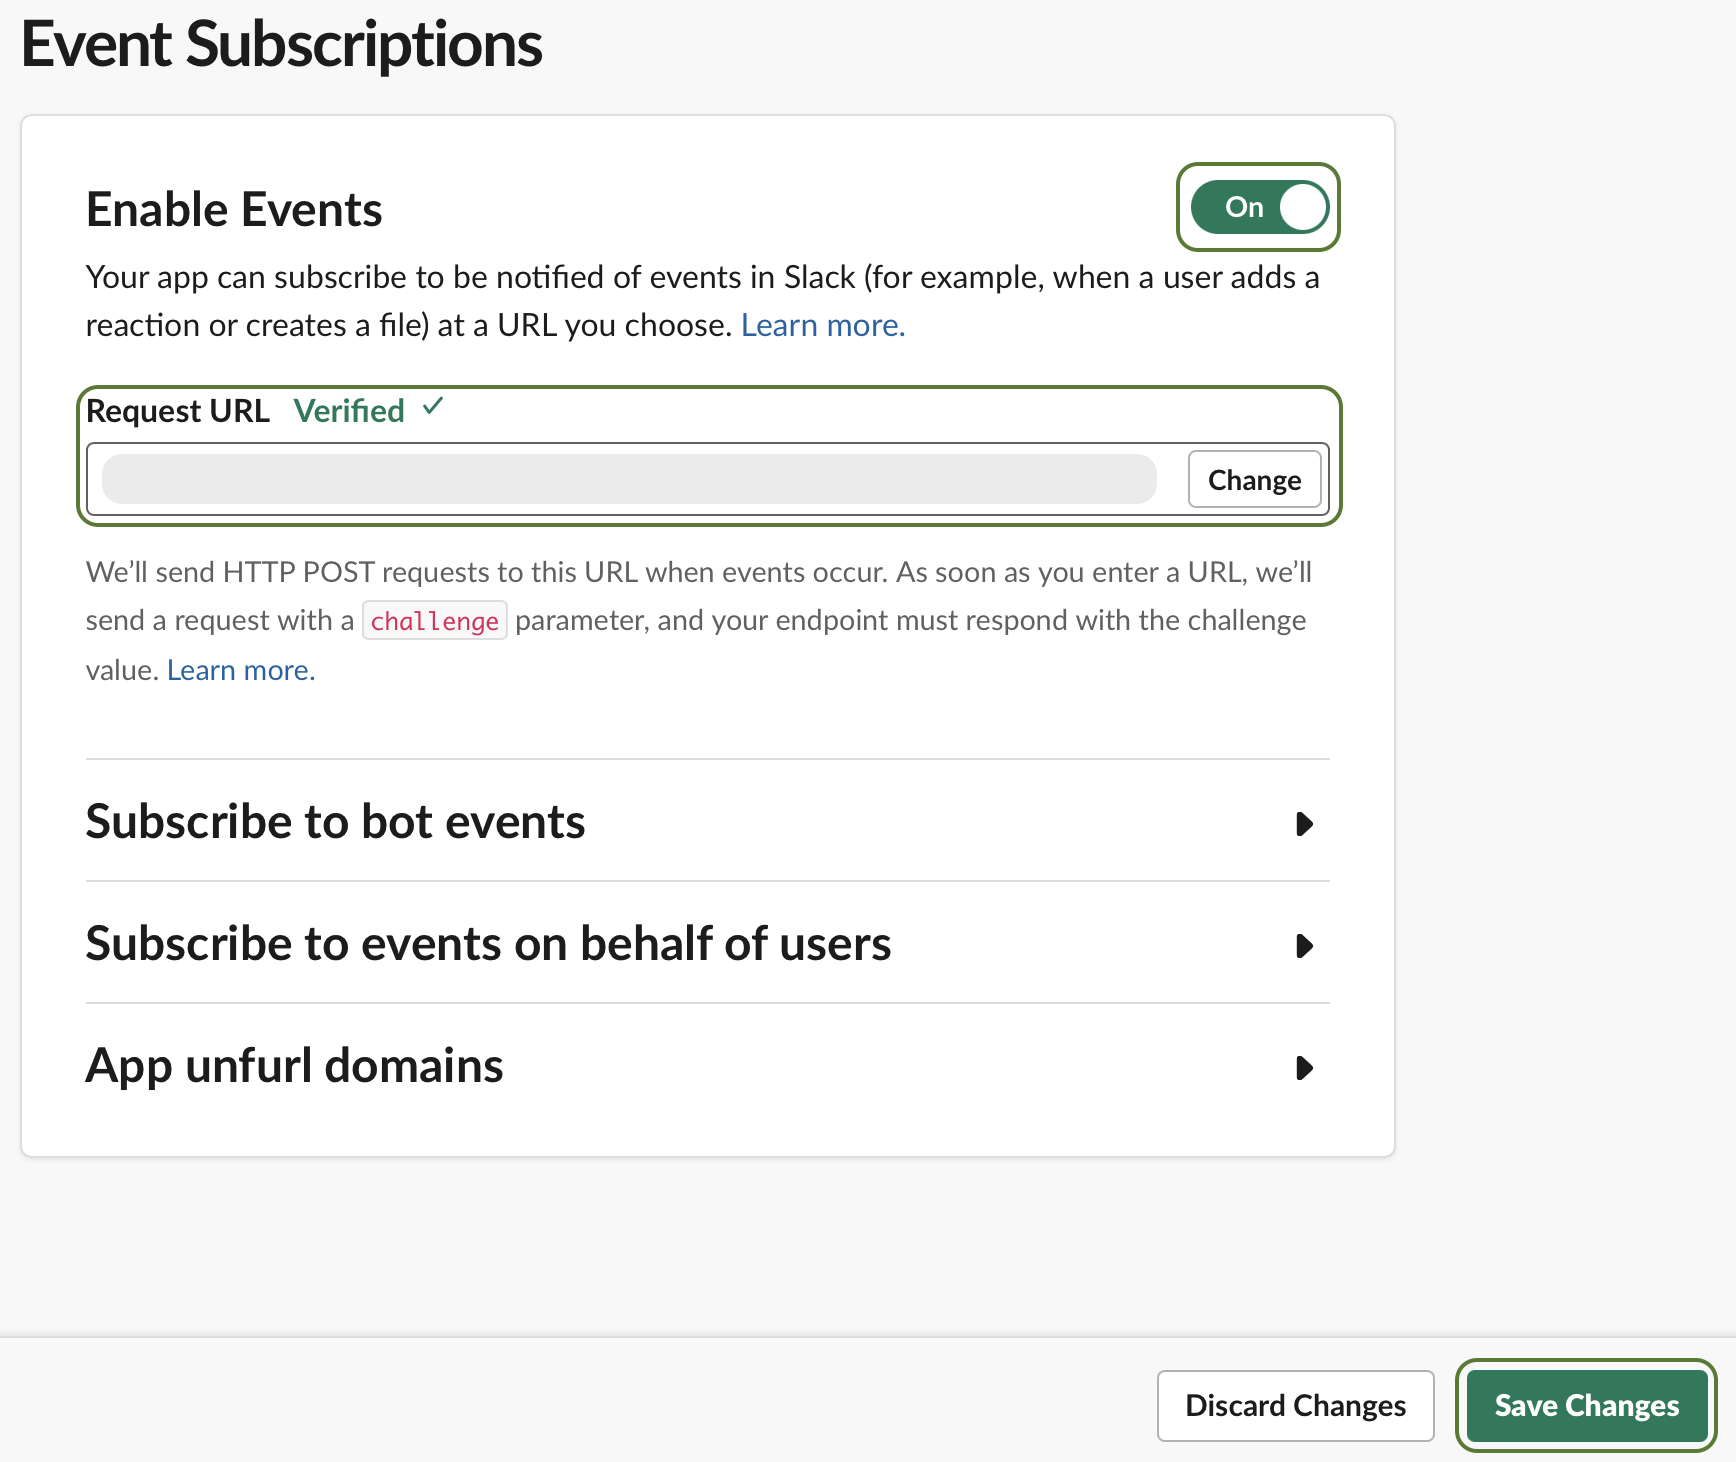
 4. After successful verification, click **Save Changes** at the bottom.
 1. In the left navigation menu, navigate to **Features** → **OAuth & Permissions**.
2. In the **OAuth Tokens** section, click "**Install to** \<`your workspace`>".
1. In the left navigation menu, navigate to **Features** → **OAuth & Permissions**.
2. In the **OAuth Tokens** section, click "**Install to** \<`your workspace`>".
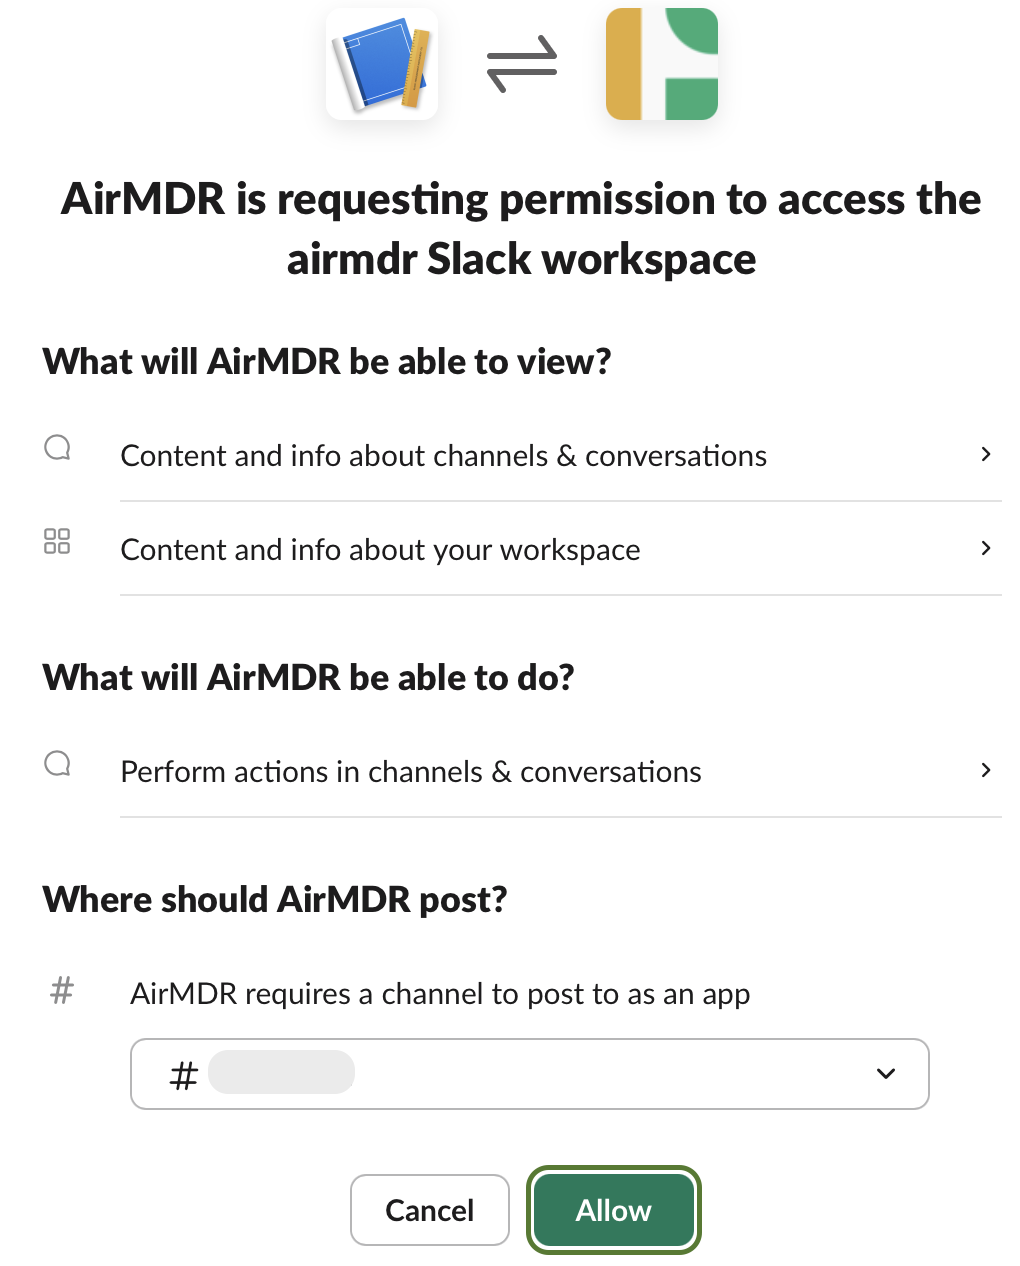
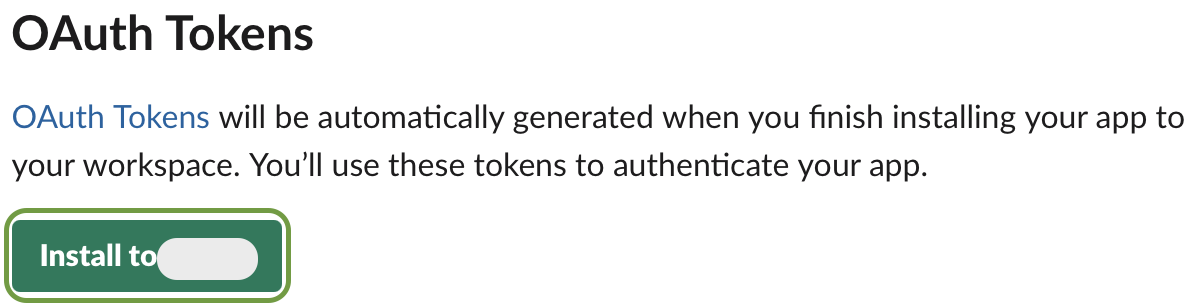 1. In the "**Where should \<**`your workspace`**> post?**"
2. Select a `#channel` in the drop-downlist where to post as an app.
3. Click **Allow**.
1. In the "**Where should \<**`your workspace`**> post?**"
2. Select a `#channel` in the drop-downlist where to post as an app.
3. Click **Allow**.
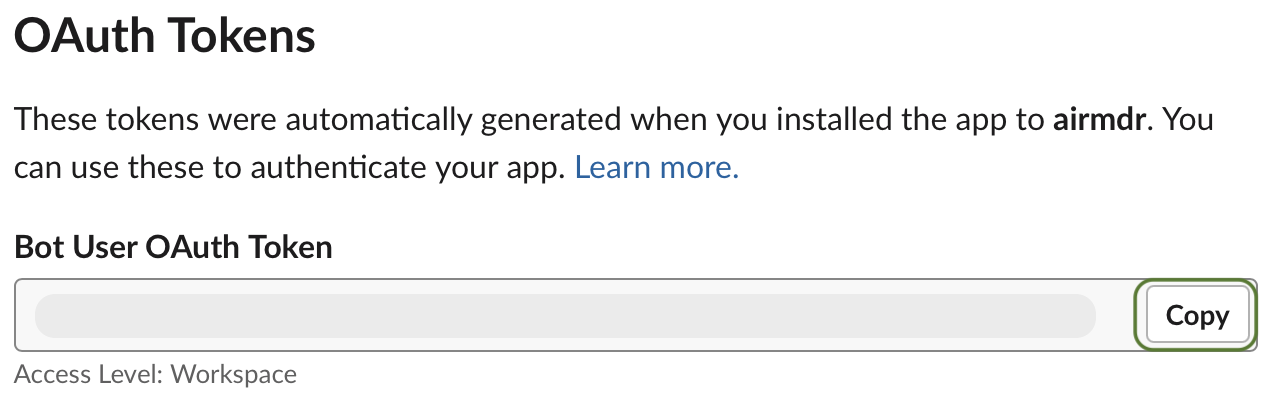
 4. After authorization, your **Bot User OAuth Token** (`xoxb-...`) will appear under **OAuth Tokens** for Your Workspace.
5. Click **Copy** to store the token.
4. After authorization, your **Bot User OAuth Token** (`xoxb-...`) will appear under **OAuth Tokens** for Your Workspace.
5. Click **Copy** to store the token.
 Click on **Revoke Tokens** button at the bottom of the page to **Revoke All OAuth Tokens**:\
You can revoke all OAuth tokens if you want to invalidate the access any existing tokens have to Slack workspace data. \
Users will need to grant your app permissions again to use it.
1. In the left navigation menu, navigate to **Settings** → **Basic Information**.
2. Under **App Credentials**, locate the **Signing Secret**.
3. Click **Show** and then **Copy**. Store it in a secure location (e.g., secrets manager).
### ✅ Summary of Retrieved Credentials
| Credential | Description |
| :----------------------------- | :--------------------------------------------------- |
| Webhook URL | Posts messages to selected Slack channels |
| Signing Secret | Verifies authenticity of incoming requests |
| Bot Token (starts with`xoxb-`) | Authenticates API calls made by your bot |
| Events URL | Receives Slack events via HTTP POST (e.g., messages) |
Securely save and share the **Webhook URL**, **Bot User OAuth Token** and **Signing Secret** with the AirMDR [support](mailto:support@airmdr.com) team to configure\
or \
Self configure Slack in the AirMDR Integrations Dashboard.
### **Evaluate Slack Bot User OAuth Token**
Open **cURL** and run the following command to check if your API Key is working:
**Sample Request**:
```
curl -X POST https://slack.com/api/auth.test \
-H "Authorization: Bearer "
```
**Sample Response**:
```
{
"ok": true,
"url": "https://yourteam.slack.com/",
"team": "Your Team",
"user": "bot-user-name",
"team_id": "TXXXXXXX",
"user_id": "UXXXXXXX"
}
```
**If Invalid**
```
{
"ok": false,
"error": "invalid_auth"
}
```
### Skills Provided by this Integration
| Skill ID | Purpose |
| :--------------------- | :-------------------------------------------------------------------------------------------------------------------------------------------------------------------------------------------------------------------------------------------------------------------------------------------------------------------------------------------------------------------------- |
| **Slack Checkpoint** | This skill sends a Slack message to a specified user to confirm suspected activities. It is used within playbooks to pause execution, awaiting user confirmation. If no response is received within a set timeout, the playbook proceeds with subsequent actions. This is crucial for verifying user activities and deciding the next steps in incident response scenarios. |
| **Send Slack Message** | Send a message to a Slack channel using a webhook. This skill is useful for real-time notifications or alerts. |
To view the details of Input Parameters and Output for the respective skills
* Go to [AirMDR → Slack](https://app.airmdr.com/integrations?search=Slack) Integration page.
* Select the **Skills** tab and click on the required listed skills.
### Configure Slack in the AirMDR Integrations Dashboard
1. Navigate to [AirMDR](https://app.airmdr.com/auth/login), provide the credentials, and click **Login.**
Click on **Revoke Tokens** button at the bottom of the page to **Revoke All OAuth Tokens**:\
You can revoke all OAuth tokens if you want to invalidate the access any existing tokens have to Slack workspace data. \
Users will need to grant your app permissions again to use it.
1. In the left navigation menu, navigate to **Settings** → **Basic Information**.
2. Under **App Credentials**, locate the **Signing Secret**.
3. Click **Show** and then **Copy**. Store it in a secure location (e.g., secrets manager).
### ✅ Summary of Retrieved Credentials
| Credential | Description |
| :----------------------------- | :--------------------------------------------------- |
| Webhook URL | Posts messages to selected Slack channels |
| Signing Secret | Verifies authenticity of incoming requests |
| Bot Token (starts with`xoxb-`) | Authenticates API calls made by your bot |
| Events URL | Receives Slack events via HTTP POST (e.g., messages) |
Securely save and share the **Webhook URL**, **Bot User OAuth Token** and **Signing Secret** with the AirMDR [support](mailto:support@airmdr.com) team to configure\
or \
Self configure Slack in the AirMDR Integrations Dashboard.
### **Evaluate Slack Bot User OAuth Token**
Open **cURL** and run the following command to check if your API Key is working:
**Sample Request**:
```
curl -X POST https://slack.com/api/auth.test \
-H "Authorization: Bearer "
```
**Sample Response**:
```
{
"ok": true,
"url": "https://yourteam.slack.com/",
"team": "Your Team",
"user": "bot-user-name",
"team_id": "TXXXXXXX",
"user_id": "UXXXXXXX"
}
```
**If Invalid**
```
{
"ok": false,
"error": "invalid_auth"
}
```
### Skills Provided by this Integration
| Skill ID | Purpose |
| :--------------------- | :-------------------------------------------------------------------------------------------------------------------------------------------------------------------------------------------------------------------------------------------------------------------------------------------------------------------------------------------------------------------------- |
| **Slack Checkpoint** | This skill sends a Slack message to a specified user to confirm suspected activities. It is used within playbooks to pause execution, awaiting user confirmation. If no response is received within a set timeout, the playbook proceeds with subsequent actions. This is crucial for verifying user activities and deciding the next steps in incident response scenarios. |
| **Send Slack Message** | Send a message to a Slack channel using a webhook. This skill is useful for real-time notifications or alerts. |
To view the details of Input Parameters and Output for the respective skills
* Go to [AirMDR → Slack](https://app.airmdr.com/integrations?search=Slack) Integration page.
* Select the **Skills** tab and click on the required listed skills.
### Configure Slack in the AirMDR Integrations Dashboard
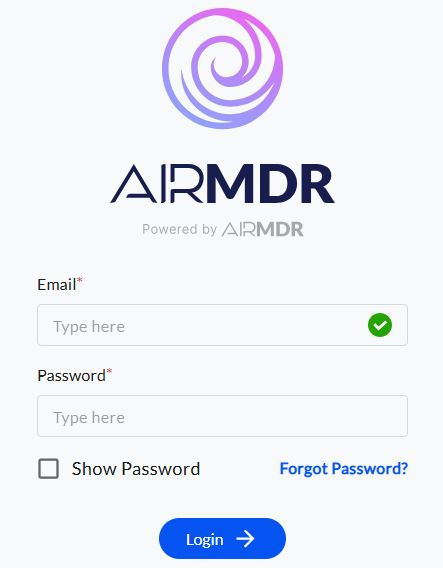
1. Navigate to [AirMDR](https://app.airmdr.com/auth/login), provide the credentials, and click **Login.**
 2. Navigate to the AirMDR Integrations Dashboard in the left navigation pane and select **Integrations.**
3. Use the search option, enter the keyword "**Slack**", select the **Connections** tab, and click **Create**.
2. Navigate to the AirMDR Integrations Dashboard in the left navigation pane and select **Integrations.**
3. Use the search option, enter the keyword "**Slack**", select the **Connections** tab, and click **Create**.
 4. Enter an unique name to the Instance (e.g., `your org name-Slack`) to easily identify the user connection by AirMDR.
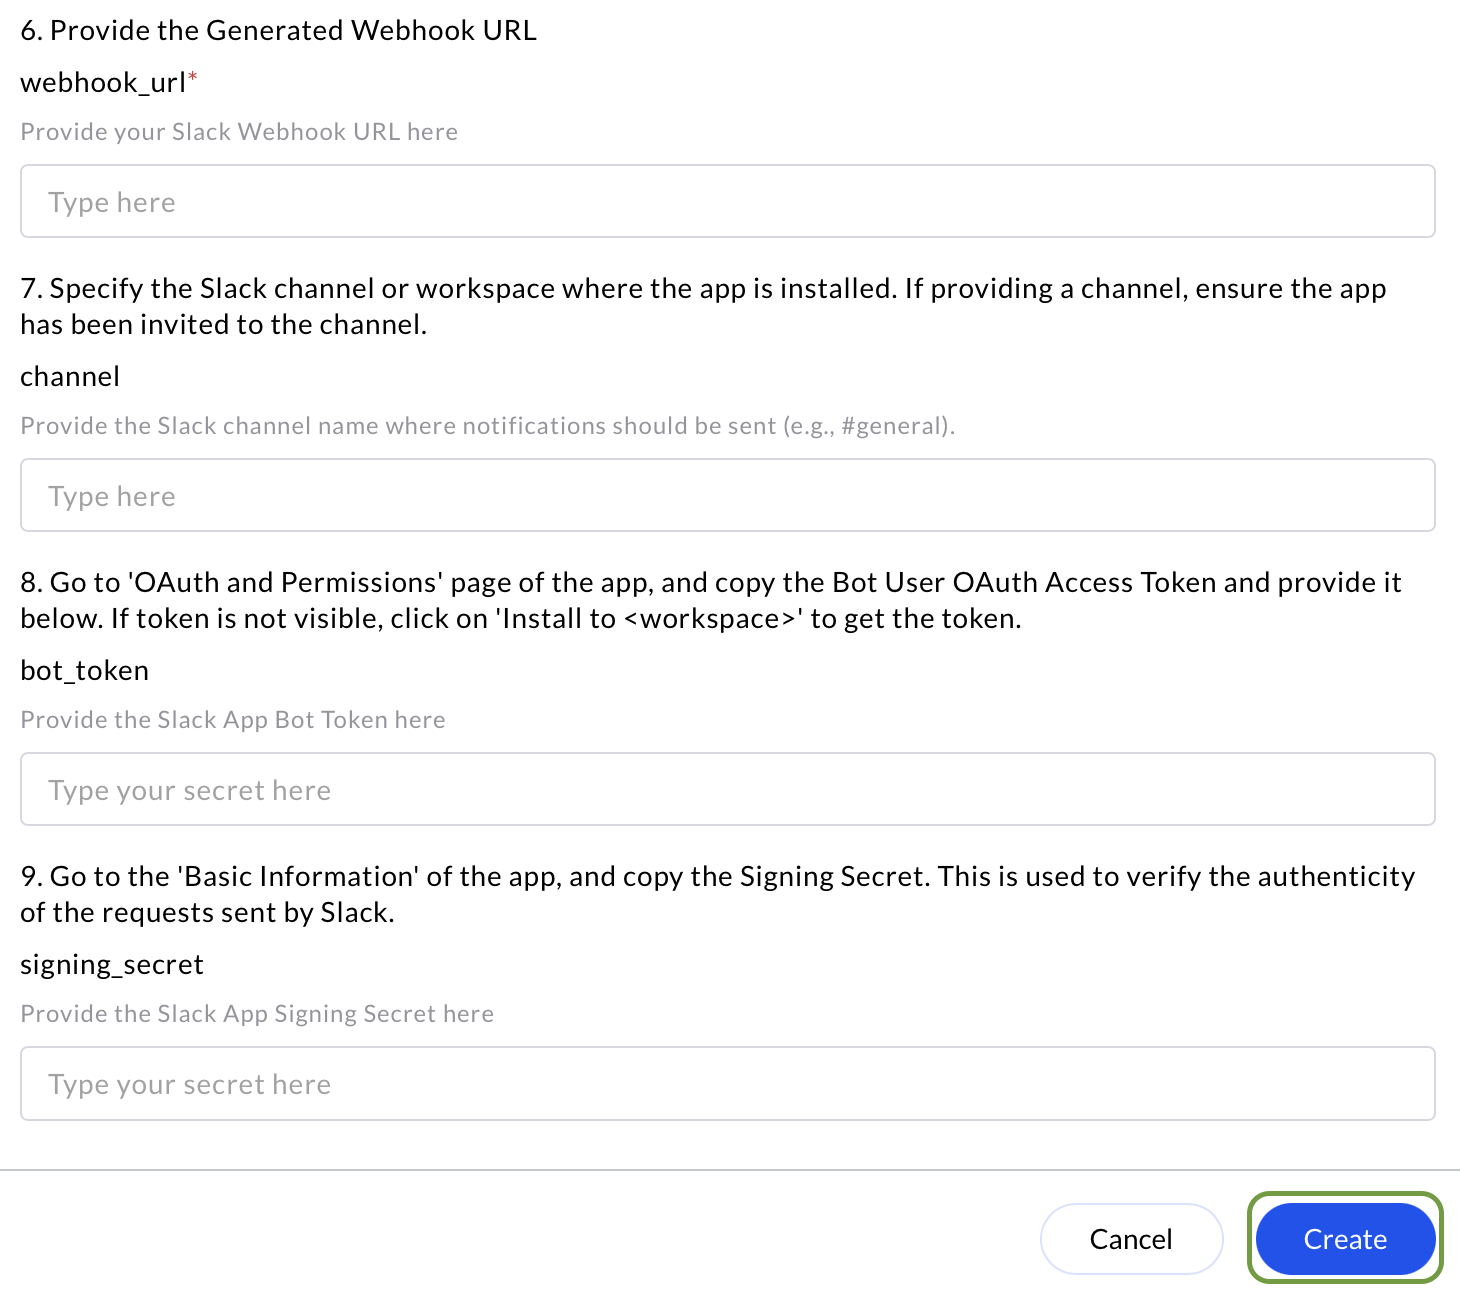
5. Enter the **Webhook URL**, **Slack channel name**, **Bot User OAuth Token** and **Signing Secret** in the Authentication Details field params, and click **Create**.
4. Enter an unique name to the Instance (e.g., `your org name-Slack`) to easily identify the user connection by AirMDR.
5. Enter the **Webhook URL**, **Slack channel name**, **Bot User OAuth Token** and **Signing Secret** in the Authentication Details field params, and click **Create**.
 6. Click the "**Authenticate**" button to authorize the connection and complete the setup.