> ## Documentation Index
> Fetch the complete documentation index at: https://docs.airmdr.com/llms.txt
> Use this file to discover all available pages before exploring further.
# Splunk
> This integration enables AirMDR to connect with the Splunk so we can securely run REST and search queries for alert enrichment, investigation timelines, and historical log lookups..
### ✅ **Prerequisites**
Before configuring the integration, ensure the following requirements are met:
* User must have a valid **Splunk Cloud Platform** or **Splunk Enterprise** account.
* Role with sufficient permissions:
* **Admin** role, \
or
* User role with capabilities: `edit_tokens_own`, `search`, and `rest_apps_management`.
* In Splunk **Settings → Tokens**, confirm that **Authentication Tokens** are enabled. If not enabled, an **Admin** must toggle this feature before tokens can be created.
* For Splunk Cloud private connectivity: ensure your VPC/firewall allows outbound requests to these ports.
* Identify the correct stack URL (e.g., `https://mycompany.splunkcloud.com`) which you’ll use in the integration.
* Default Splunk **management port is 8089**.
* If your Splunk admin has customized this, note down the updated port value under:\
`Settings → Server Settings → General Settings`.
* For Splunk Cloud Platform: Ensure REST API access (port 8089) is enabled. If it is not, you must contact Splunk Support to enable API access for your stack.
If your Splunk Cloud tenant enforces IP allow lists, you must add AirMDR’s egress IP/subnet **44.211.145.170** to the allow list.
### Authentication
* **Method:** Splunk **Authentication Token (JWT)** passed as an HTTP header:\
`Authorization: Bearer ` (used for Splunk REST/management endpoints).
* **Role considerations:**
* Users can create tokens for themselves if their role has `edit_tokens_own`.
* Admins can create tokens for other users with `edit_tokens_all`.
If **Tokens** isn’t visible in the menu, **enable token authentication** first (admin).
### Generate the Splunk Management Port, Auth Token & Identify the **Splunk Management Port**
Follow the instructions below to retrieve the the **Splunk Management Port, Auth Token** and the **Splunk Management Port**, which are required to authenticate and configure the Splunk integration in AirMDR:
* **Splunk Cloud Platform**
1. Open your browser and go to your **Splunk Cloud stack URL**.
```
https://.splunkcloud.com
```
2. On the login page:
* Enter your **Splunk Cloud username** (usually your corporate email).
* Enter your **password**.
* If configured, complete **MFA/SSO** steps.
3. Click **Sign In** to access the **Splunk Cloud UI**.
Your **stack URL** is provided in your onboarding email or by your Splunk admin.
**(Or)**
* **Splunk Enterprise**
1. Open a browser and navigate to your **Splunk Enterprise host**.
* Default format (local install): `https://:8000`
Port **8000** is the default Splunk Web port unless your admin changed it.
2. On the login page:
* Enter the **username** and **password** created during installation or provided by your admin.
3. Click **Sign In** to open the **Splunk Enterprise Web UI**.
If you’re testing on your own machine, it’s typically: `https://localhost:8000`
After login, both Splunk Cloud and Enterprise drop you into the **Splunk Home page** where you can navigate to **Settings**, **Search & Reporting**, or your custom apps.
> Works for **Splunk Cloud Platform** and **Splunk Enterprise**. If you don’t see **Tokens**, an admin must first enable token auth.
1. **Sign in** to your Splunk deployment.
2. In the top bar, go to **Settings → Tokens**.
* If prompted, click **Enable Token Authentication** (admin only).
3. Click **New Token**.
4. In **New Token**:
* **Owner/User**: choose the Splunk user the token will represent.
* **App** (optional scope): select an app context if you want to limit scope.
* **Expiration**: set a sensible expiry.
* **Audience** (if shown): leave default unless your policy requires a value.
5. Click **Create** and **copy the token immediately** (shown once). Store it securely.
**Header format (important):**
```
Authorization: Bearer
```
You can validate quickly with splunkd (management) REST:
```
curl -k https://:8089/services/server/info \
-H "Authorization: Bearer "
```
A **200** confirms the token is valid for REST.
User roles control who can create tokens (e.g., `edit_tokens_own` / `edit_tokens_all`). If the menu is missing, ensure token auth is enabled.
* The ****`default Splunk management (splunkd) port is 8089(HTTPS)`**** .
**Where to see or change it (Splunk Enterprise)**
1. **Settings → Server settings → General settings**
2. Look for **Management port** (default **8089**). Adjust only if your architecture requires it.
Splunk Cloud generally uses TLS on the management interface; some management APIs are fronted by Splunk’s service layers (e.g., ACS/API). For most integrations and admin tasks, **assume 8089** unless your organization has a documented override.
1. **Sign in** to your Splunk Cloud Platform.
2. Copy the **browser URL/hostname** — this is your **Splunk Cloud Instance** value.
* Example: `https://mycompany.splunkcloud.com`
For Splunk Enterprise, your host is typically `https://`.
### UI Path Reference (at a glance)
| **Item** | **Where to find it (UI path)** |
| :----------------------------------- | :----------------------------------------------------------------------------------------- |
| **Splunk Cloud Instance (URL/host)** | Your browser address bar after login (e.g., `https://mycompany.splunkcloud.com`). |
| **Auth Token** | **Settings → Tokens → New Token** (enable token authentication if prompted). |
| **Management Port** | Default **8089**; Splunk Enterprise UI: **Settings → Server settings → General settings**. |
### Error Handling
| **Symptom / Error** | Likely Cause | Resolution |
| :--------------------------- | :-------------------------------------- | :----------------------------------------------------------------------------------------- |
| `401 Unauthorized` | Token missing, expired, or wrong header | Use `Authorization: Bearer `; generate a fresh token. |
| `403 Forbidden` | Role lacks capability (search/rest) | Grant required capabilities or use an admin-scoped token for testing. |
| Connection failed / timeouts | Network/VPC/firewall restrictions | Allow outbound **443**/**8089** to the Splunk instance; verify private endpoints if Cloud. |
| `404` on endpoint | Wrong path or port | Confirm you’re calling a valid REST path (e.g., `/services/server/info`) on **8089**. |
| “Tokens” menu not visible | Token auth disabled | Enable token authentication in Settings (admin). |
### Support & Maintenance
* **AirMDR Support Contact**: `support@airmdr.com`
* **Splunk Docs** — Token auth & UI steps: **Settings → Tokens**, create/enable/manage.
* **Default Management Port:** 8089 reference and how to change defaults.
* **Best practice:** Rotate tokens quarterly, scope roles minimally, and revoke tokens on user off-boarding.
### Skills Provided by this Integration
| **Skill ID** | Purpose |
| :---------------------------- | :--------------------------------------------------------------------------------------------------------------------------------------------------------------------------------------------------------------------------------------------------------------------- |
| **Execute a query in Splunk** | Run a query on splunk tables to retrieve specific data based on user-defined parameters. This skill is useful for extracting logs or other data stored in Splunk for analysis or monitoring purposes. The output will include the queried data in a structured format. |
To view the details of Input Parameters and Output for the respective skills
* Go to [AirMDR → Splunk](https://app.airmdr.com/integrationsv2/16d17936-6ad9-41eb-8d4a-a7e40971c7b7/skills?search=Splunk) Integration page.
* Select the **Skills** tab and click on the required listed skills.
### Splunk API Testing
Open **cURL** and run the following command to check if your API Key is working:
**Sample** `cURL`**Command**
```
# Valid token required; 8089 must be reachable
curl -k https://.splunkcloud.com:8089/services/server/info \
-H "Authorization: Bearer "
```
> Replace `SPLUNK_AUTH_TOKEN` with your actual Auth Token.
**Sample Response**
* **200 OK** → API access is enabled and reachable.
* **Timeout / connection refused** → open a Splunk Support ticket to enable REST access and/or review IP allow list.
### Configure Splunk in the AirMDR Integrations Dashboard
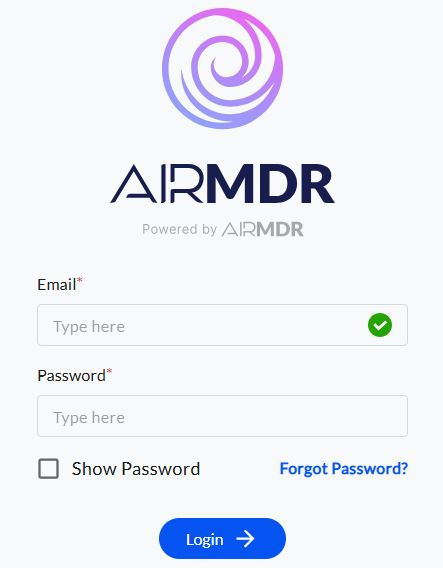
1. Navigate to [AirMDR](https://app.airmdr.com/auth/login), provide the credentials, and click **Login**
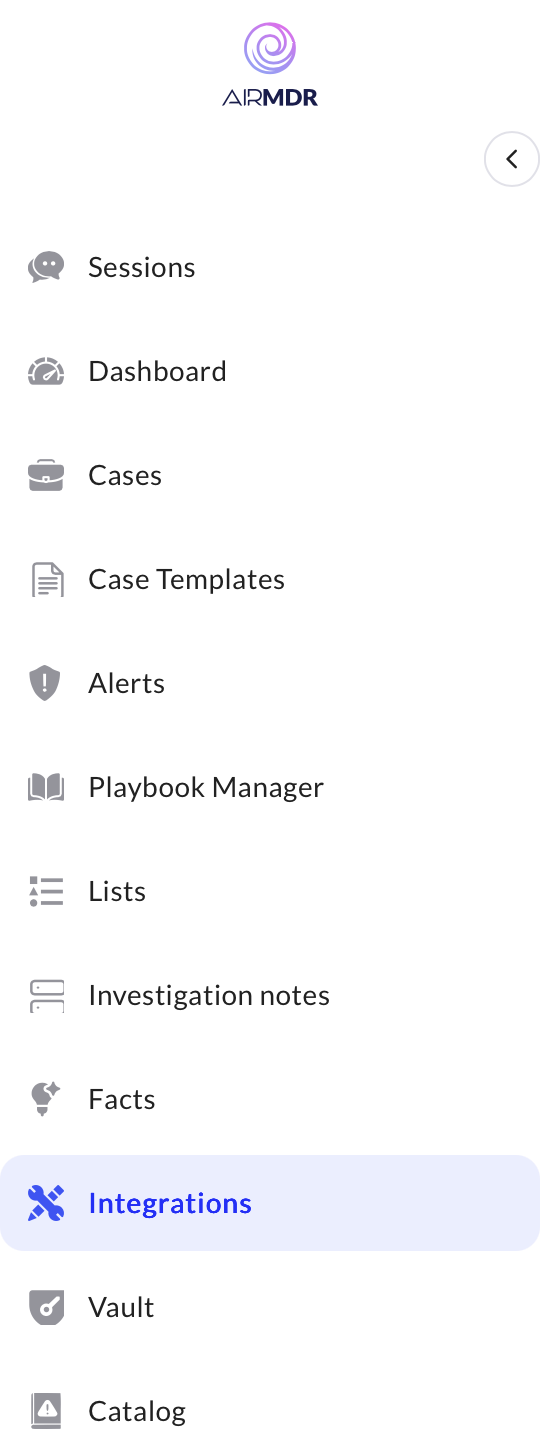
 2. Navigate to the AirMDR Integrations Dashboard in the left navigation pane and select **Integrations.**
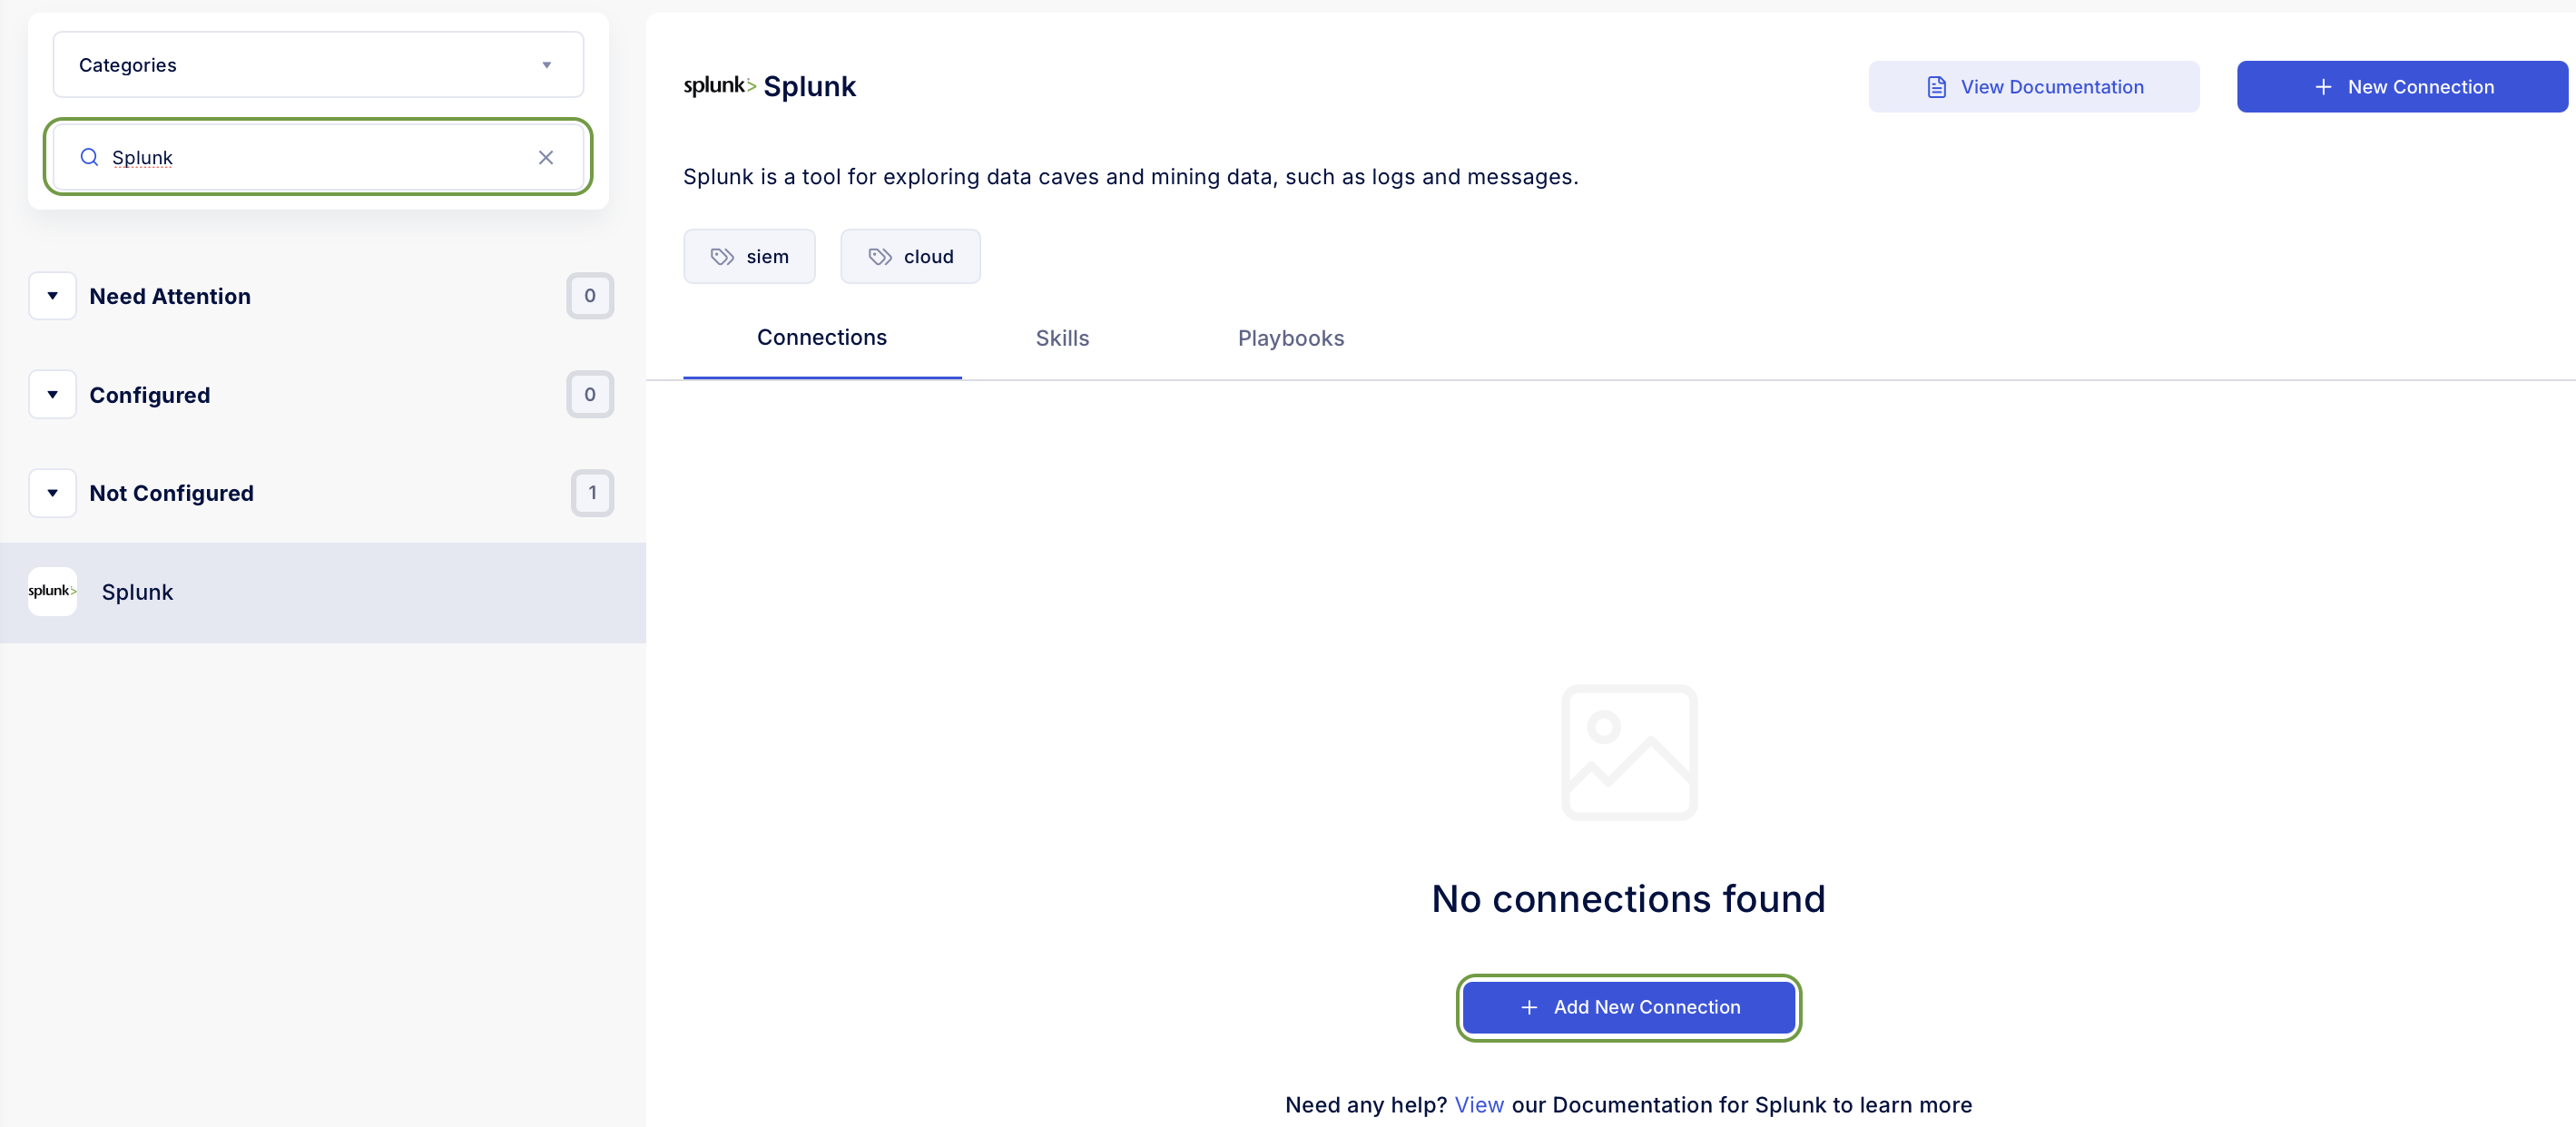
 3. Use the search option, enter the keyword “**Splunk**”, select the **Connections** tab, and click **Add New Connection**.
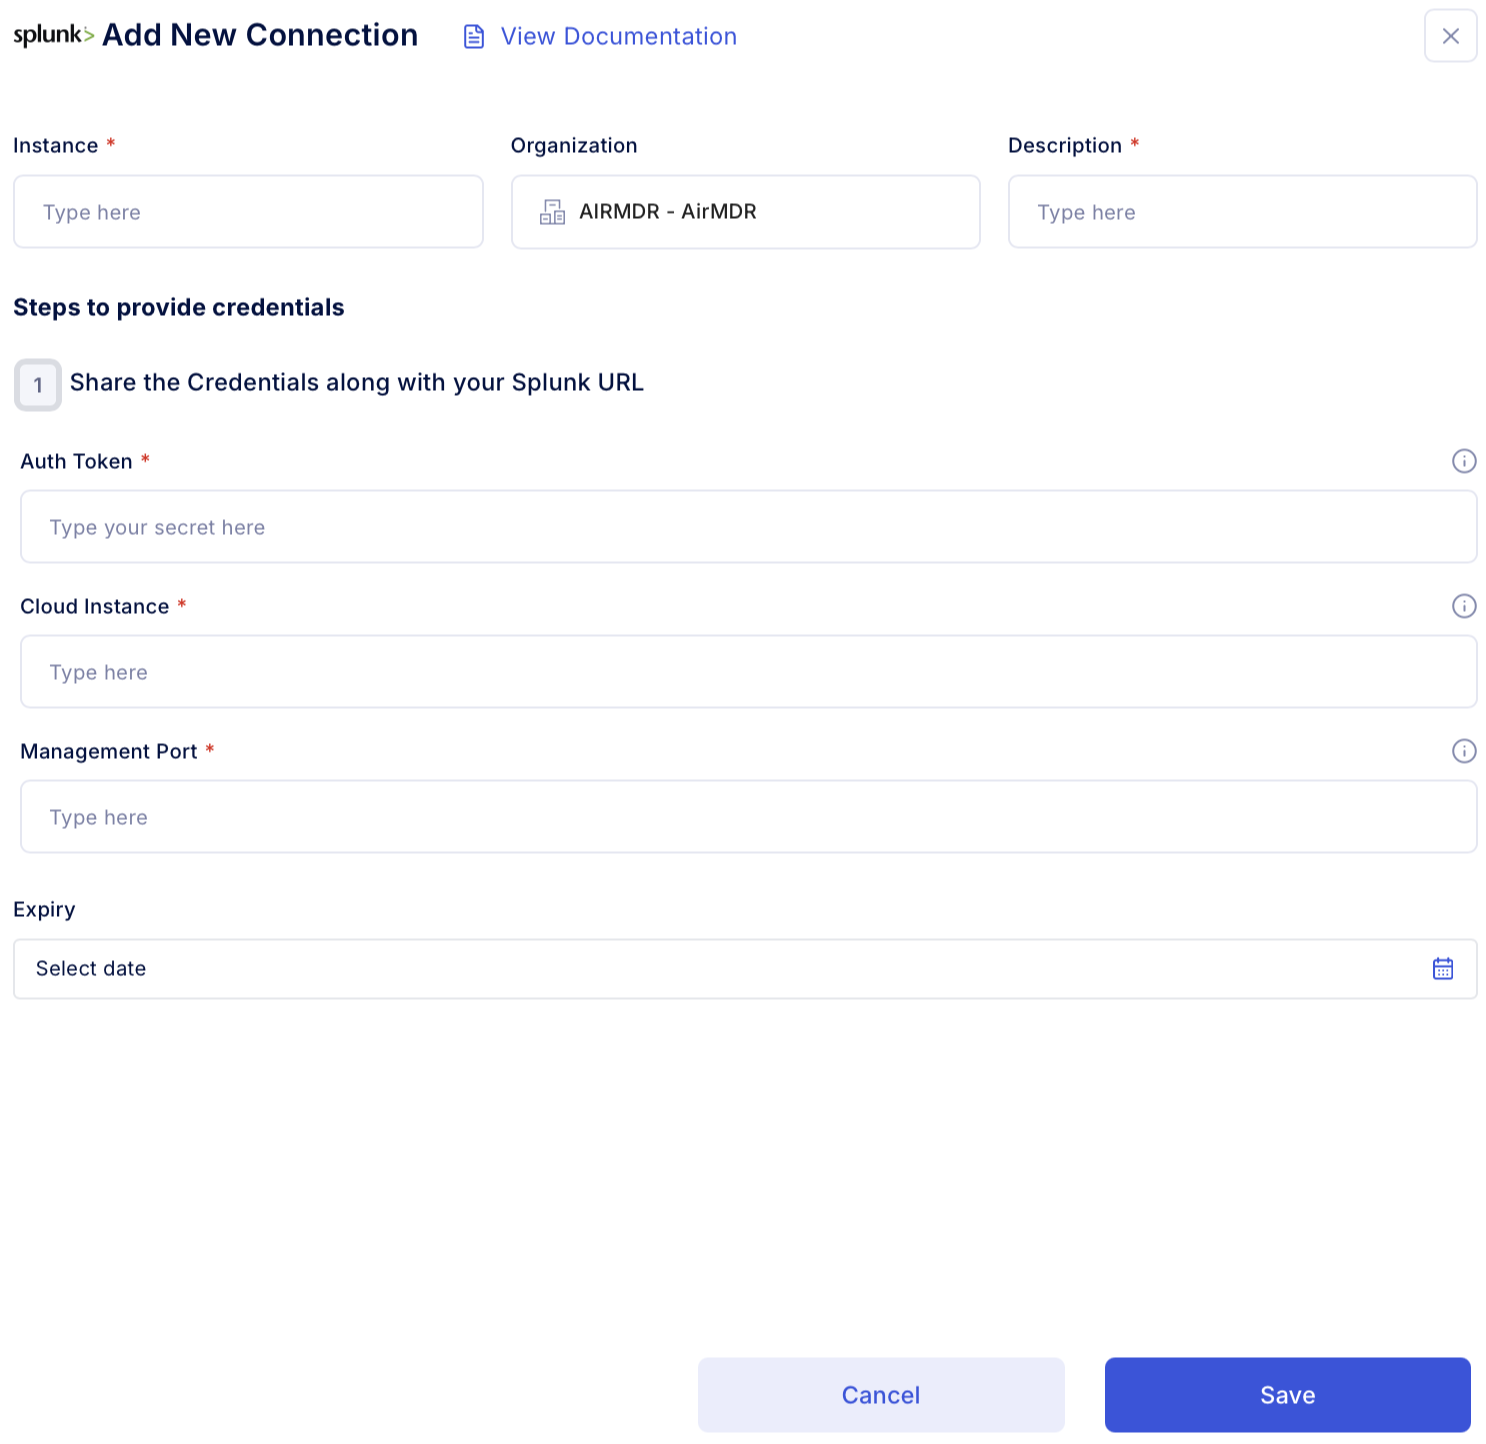
 4. Enter an unique name to the **Instance** (e.g., `your org name-Splunk`) and brief **Description** to easily identify the user connection by AirMDR.
5. Enter the generated **Splunk Auth Token**, **Splunk Management Port**, **Splunk Cloud Instance** and Expiry (optional) in the Authentication Details field params, and click **Save.**
4. Enter an unique name to the **Instance** (e.g., `your org name-Splunk`) and brief **Description** to easily identify the user connection by AirMDR.
5. Enter the generated **Splunk Auth Token**, **Splunk Management Port**, **Splunk Cloud Instance** and Expiry (optional) in the Authentication Details field params, and click **Save.**