Overview
AirMDR supports SAML 2.0 Single Sign-On (SSO) with Google Workspace so your users can authenticate to AirMDR using their Google identities. This centralizes access control, reduces password sprawl, and enables security controls such as MFA and conditional access policies managed in Google Admin.Pre-requisites
SSO Set-up & Configuration
1
Create a Custom SAML app in Google
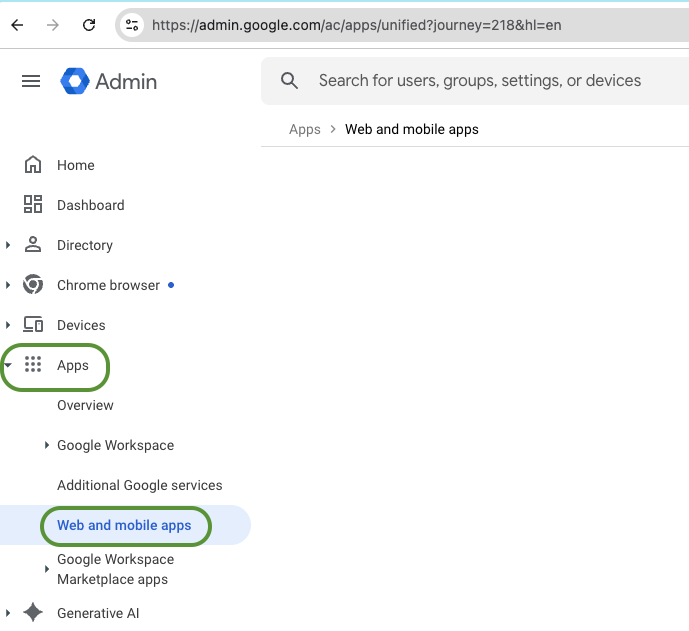
- Go to Google Admin.
- Sign in with an admin account.
-
In the left-hand navigation pane, select Apps → Web and mobile apps.
-
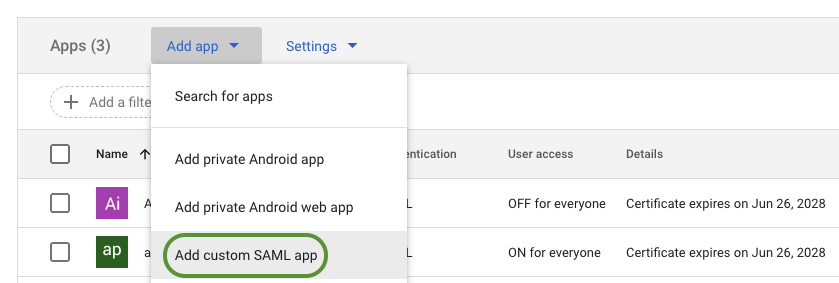
Add Custom SAML app
-
Click Add app → Add custom SAML app
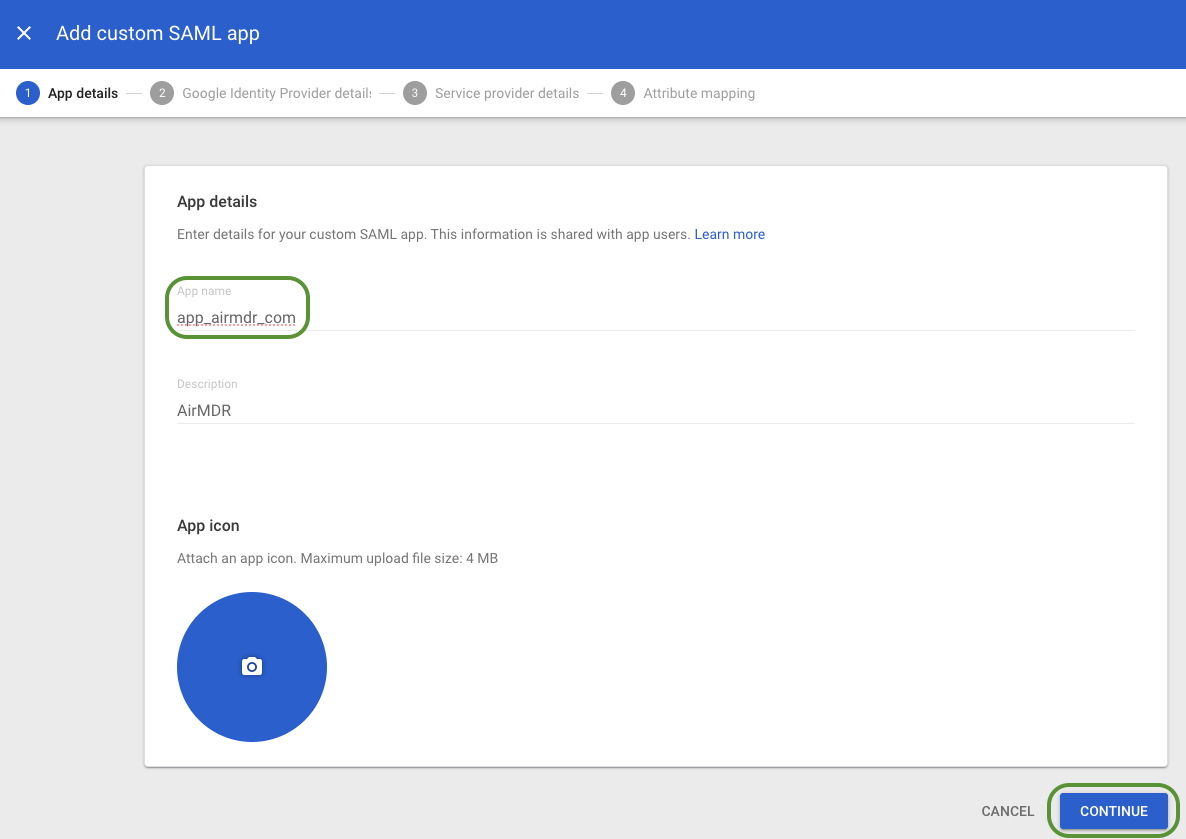
- Provide a name to the application Example: app_airmdr_com (logo optional)
-
Click Continue.
-
Click Add app → Add custom SAML app
-
Collect IdP details
Copy and securely save the Identity Provider (IdP) details, you’ll paste these into AirMDR later
- From the Google IdP Information screen, save the following:
-
SSO URL (IdP SSO URL)
https://accounts.google.com/o/saml2/idp?idpid=<code> -
Entity ID (Issuer)
https://accounts.google.com/o/saml2?idpid=<code> -
Certificate (download the X.509 certificate).
If the downloaded Google certificate has a file extension of
.cert.
Users must ensure the file extension is changed to.crtbefore uploading in to the AirMDR.For example:Google.crt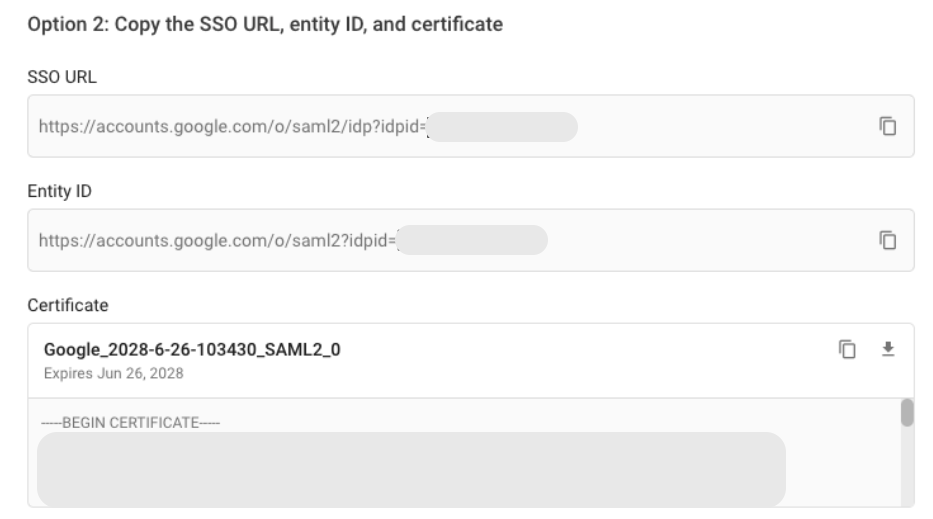
-
SSO URL (IdP SSO URL)
- From the Google IdP Information screen, save the following:
-
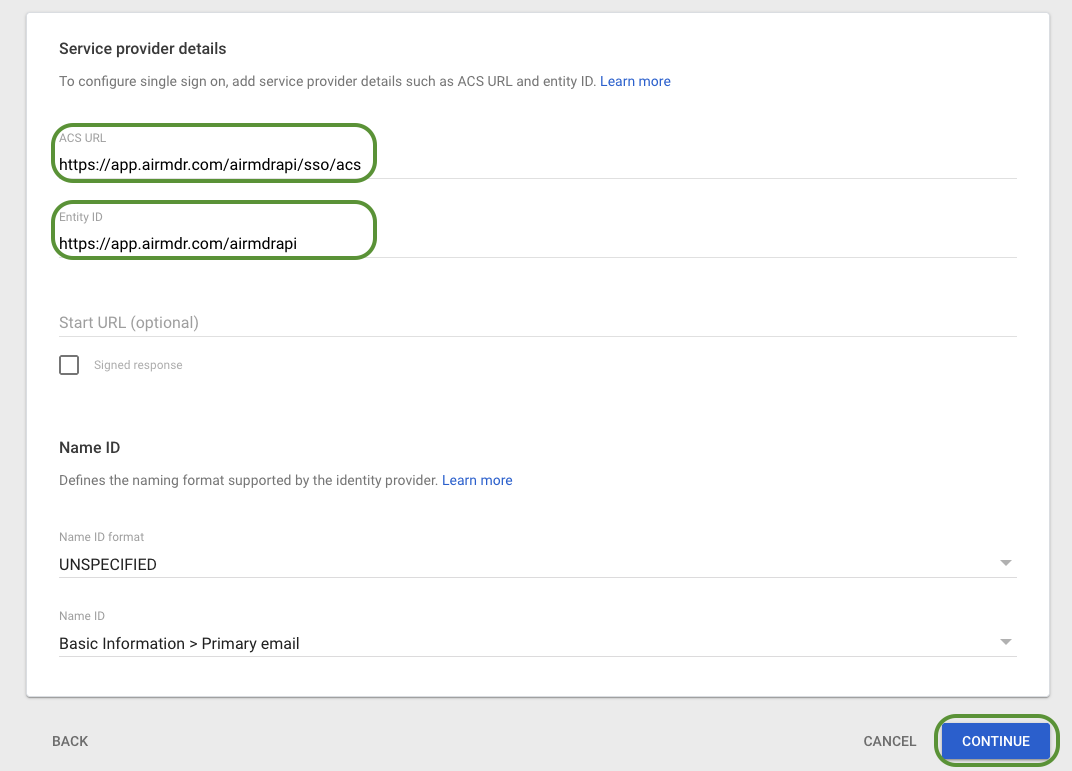
Service Provider (SP) details for AirMDR
-
Enter the following exact values when prompted:
- ACS URL:
https://app.airmdr.com/airmdrapi/sso/acs - Entity ID (SP):
https://app.airmdr.com/airmdrapi
- ACS URL:
-
Click Continue → Finish.
-
Enter the following exact values when prompted:
-
Turn the app ON for users
- In the apps list, click the SAML app you just created (e.g., app_airmdr_com) to open its settings page.
- Enable user access
-
In the app’s overview page, locate User access
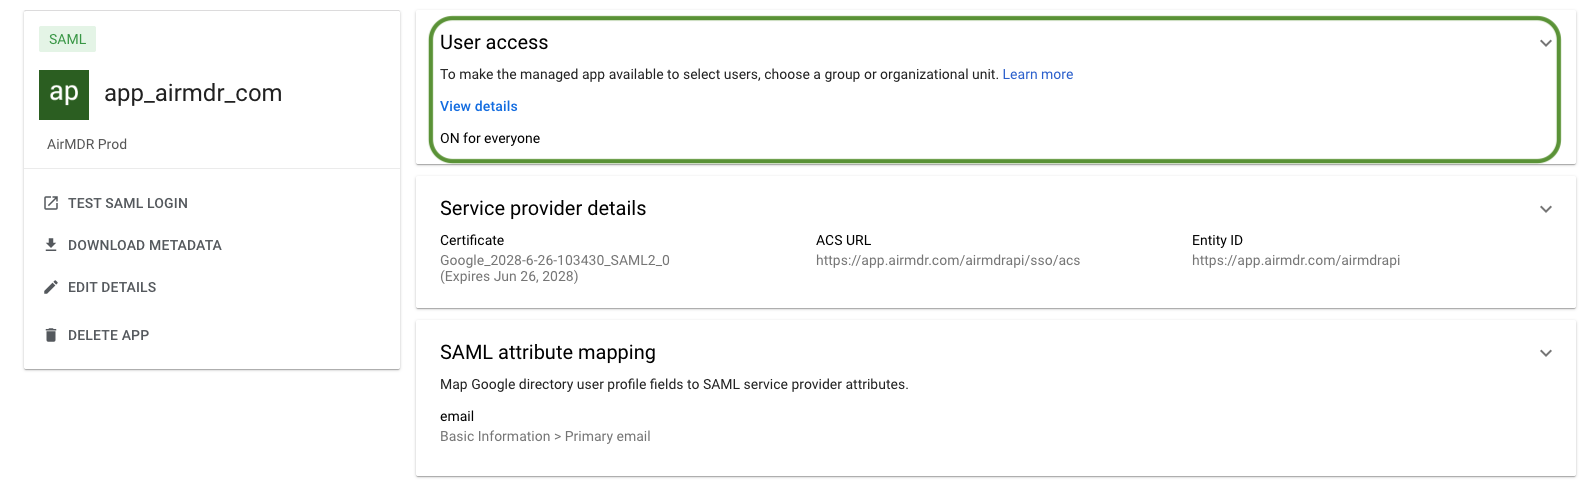
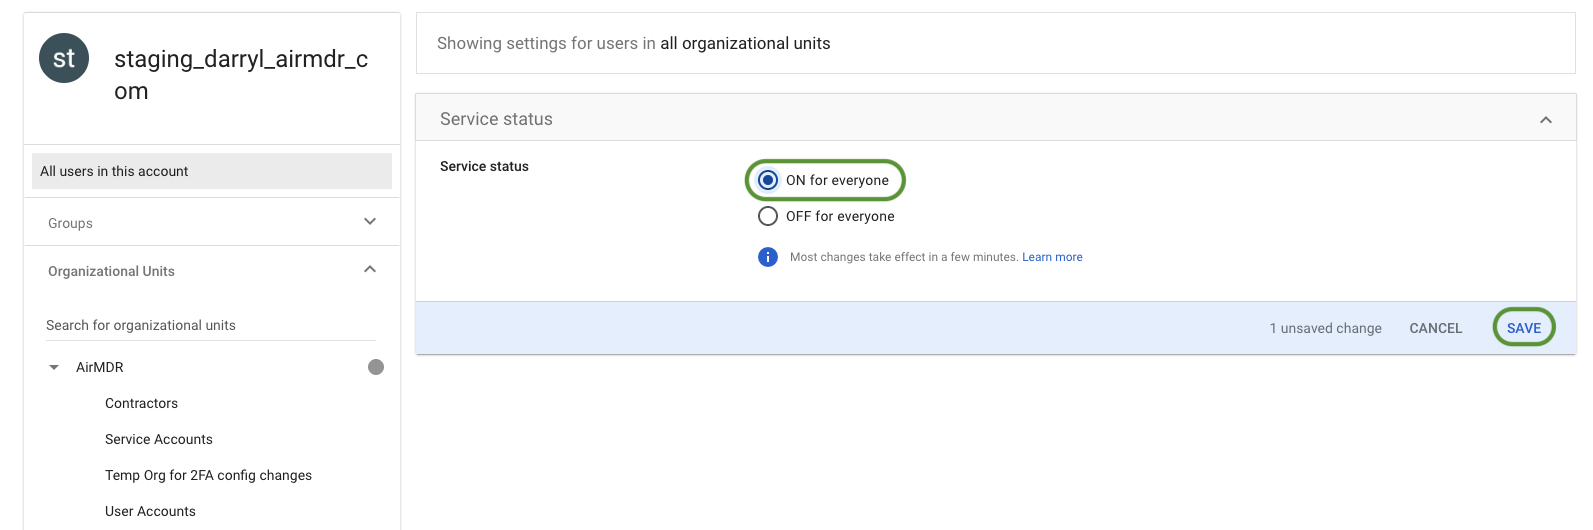
- Click the ▾ (dropdown) next to User access, switch it ON for everyone
-
Click SAVE (mandatory to save the changes made).
-
In the app’s overview page, locate User access
2
Configure SSO in AirMDR
- Sign in to AirMDR with your credentials.
-
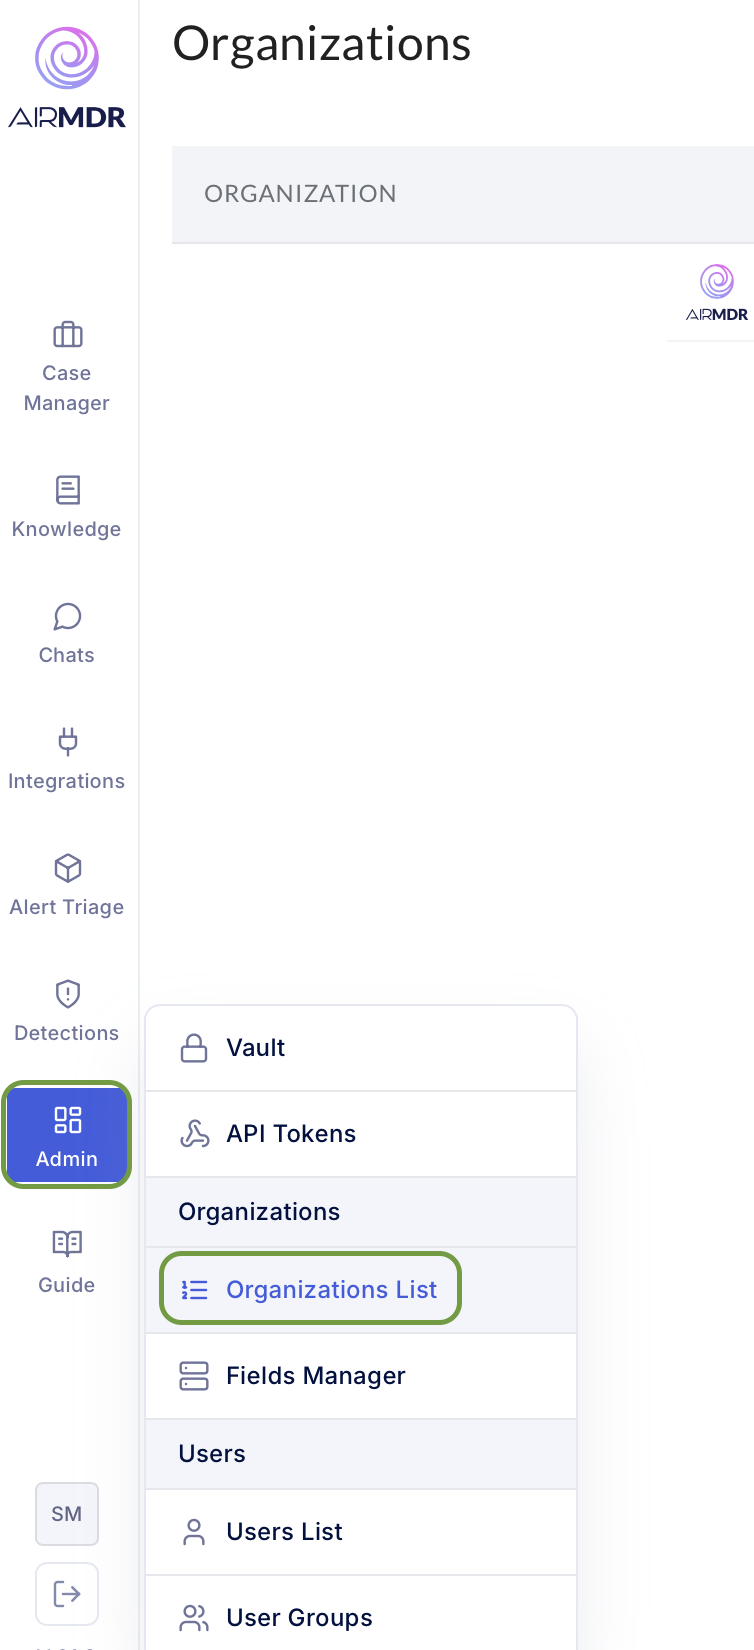
Open your organization
-
Admin → Organizations List → click your Org Name.
-
Admin → Organizations List → click your Org Name.
-
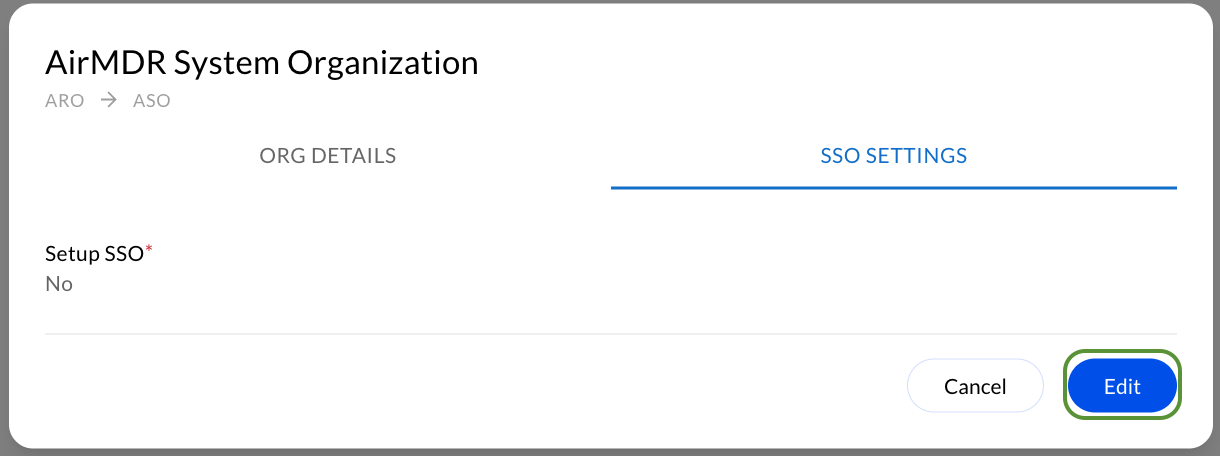
Edit SSO settings
-
In SSO Settings, click Edit.
-
Choose Yes, New Config.
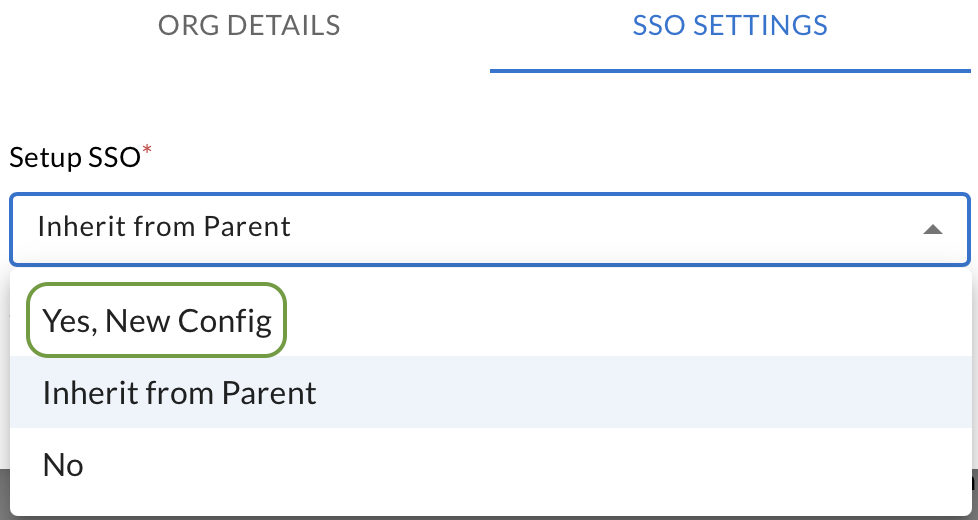
-
In SSO Settings, click Edit.
-
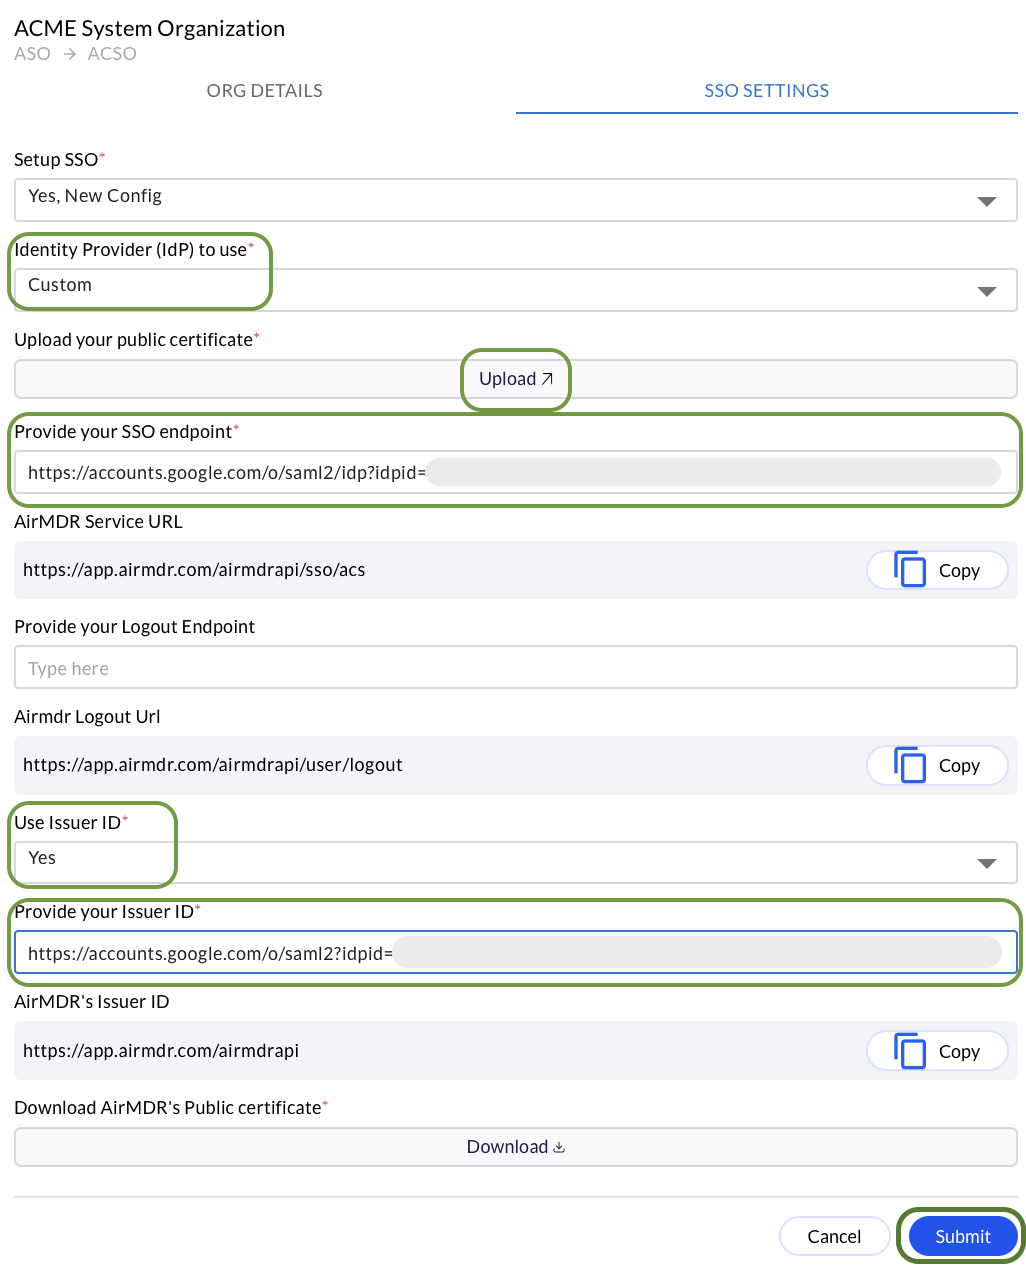
Complete the fields (paste values collected in the Google IdP Information screen)
- Identity Provider: Custom
- Certificate: Upload the X.509 certificate downloaded from Google
- SSO endpoint (IdP SSO URL):
https://accounts.google.com/o/saml2/idp?idpid=<code> - Use Issuer ID: Yes
- Issuer ID (IdP Entity ID):
https://accounts.google.com/o/saml2?idpid=<code>
-
Click Submit.
Field mapping (quick reference)
Validation
- In Google Admin, ensure User access = ON for the target OU/group.
- In AirMDR, after Submit, log out and initiate login via Sign in with SSO (or use your org-specific SSO link if provided).
- If sign-in fails, double-check:
- Typos in SSO endpoint and Issuer ID (must match Google exactly).
- Certificate uploaded is the current Google IdP certificate.
Hurray! You are Logged in Successfully