- Instance URL – The unique URL of your JIRA instance.
- Email Token (API Token) – Used for authentication in API requests.
Generate JIRA Email Token (API Token)
JIRA API tokens allow users to authenticate API requests securely without using passwords. Here’s how to create, manage, and revoke API tokens in JIRA.1
Access Atlassian API Token Page
- Go to the Atlassian API Token Page.
- Log in with your JIRA (Atlassian) credentials.
2
Generate a New API Token (Email Token)
- Scroll to the API token section.
- Click “Create API token”.
- Enter a meaningful label (e.g., “Integration with XYZ”).
- Click “Create” and then copy the token.
Access Instance URL
- Go to the Atlassian API Token Page.
- Log in with your JIRA (Atlassian) credentials.
- Click on your profile picture (top-right corner) → “Profile”.
- Your instance URL is displayed in the browser’s address bar.
Manage & Revoke API Tokens
1
Access Atlassian API Token Page
- Go to the Atlassian API Token Page.
- Log in with your JIRA (Atlassian) credentials.
2
Revoke the Token Access
- Scroll to the API Tokens section.
- You will see a list of all active API tokens.
- Click “Revoke” next to the token you want to delete.
- Confirm the action when prompted.
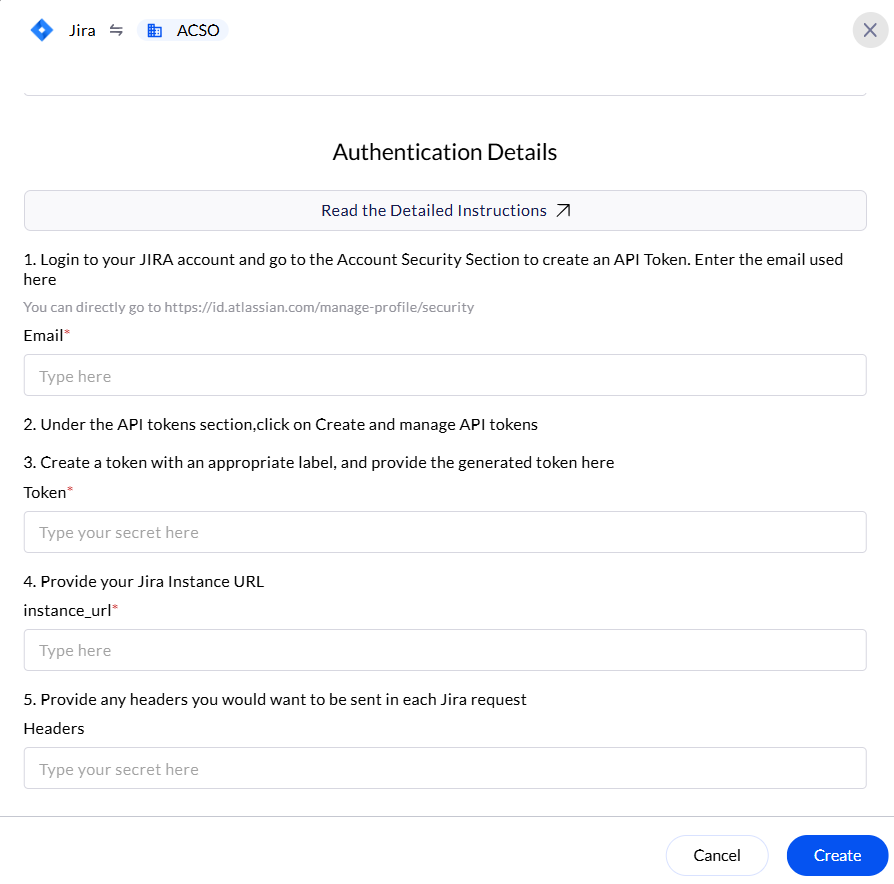
Configure JIRA API Token in the AirMDR Integrations Dashboard
-
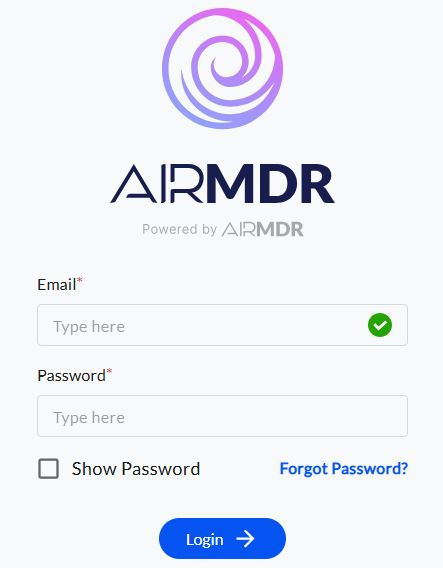
Navigate to AirMDR, provide the credentials, and click Login.
-
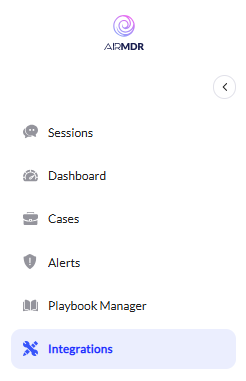
Navigate to the AirMDR Integrations Dashboard in the left navigation pane and select Integrations.\
-
Use the search option, enter the keyword “JIRA”, select the Connections tab, and click the + Create icon.\

-
Enter the email used to login to the JIRA account and the generated Token, instance_url in the Authentication Details field params, and click Create.\