✅ Pre-requisites
Before AirMDR can integrate with your Microsoft 365 tenant to retrieve quarantined emails, the following technical and organizational prerequisites must be met:Microsoft 365 Tenant Requirements
Azure AD App Setup Requirements
Onboarding Guide - step by step process to get_ms365_quarantined_emails
This guide outlines the process to provide credentials securely, by creating an Azure AD application and uploading a certificate, so AirMDR can access Microsoft 365 quarantine APIs on your behalf. This enables AirMDR security team to audit, review, or act on potentially malicious emails.
1
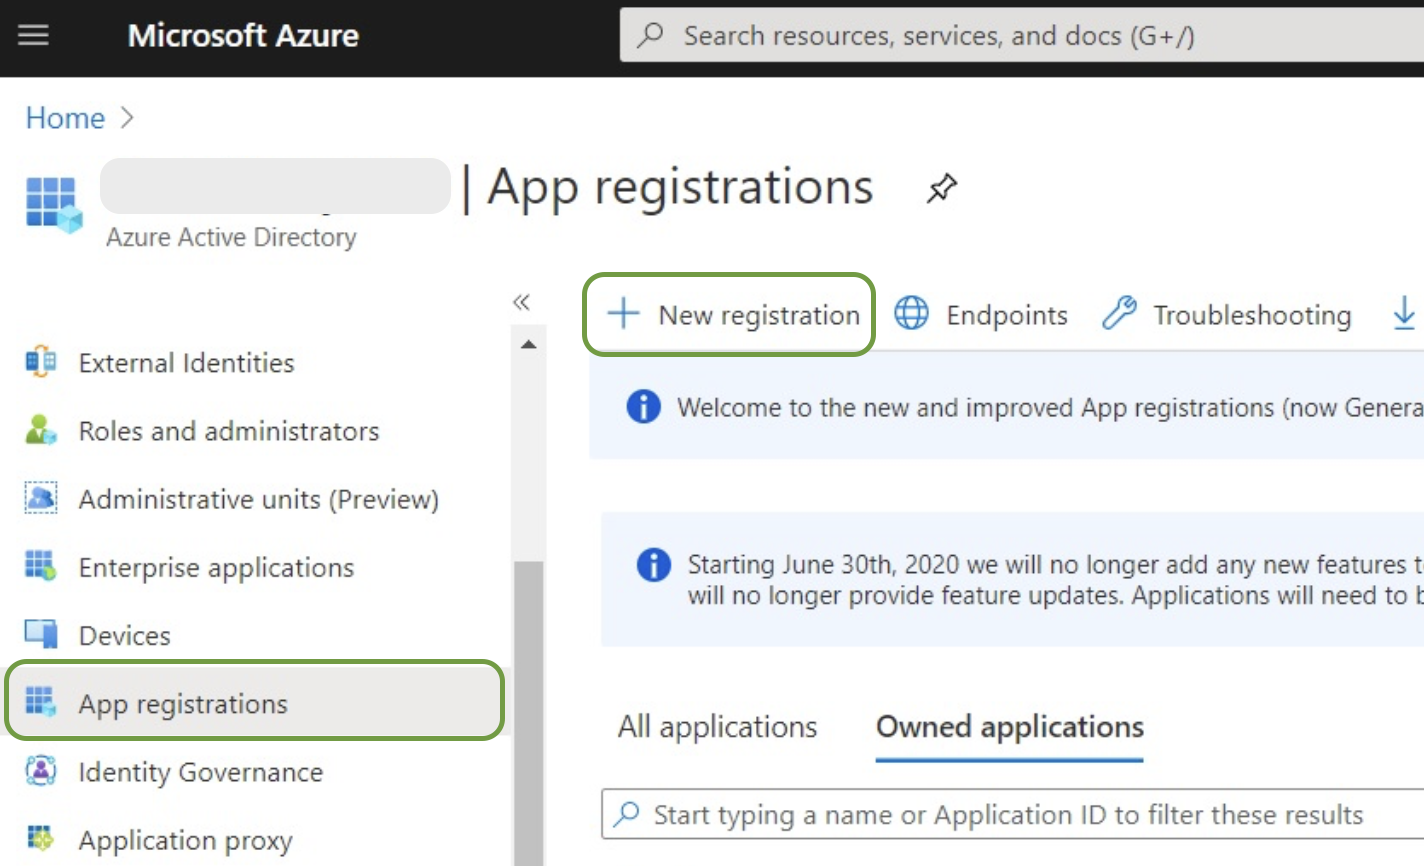
Create an App Registration in Azure Portal
- Log in to your Azure Portal using a user with Global Admin or Application Administrator permissions.
-
Navigate to Microsoft Entra ID → App registrations → New registration.
-
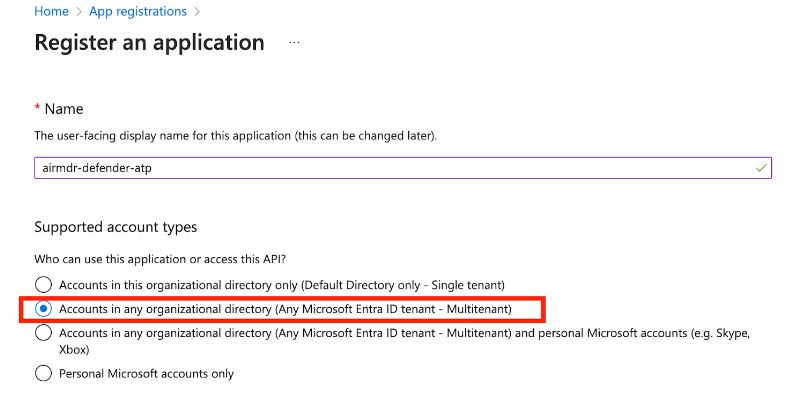
Fill out the mandatory details:
-
Name:
AirMDR Quarantine Access -
Supported account types: Select “Accounts in any organizational directory (Any Microsoft Entra ID tenant - Multitenant)” option).
-
Name:
- Click Register.
2
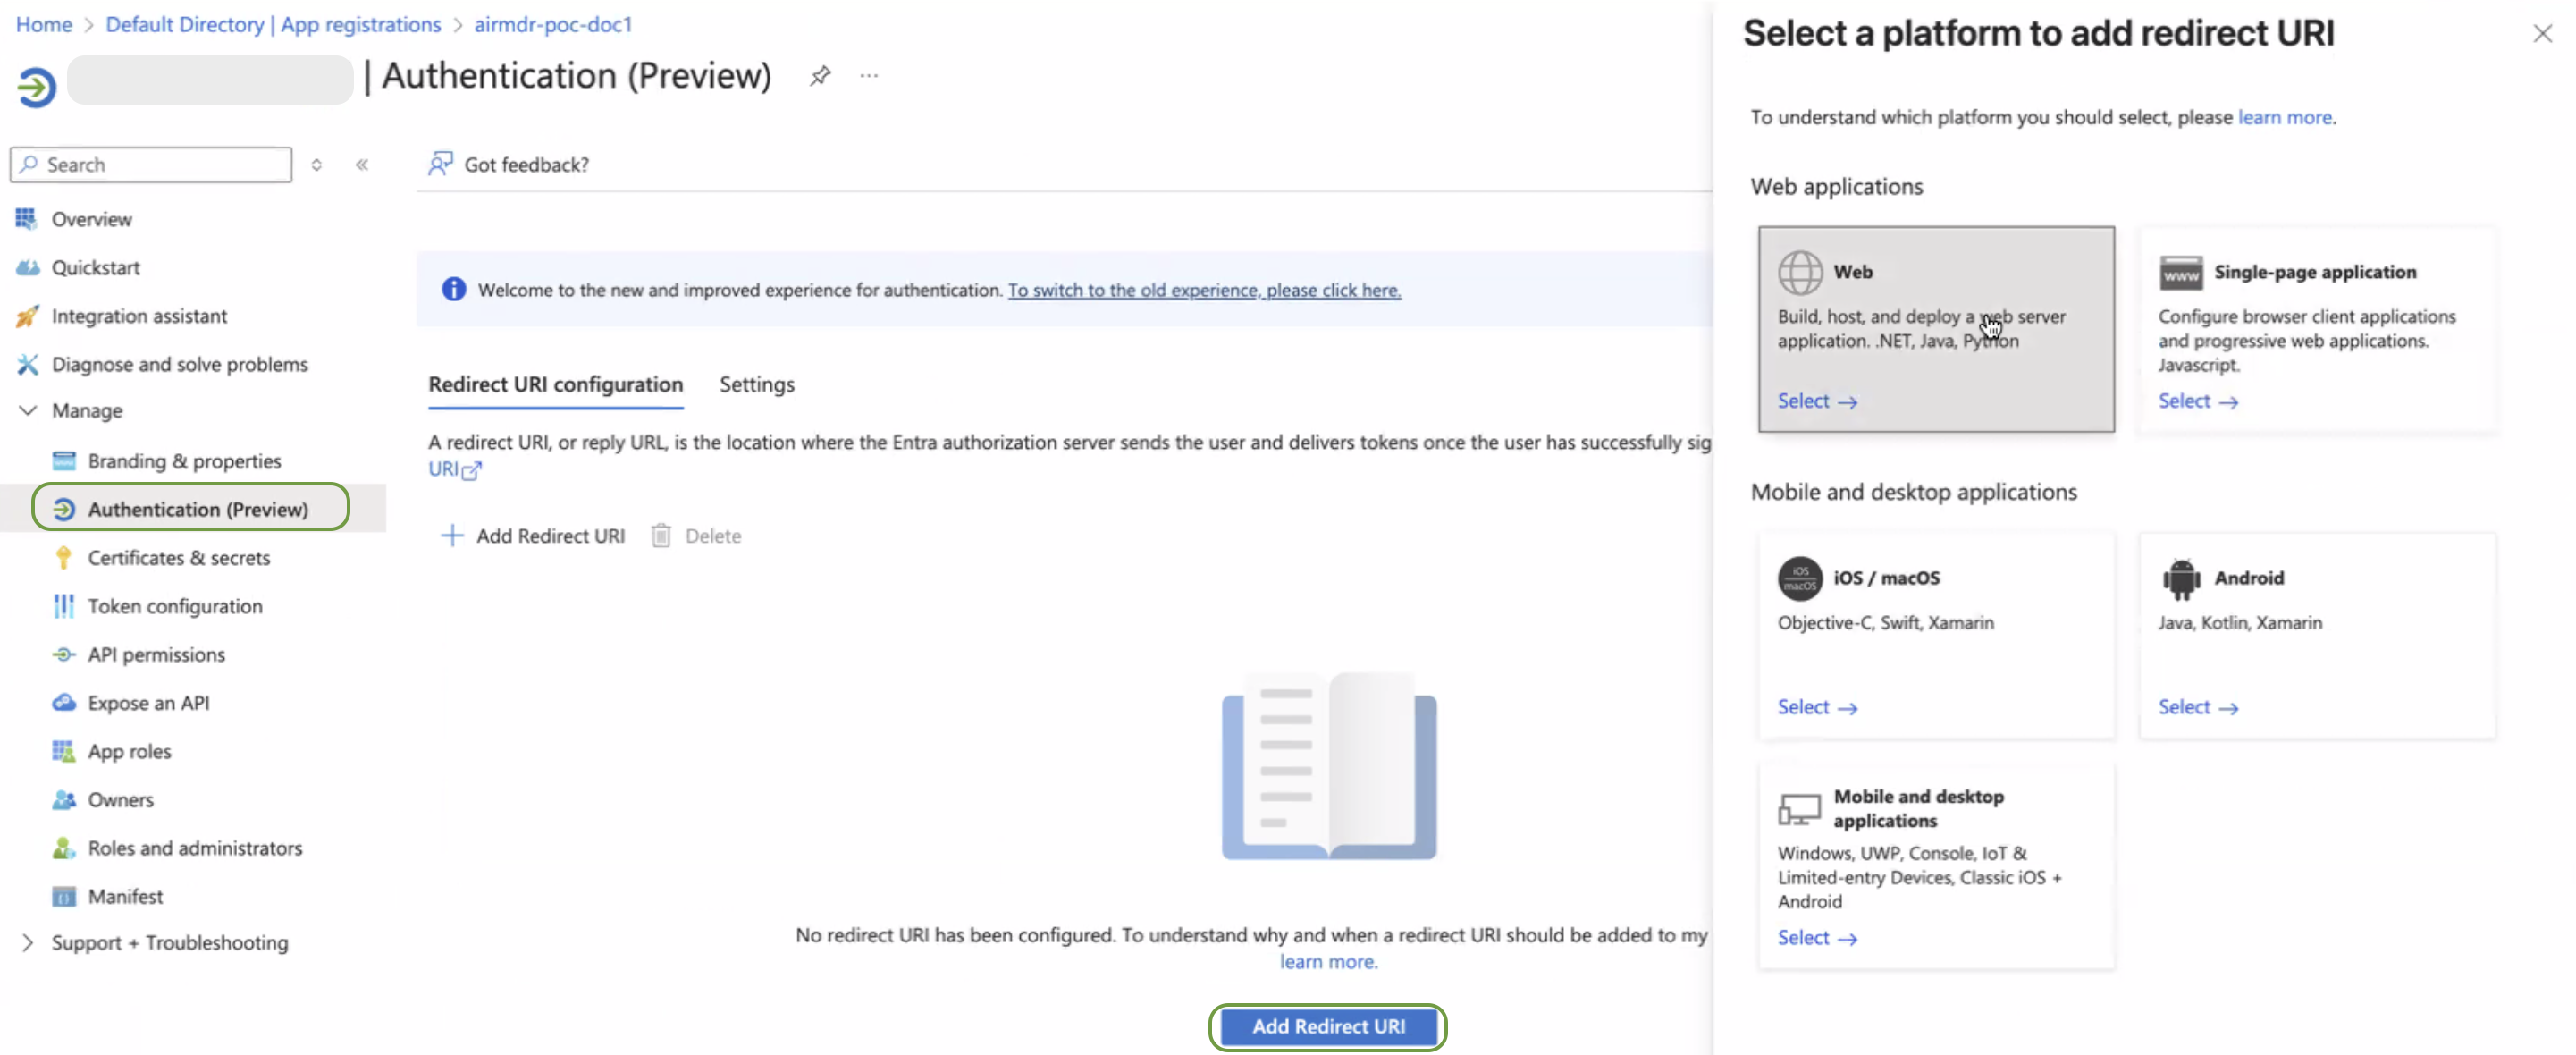
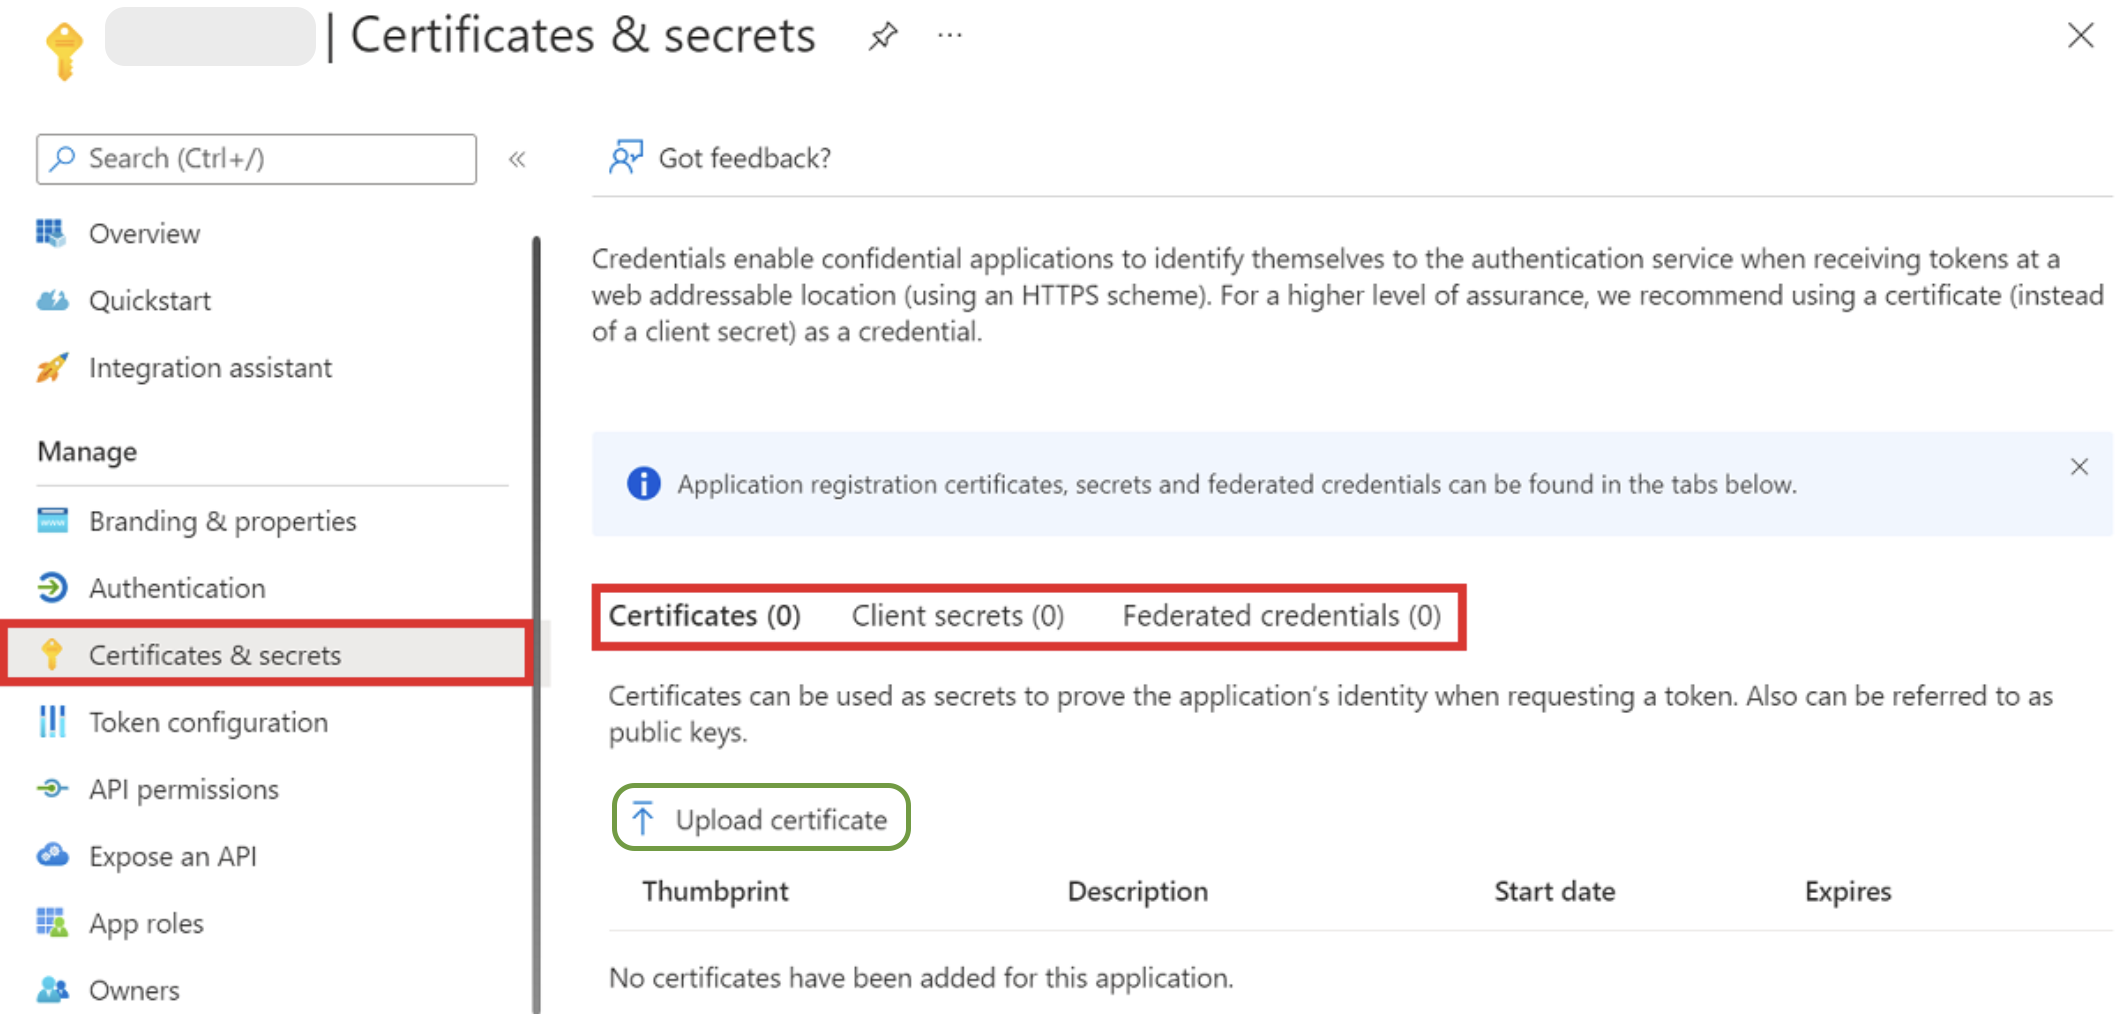
Upload a Certificate
- After registering the app, navigate to the Manage → Certificates & secrets section.
-
Under Certificates, click Upload certificate.
-
Select a file and upload the public certificate provided by AirMDR (usually a
.cerfile).If you do not already have the certificate, please request AirMDR to generate and provide a new certificate for you. -
Once uploaded, copy the thumbprint of the certificate and click on Add at the bottom of the page.
Share the thumbprint (SHA-1 hash) of the certificate data with AirMDR.

3
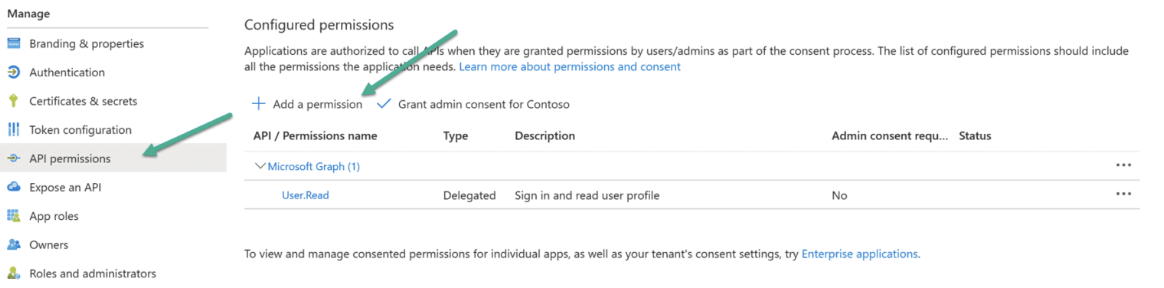
Configure API Permissions
- In the application Overview page left navigation pane, select Manage dropdown.
-
Navigate to API Permissions and click + Add a permission.
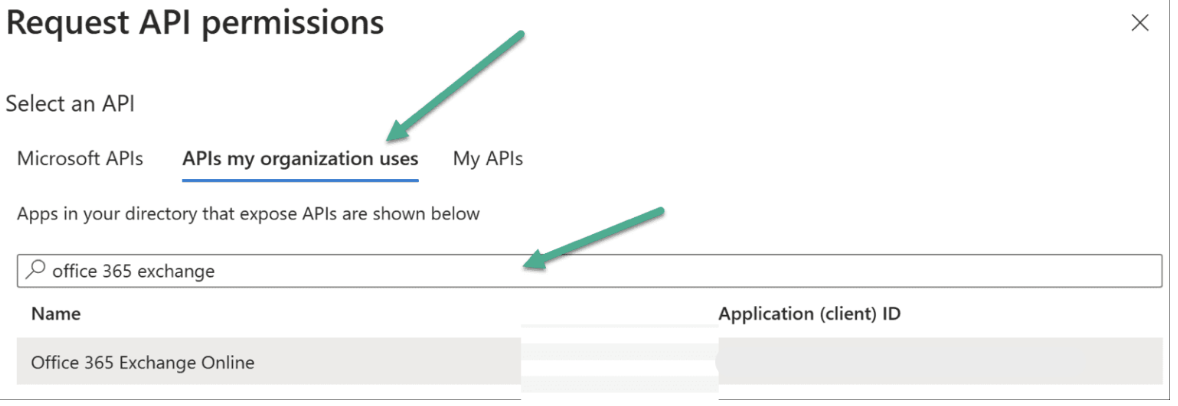
- On the Request API permissions page, choose APIs my organization uses tab.
-
Search and select Office 365 Exchange Online exactly as shown.
-
Choose Application permissions.
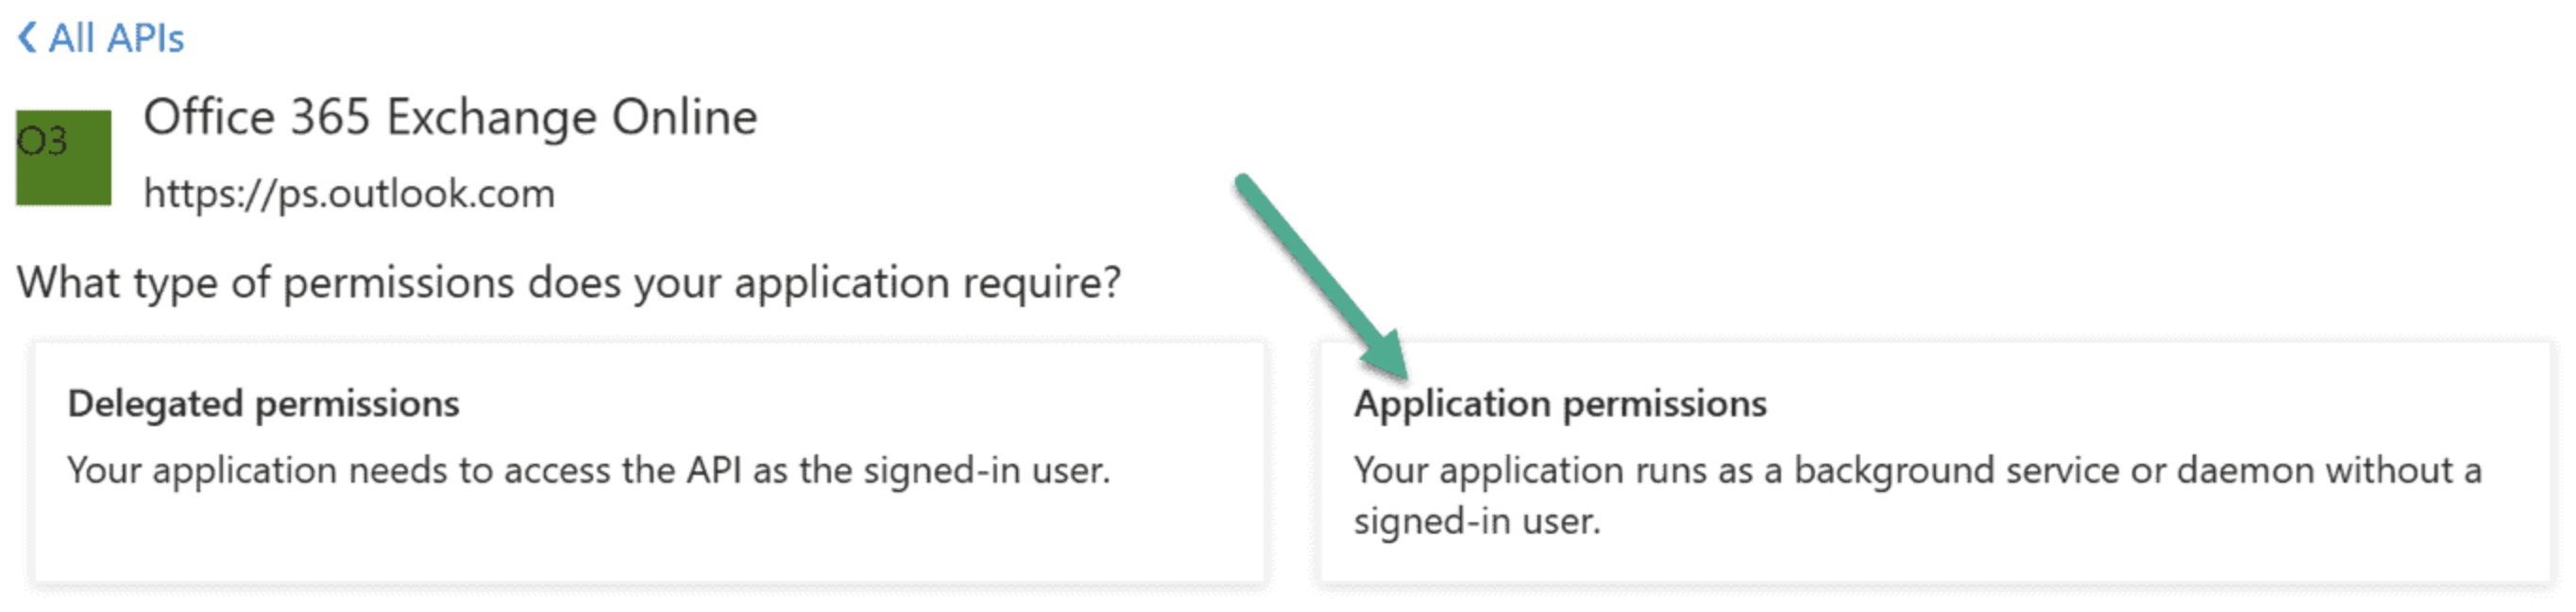
-
Search and select the required permissions as shown:
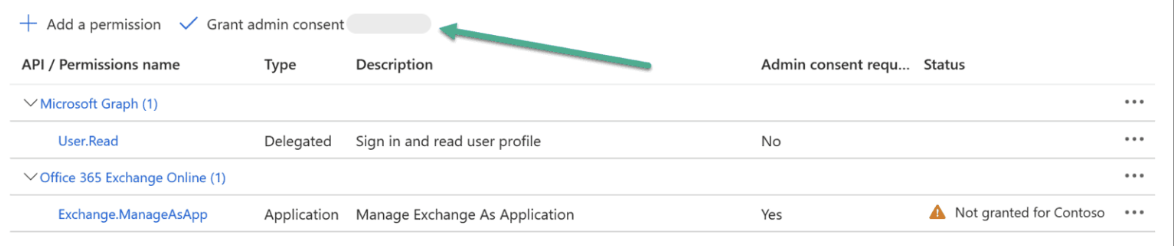
- To Manage Exchange as Application -
Exchange.ManageAsApp

- To Manage Exchange as Application -
-
Choose Grant admin consent.
- Navigate to Manage → Roles and administrators page, to assign the Exchange Administrator role to the application.
-
Search and select the Exchange Administrator role.
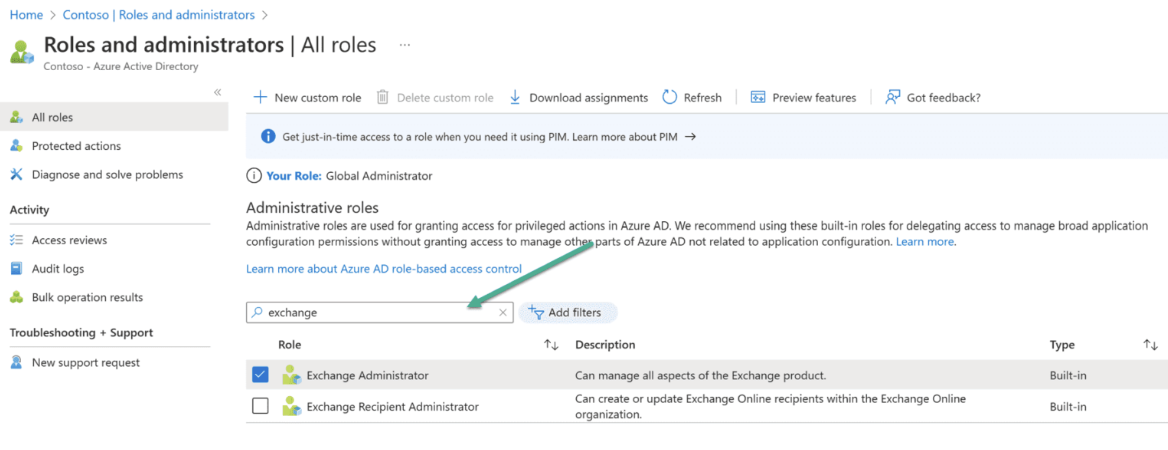
-
Choose Add assignments, and add the app registration we created.
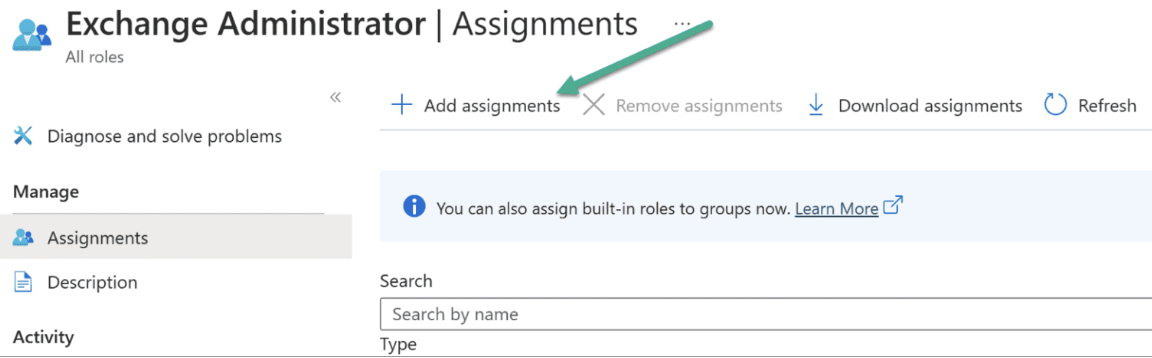
-
In the search bar enter the application name “For example:
AirMDR Quarantine Access” given earlier. - Click on Add at the bottom of the page.
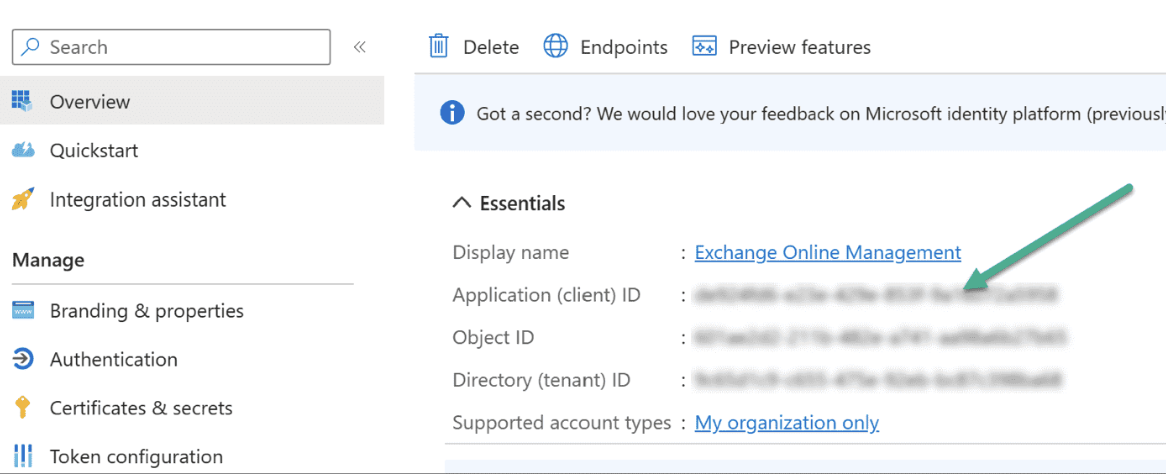
- Navigate to **Entra ID **→**Manage ** →**App registrations ** →All Applications
- Search and select the application name.
-
In the Overview page copy all the required essentials (Application (client) ID, Directory (tenant) ID).
4
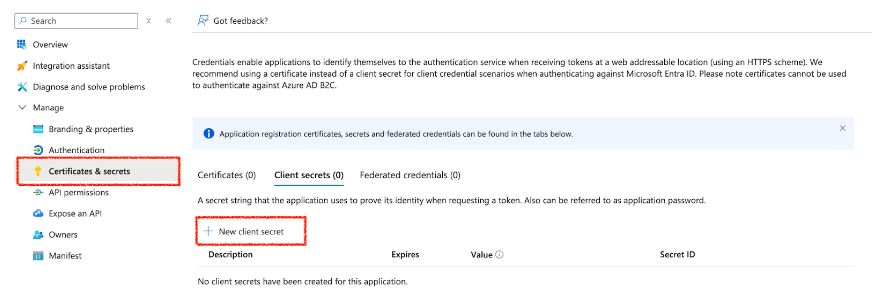
Create a Client Secret (For Authentication)
- In the left navigation pane, select Manage dropdown.
- Click Certificates & secrets.
-
Click + New client secret.
-
Enter a description (e.g.,
MySecretKey) and set expiration. - Click Add.
📤 Information to Provide to AirMDR
- Go to Azure Portal → Entra ID.
- Click App registrations and select your registered app.
- Under the Overview section, locate the Application (client) ID and Tenant ID (Directory ID).
- Click the Copy icon 📋 next to the Client ID, and the Tenant ID respectively.
Securely share the Client (Application) ID, Tenant ID, Client Secret Value, Secret ID, Certificate Thumbprint, and the Tenant Domain (Organization) to AirMDR.
Example:
For a customer like FCAP, the domain wasfoundationcap.onmicrosoft.com. The.onmicrosoft.comsuffix is common across tenants.
If you need assistance during this process, contact AirMDR support.
💼 AirMDR Internal Requirements
Once credentials are received:- AirMDR will create a connection in the Connection Manager using:
Provider type: Microsoft- The credentials listed above
- Access is used only for retrieving quarantined emails via Microsoft Graph or Defender APIs
🔁 Future Automation
Once AirMDR agents are deployed to the customer’s remote infrastructure:- The current Powersheller instance used to perform these operations can be deprecated.
- The onboarding steps (like certificate auth and quarantine sync) will be handled directly by remote agents.
This ensures full automation, scalability, and centralized control without requiring manual setup steps on an ongoing basis.
🛑 Security & Access Best Practices
- ✅ Certificate-based auth ensures non-password-based secure access
- ✅ Permissions are application-only and limited to read quarantine info