Overview
The Microsoft Teams integration enables AirMDR to send alerts, notifications, and workflow updates directly to Microsoft Teams channels. This helps security teams receive real-time updates, collaborate on incidents, and streamline response actions within their communication workflows. AirMDR supports two integration methods:Supported Versions
Authentication
AirMDR supports two authentication methods for Microsoft Teams:Method 1: Microsoft Graph API (Advanced & Scalable)
Method 1: Microsoft Graph API (Advanced & Scalable)
- Uses OAuth-based authentication via Microsoft Graph
- Supports advanced automation and messaging
- Requires Azure AD configuration
This step requires administrative privileges in Azure AD.
Method 2: Incoming Webhook (Recommended for Quick Setup)
Method 2: Incoming Webhook (Recommended for Quick Setup)
- No API authentication required
- Simple and fast setup
- Limited customization and control
Pre-requisites
Users must have owner or member access to the Microsoft Teams channel.Microsoft Teams app installed or access via Teams Web.Permission to manage connectors in the selected channel.
Method 1: Microsoft Graph API (Advanced)
1
Register Azure AD Application
- Go to Azure Portal
- Search for Microsoft Entra ID
- In the left navigation pane, click on Manage dropdown.
- Select App registrations → + New registration
- Enter:
- Application name
- Supported account types
- Redirect URl (optional)
- Click Register
2
Capture Tenant ID & Client ID
- Post registration.
- Under the All applications section click on the application (Example: MS Teams Setup) created. Copy:
- Application (Client) ID
- Directory (Tenant) ID
3
Grant Microsoft Graph API permissions
- Navigate to the newly created application.
- Click on Manage dropdown and select API Permissions.
- Select + Add a permission → Microsoft Graph.
- Click on Delegated permissions.
- Select Application permissions
- In the Select permissions search option Add required permissions:
User.ReadUser.ReadBasic.AllChat.CreateChat.ReadWriteChatMessage.Send
- Click Grant admin consent for Default Directory.
Only admin have access to Grant admin consent for Default Directory.
4
Create Client Secret
- Click on Manage dropdown.
- Navigate to Certificates & secrets → Client Secrets → + New client secret
- Provide:
- Description
- Expiry
- Click Add
- Copy the Client Secret
This value will not be shown again.
5
Create a New User
- Create a new Microsoft 365 user: teams-bot@yourtenant.onmicrosoft.com
- Assign:
- Microsoft Teams license
- Disable MFA for this account
Graph API uses password-based authentication. MFA must be disabled.
Method 2: Configure Incoming Webhook in MS Teams
1
Open Microsoft Teams
- Launch the Microsoft Teams app or navigate to teams.microsoft.com.
- Sign in using your organizational credentials.
2
Create a New Target Team & Channel
If you already have Target Teams & Channel to integrate, skip this step.
- In the Teams sidebar, select the Chat icon.
- Navigate to Teams and channels, click on the more options ellipsis (⋯).
- Select Your teams and channels, and click on Create team icon in the top right corner.
- In the Create a team pop-up, enter the mandatory values
- Team name: (For example
AirMDR Logs) - Name the first channel: (For example
Workflow Test Channel)
- Team name: (For example
- Click Create.
3
Navigate to the Target Team & Channel
- In the Teams sidebar, select the desired Team.
- Click on the specific Channel (For example
Workflow Test Channel) where you want to post messages.
4
Open Channel Options
- Click on the more options ellipsis (⋯) next to the channel name (For example
Workflow Test Channel). - Select Workflows from the context menu you want to setup for your team\
 If you do not see “Workflows,” ensure the feature is enabled in your tenant or contact your IT administrator.
 - In the pop-up search for and choose “Post to a channel when webhook request is received” option. \
 For this workflow to run, all apps must have a valid connection.
 - Select the radio button option beside Microsoft Teams option.
- Click Next.
5
Add Workflow
- In the Details, select your Microsoft Teams Team and Microsoft Teams Channel.
- Click Add workflow.
- In the same pop-up window, click on Manage your workflow option at the bottom left corner.
- Click Edit, to manage your workflow. \
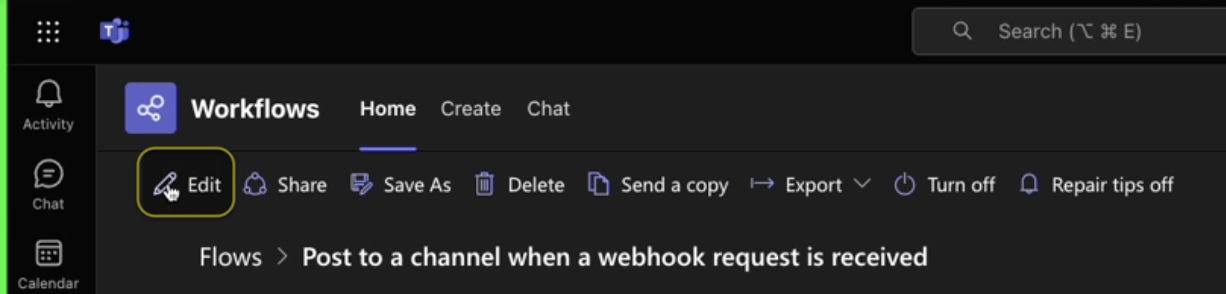
- Once the User is redirected to the edit page, double-click on the respective display boxes to expand and view the content. \
- Double-click and select “When a Teams webhook request is received” option to view “who can trigger the flow” and the “POST URL”.
Copy the POST URL for future reference. That is, for the connector credential and webhook configuration in the AirMDR web interface.
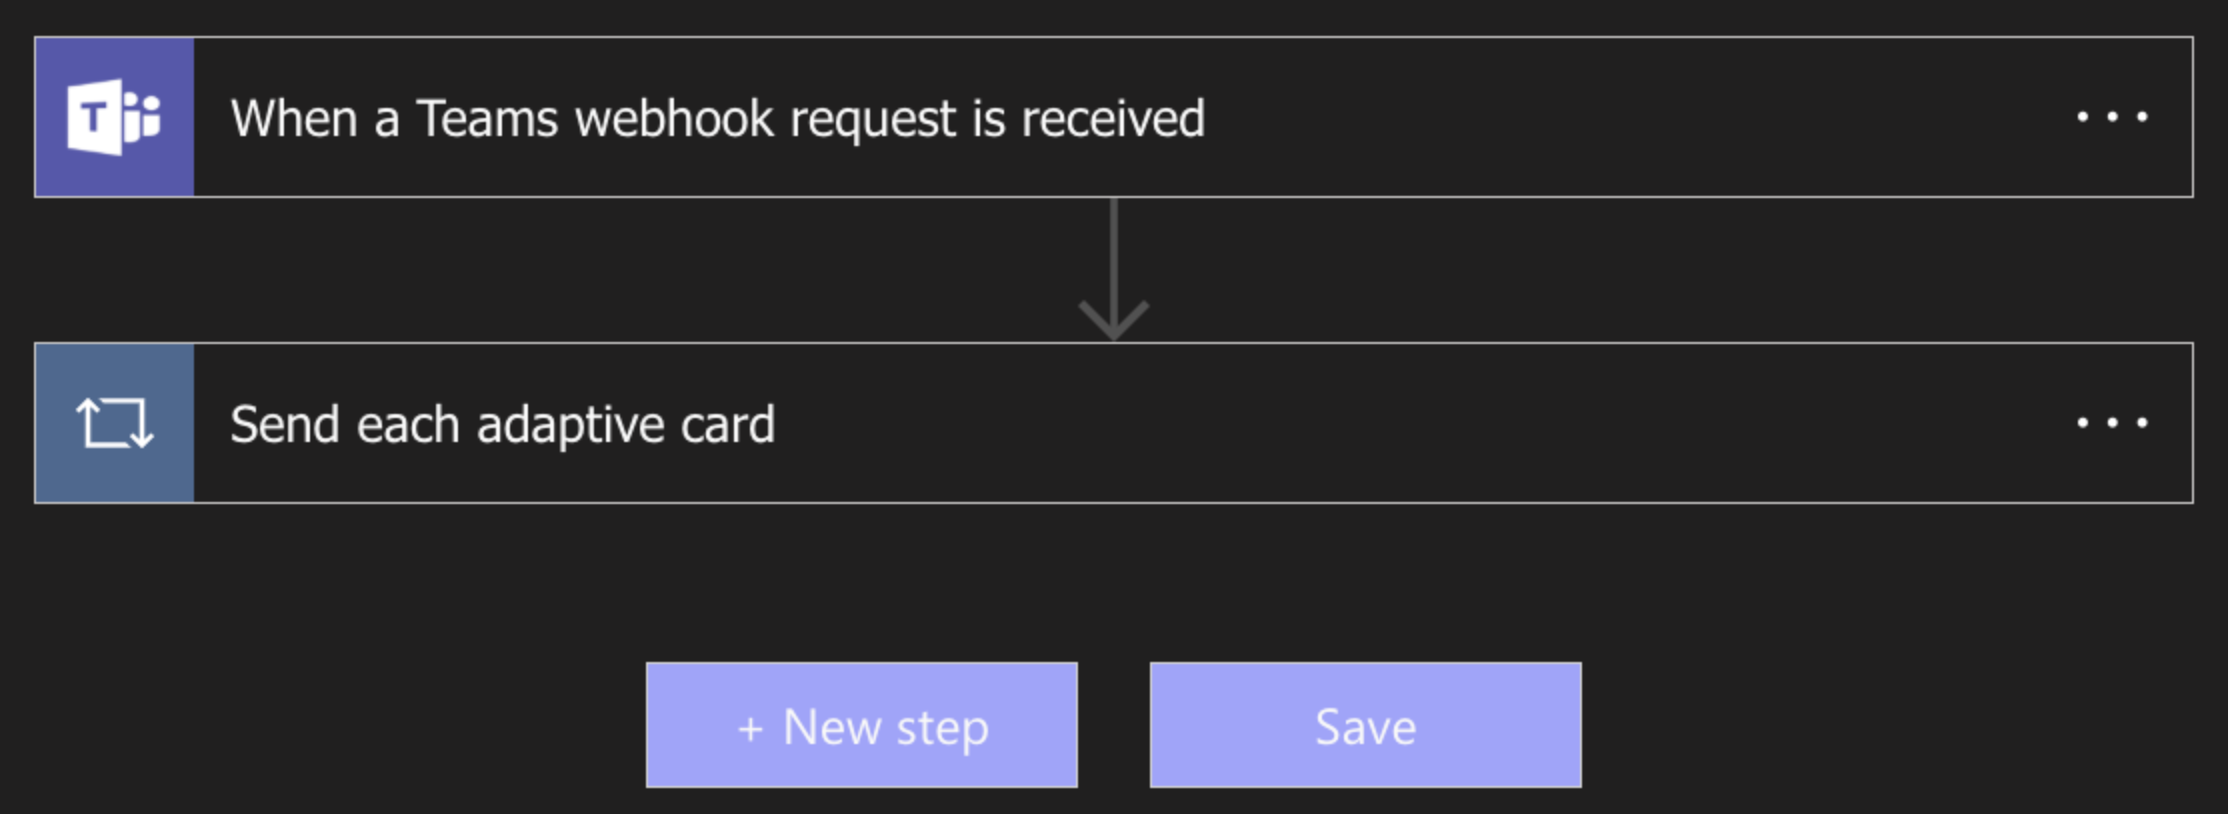
- Double-click and select “Send each adaptive card” option.
- In the “Select an output from previous steps” search box, follow the below steps to ensure the output format is set to attachments
- Delete the existing body.attachments
- In the Dynamic content list, select the attachments.\
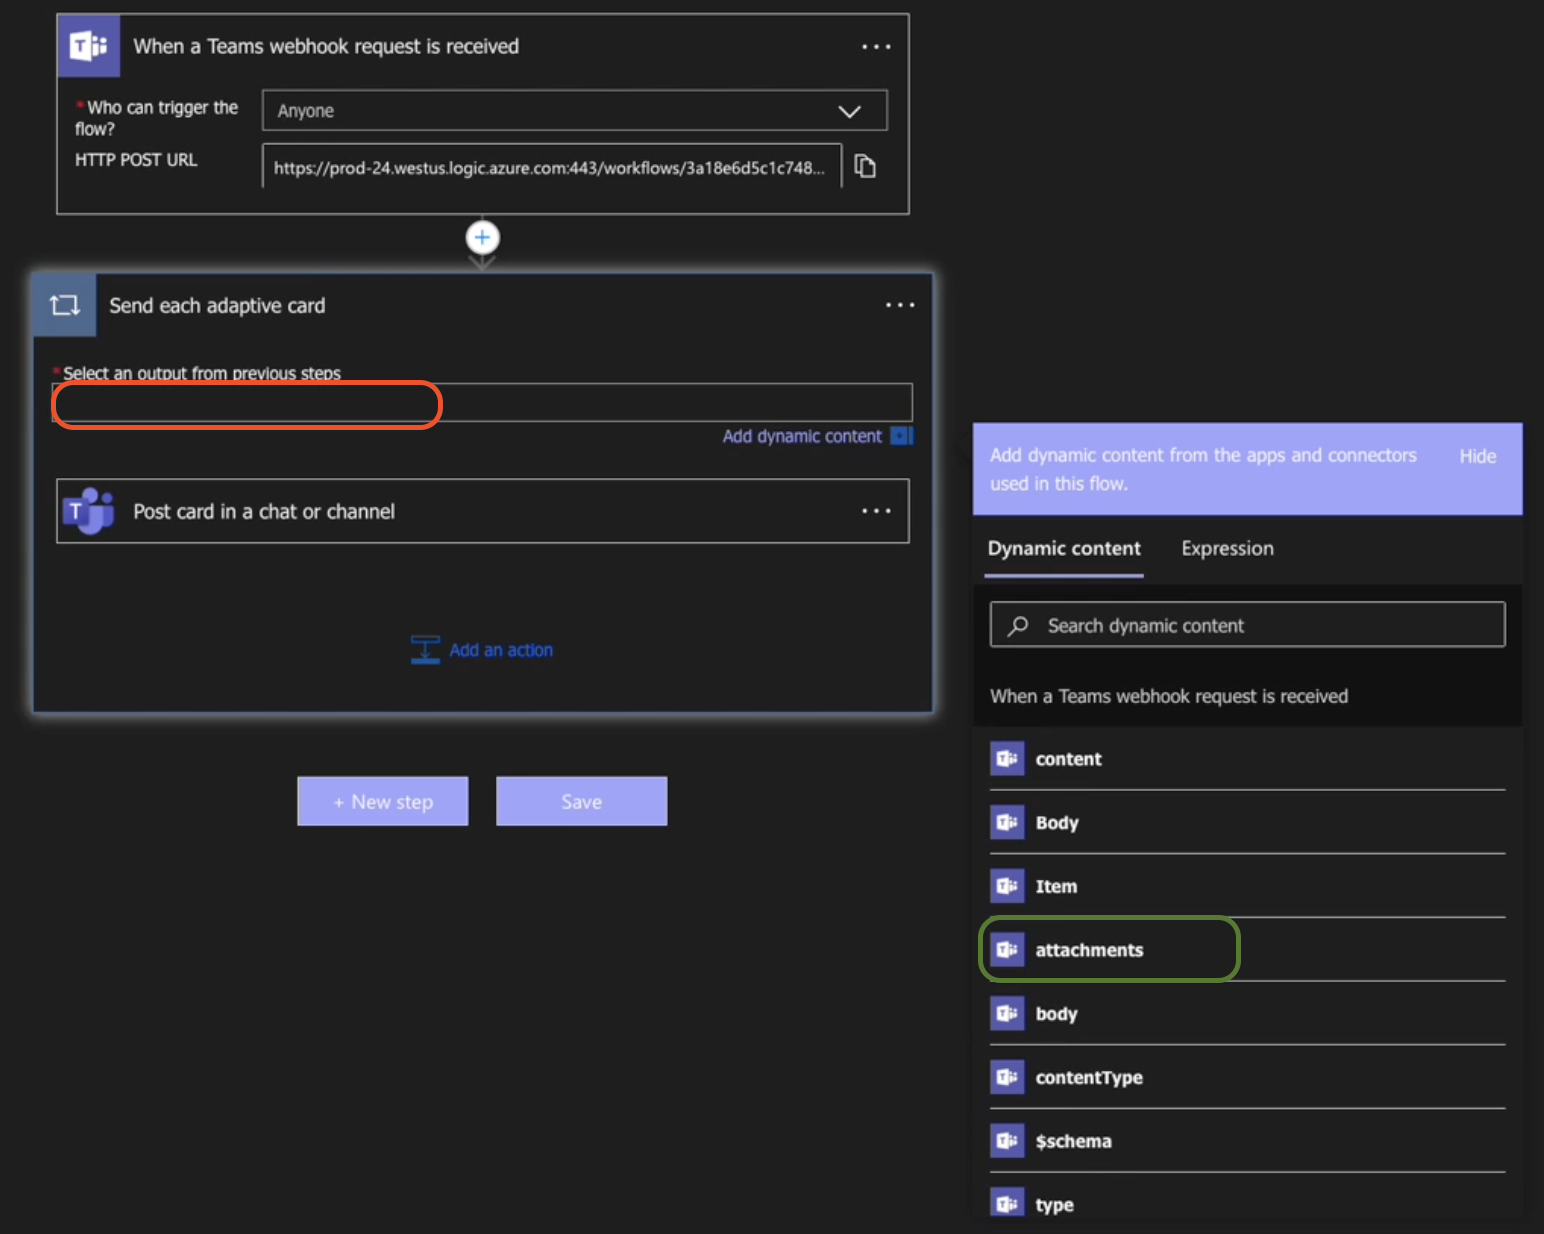
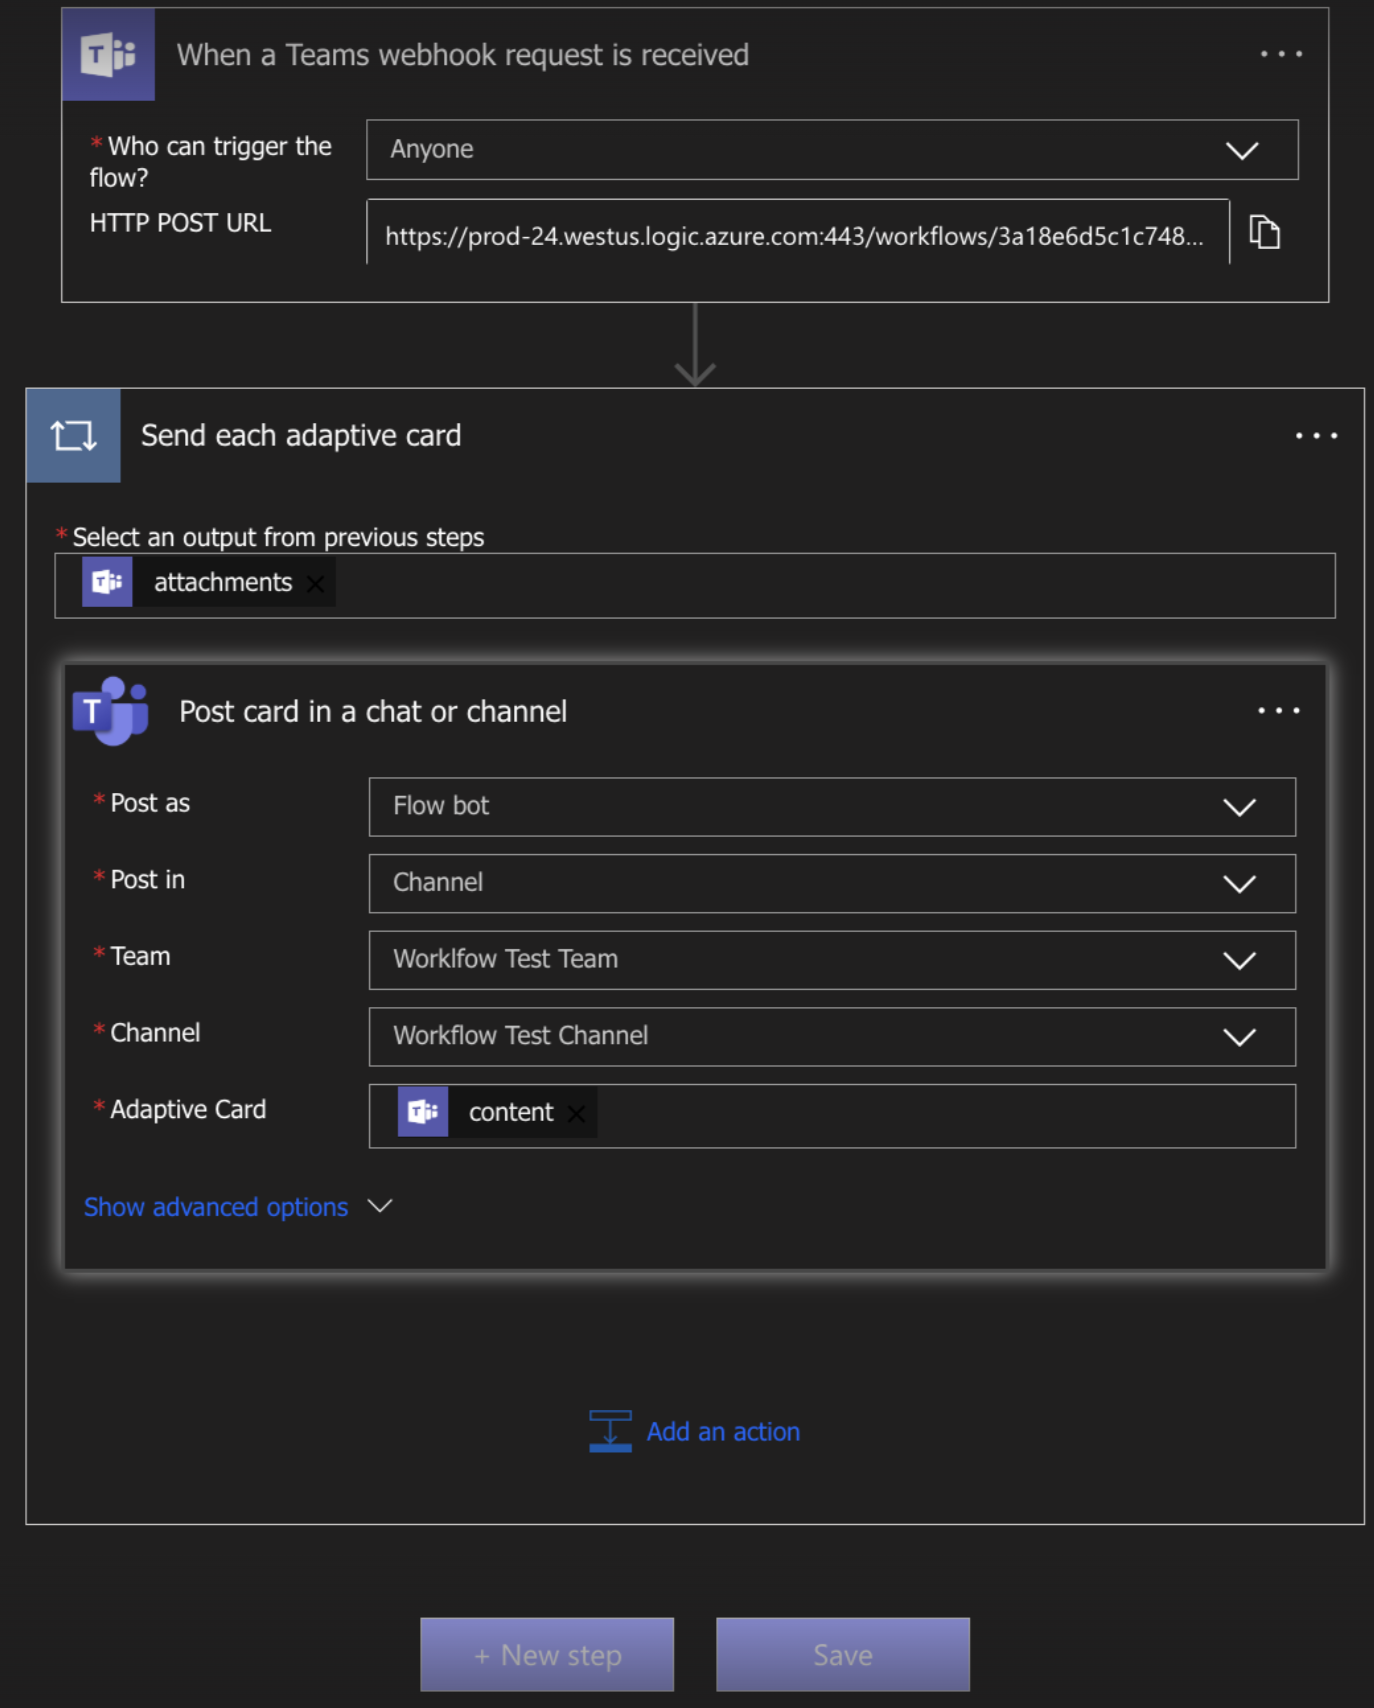
- For private Team channels, use the dropdowns to set Post as: Flow Bot.
- Make sure Post in, Team and Channel fields are pointing to correct desired values.
- Ensure the Adaptive card is defined as content.\
- In the “Select an output from previous steps” search box, follow the below steps to ensure the output format is set to attachments
- Double-click and select “When a Teams webhook request is received” option to view “who can trigger the flow” and the “POST URL”.
- Click Save.
Microsoft Teams - Test Case Scenarios
Send a Message using the Webhook
Send a Message using the Webhook
User can now send a message using a simple HTTP POST request using Postman or cURL.Example POST Request using cURL:Response Sample
Replace
<Workflow_URL> with the URL copied from the Teams UI.202 AcceptedTesting the Resource Owner Password Credentials (ROPC) grant flow for Microsoft Entra ID (formerly Azure AD)
Testing the Resource Owner Password Credentials (ROPC) grant flow for Microsoft Entra ID (formerly Azure AD)
Example POST Request using cURL:Successful Response SampleError Response Sample
Configure Microsoft Teams in AirMDR Integrations Dashboard
- Navigate to AirMDR, provide the credentials and click Login
- Navigate to the AirMDR Integrations Dashboard in the left navigation pane and select Integrations.
- Use the search option, enter the keyword “Microsoft Teams”, select the Connections tab, and click + Create button.
- Enter an unique name to the Instance (e.g.,
your org name-MSTeams) to easily identify the user connection by AirMDR. - For Webhook URL: Enter the generated Webhook URL in the Authentication Details field params, and click Save.
(or) - For Azure AD: Enter the Azure AD application credentials like Tenant ID, Client ID, Client Secret, Sender Username, Sender Password, and Remote Agent in the Authentication Details field params, and click Save.
Skills provided by this Integration
Additional Information
🧰 Error Handling
🧰 Error Handling
🔄 Managing or Deleting the Webhook
🔄 Managing or Deleting the Webhook
To manage the webhook:
- Go to the channel’s connectors (as in Step 3).
- Click Configured (top-left tab).
- Locate your webhook, and click Manage or Remove.
🛑 Security & Access Best Practices
🛑 Security & Access Best Practices
- Rotate webhook URLs periodically for security and use Webhook for simple use cases.
- Do not expose webhook URLs in public repositories or logs.
- Use appropriate naming conventions to identify webhook sources.
- Use Graph API for automation workflows and limit Graph permissions to minimum required
- Secure service account credentials
👉 Support & Maintenance
👉 Support & Maintenance
- 📧 Contact AirMDR Support through your designated support channel.
- 🔁 Rotate credentials regularly.
- 🔄 Reconnect in AirMDR when secrets are changed.