Overview
The Microsoft Teams integration uses an application registration in Microsoft Entra ID and authenticates with Tenant ID, Client ID, and Client Secret. Microsoft documents this as the standard application-based method for accessing Microsoft Defender APIs without a user session.Supported Versions
Microsoft provides separate but similar app-registration guidance for Microsoft Defender XDR and Microsoft Defender for Endpoint, both using Microsoft Entra application authentication.
Authentication
AirMDR uses application-based OAuth authentication through Microsoft Entra ID.Pre-requisites
Set Up Steps
1
Register a Microsoft Entra Application
- Log in to your Azure Portal.
- Go to Microsoft Entra ID (formerly Azure AD).
- In the left menu, click Manage → App registrations.
2
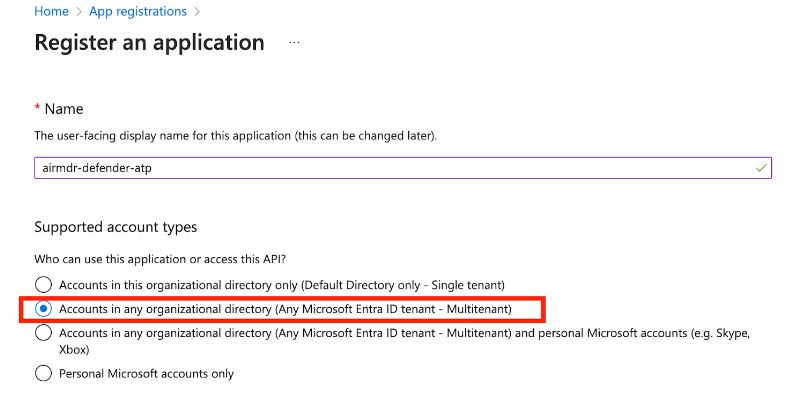
Register a New Application
- Click + New registration.
- Provide the mandatory details:
- (Application Name: Enter a name for your app (e.g.,
airmdr-defender). - Supported Account Types: Select “Accounts in any organizational directory (Any Microsoft Entra ID tenant - Multitenant)” option).
- (Application Name: Enter a name for your app (e.g.,
- Click Register.
3
Retrieve the Application (Client) ID and Tenant ID
- After successful registration, you will see the App Overview page.
Copy Application (Client) ID – Identifies your app.
Copy Directory (Tenant) ID – Identifies your Azure AD tenant.
4
Configure API Permissions
- In the application Overview page left navigation pane, select Manage dropdown.
- Click API Permissions.
- Click + Add a permission
- Select APIs my organization uses tab.
- Search and select the API “Microsoft Threat Protection”.
- Click on Application permissions.
- Select the required permissions:
- To Fetch List of Incidents -
Incident.Read.All
- To Fetch List of Incidents -
- Click Add permissions at the bottom of the page.
- Click API permissions, select Yes for Grant admin consent confirmation to allow access.
5
Create a Client Secret (For Authentication)
- In the application Overview page left navigation pane, select Manage dropdown.
- Click Certificates & secrets.
- Click + New client secret.
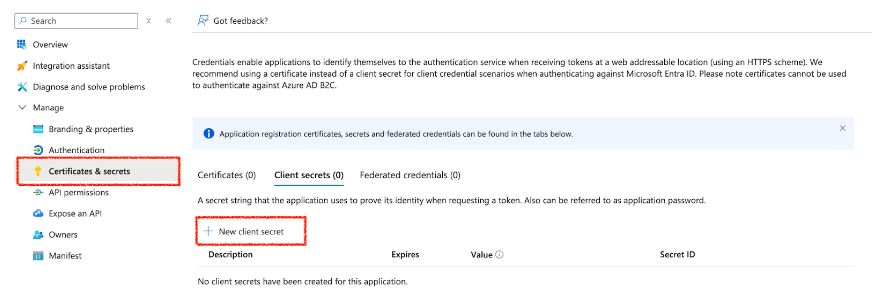
- Enter a description (e.g.,
MySecretKey) and set expiration. - Click Add.
Email the Tenant ID, Client ID and the Client Secret Value to AirMDR or self Configure Microsoft Defender in AirMDR Integrations Dashboard.
Evaluate Microsoft Defender
Pre-requisites
Azure App Registration with API permissions for Microsoft Defender.
Client ID, Tenant ID, and Client Secret.
1
Obtain an Access Token
Open cURL and run the following command to check if your API Access is working:MDE uses OAuth 2.0 authentication. First, request an access token from Microsoft Entra ID (Azure AD):Replace:
<tenant_id>– Your Azure Directory (Tenant) ID.<client_id>– Your App Registration Client ID.<client_secret>– Your App Registration Client Secret.
- This verifies if the user can retrieve device information based on the assigned scope.
2
Test API Access with MDE
Once you have the Expected Response: A JSON list of devices onboarded to Microsoft Defender.Expected Response:A list of security alerts detected by Microsoft Defender.
access_token, use it in API calls.- To Get Device List
- To Get Alerts
Configure Microsoft Teams in AirMDR Integrations Dashboard
- Navigate to AirMDR, provide the credentials and click Login
- Navigate to the AirMDR Integrations Dashboard in the left navigation pane and select Integrations.
- Use the search option, enter the keyword “Microsoft Defender”, select the Connections tab, and click + Create button.
- Enter an unique name to the Instance (e.g.,
your org name-Microsoft Defender) to easily identify the user connection by AirMDR. - Enter the generated Tenant ID, Client ID and the Client Secret in the Authentication Details field params, and click Save.
Skills provided by this Integration
Additional Information
🧰 Troubleshooting Authentication Issues
🧰 Troubleshooting Authentication Issues
🛑 Security & Access Best Practices
🛑 Security & Access Best Practices
- Secure service account credentials
- Use built-in RBAC from Microsoft Defender for Endpoint and related Defender services.
- Assign only the minimum required permissions using Microsoft Entra ID roles.
- Enforce:
- Multi-Factor Authentication (MFA)
- Device compliance checks
- Location-based access restrictions
- Ensure all endpoints:
- Are onboarded to Microsoft Defender for Endpoint
- Meet compliance policies
- Enable:
- Attack Surface Reduction (ASR) rules
- Endpoint Detection and Response (EDR)
- Disable:
- Unnecessary services and ports
- Ensure encryption:
- In transit → TLS 1.2+
- At rest → Microsoft-managed or customer-managed keys
👉 Support & Maintenance
👉 Support & Maintenance
- 📧 Contact AirMDR Support through your designated support channel.
- 🔁 Rotate:
- Client secrets (recommended every 30–90 days)
- Certificates before expiration
- Implement automated rotation where possible
- 🔄 Reconnect in AirMDR when secrets are changed.